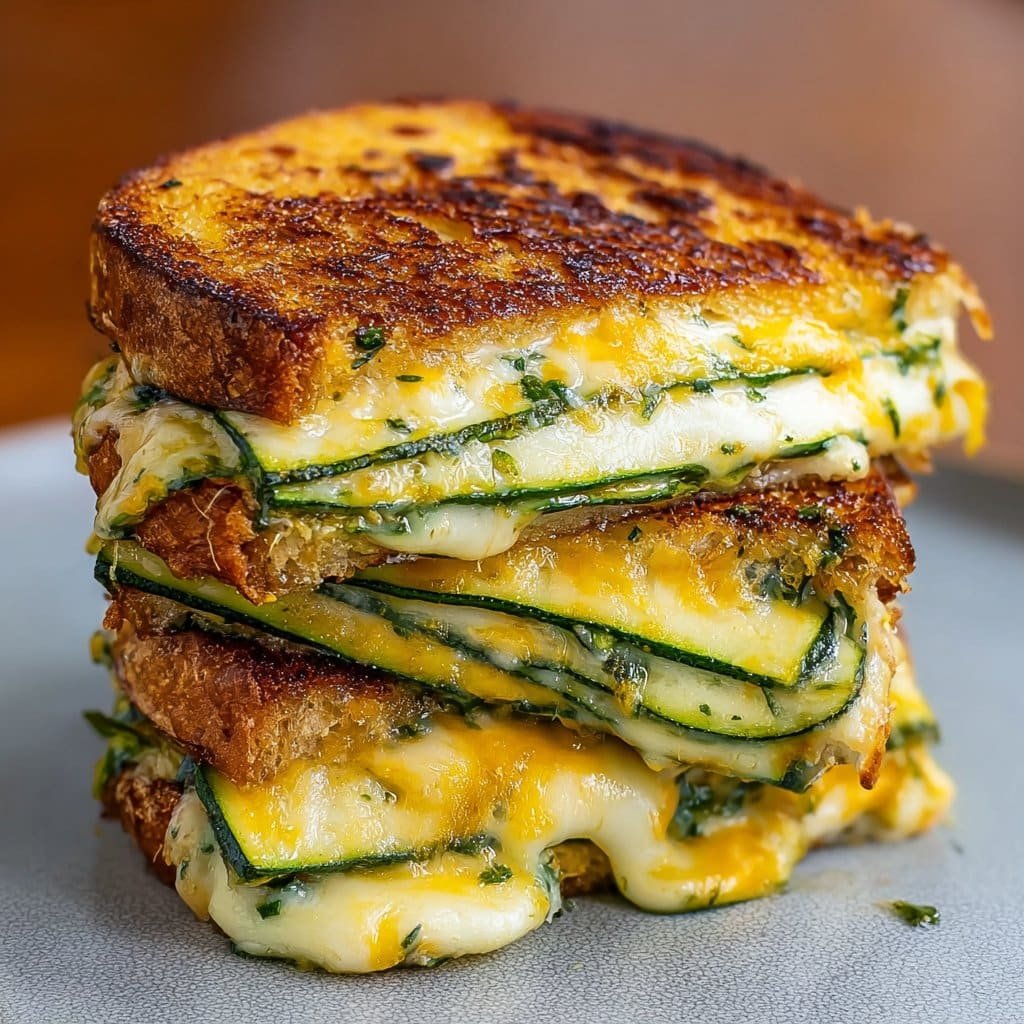
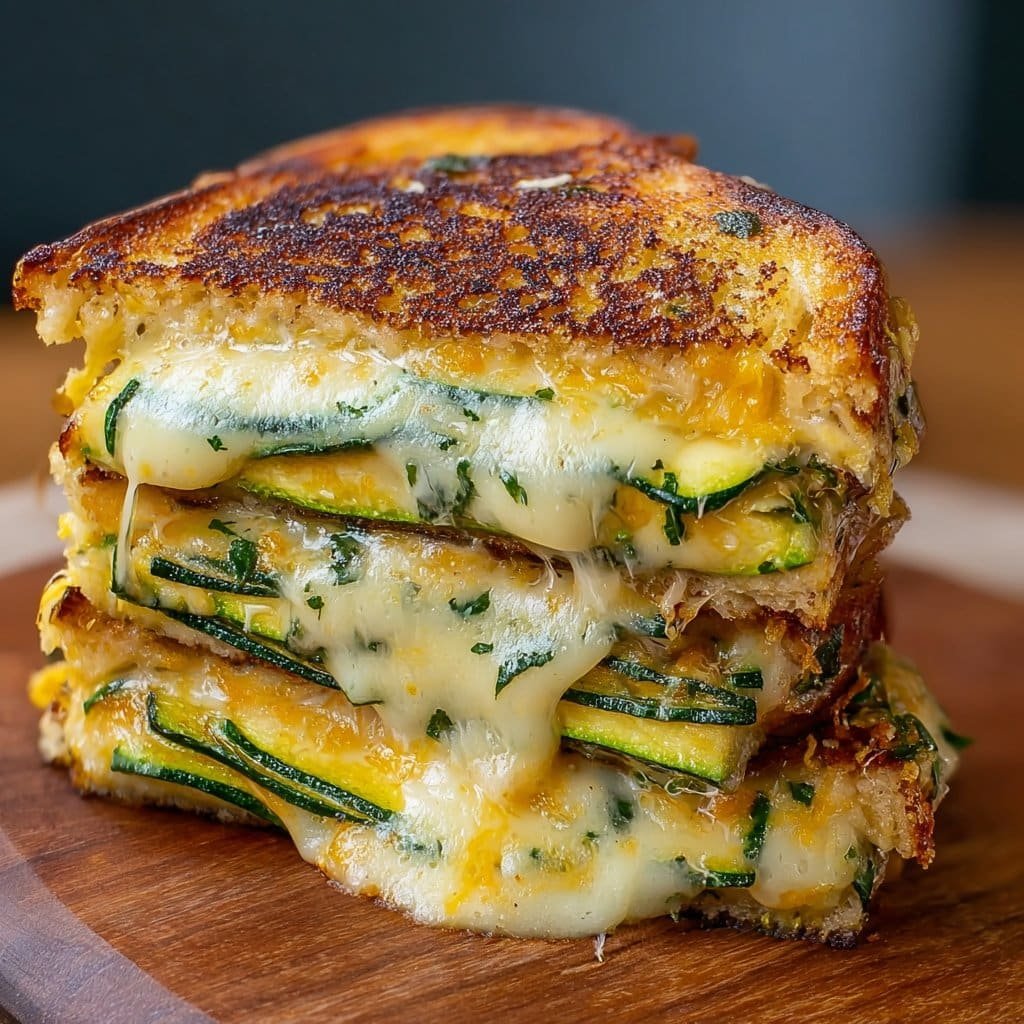
Alright, friend, let me tell you about this Zucchini Grilled Cheese that kinda saved my sanity one soggy Tuesday. You know how there are those days where you eye the sad veggies in your crisper and just can’t face another salad? That’s when this sandwich swoops in like some comfort food superhero (cape optional). The first time I made it, I actually tried to convince my kids it was just ‘sneaky pizza toast’—and they totally bought it, until my youngest caught me grating the zucchini. Busted, but worth it.
Why I’m Slightly Obsessed With This Zucchini Grilled Cheese
I whip this up when I want something hot and melty but don’t want my conscience (or my waistband, honestly) yelling at me. My partner says it’s the one veggie thing he’ll never complain about (‘Green stuff? In grilled cheese? Questionable, but somehow it works!’). Plus this is the only way my cousin Jamie ever got his toddler to eat zucchini without tears. Once I tried skipping the draining step and yep, resulted in the legendary Soggy Bread Disaster of 2021. Not my proudest kitchen moment.
What Goes Into My Zucchini Grilled Cheese?
- 2 medium zucchini, grated (I use whatever looks okay—my neighbor’s garden haul, store-bought, even the giant ones that sometimes taste a bit bland; they’re fine!)
- 2 eggs (large is best, but any will do in a pinch)
- 1 cup shredded cheese (cheddar is my go-to, mozzarella if I’m feeling a pizza vibe, honestly use up those almost-finished cheese ends too)
- 1/2 cup flour (AP flour is fine, but I’ve been known to sub whole wheat or even oat flour when I’m pretending to be healthy)
- 1/4 teaspoon garlic powder (or a smashed garlic clove if you want to live dangerously)
- 1/2 teaspoon salt, plus more to taste
- Fresh ground pepper — I eyeball it
- A good knob of butter or a glug of olive oil for the pan (grandma swore by salted Irish butter, but I’m not made of money so I use regular most of the time)
- Bread slices (thick, thin, sourdough, even sandwich bread—good bread is nice but whatever you have lurking works too)
- Optional: A pinch of dried Italian herbs, red pepper flakes, or a tablespoon of chopped fresh herbs if you’ve got them
How I Make It (No Judgement If You Skip a Step)
- Grate the zucchini — don’t bother peeling unless you’re feeling fancy. Toss it all in a colander, sprinkle on the salt, and let it sit for 10 minutes or so. (Sometimes I wander off and forget, but it’s fine.)
- Squeeze the bejeezus out of the zucchini with a clean towel or whatever’s clean, honestly. Drain as much water as you can—this is vital. Seriously, don’t skip or you’ll get sludge bread.
- Whisk eggs in a big bowl. Add in the drained zucchini, flour, cheese, garlic powder, and some pepper. Mix it up till it’s no longer scary-looking (this is where I usually sneak a taste—don’t judge, it’s mostly cooked anyway!)
- Melt butter in a big skillet over medium heat. (Or olive oil if you’re going for Mediterranean vibes.) Scoop about a third-cup of the mixture for each patty—flatten into little pancakes. Don’t worry if it looks weird, it will cook up fine.
- Cook 3-4 minutes a side. You want them a deep golden, not pale—we’re going for flavor, not limp zucchini.
- While those cook, butter your bread (one side only, up to you if you want to go wild and butter both).
- Sandwich a zucchini patty or two and more cheese between the bread, buttered sides out. Back into the pan, grill 2-3 minutes on each side, pressing down a bit. I find using a spatula works better, actually, than trying to be gentle—just go for it.
- Let sit a minute or so before you slice. Or don’t. You do you. It’s molten and stringy cheese in the middle, which… heaven.
Notes From My (Often Messy) Kitchen
- Too much water in the zucchini? Just press it out between two plates. Simple!
- If it’s falling apart, add an extra spoonful of flour. Or if it’s too stiff, a splash of milk—easy fixer-upper.
- I’ve tried baking the patties, but they never crisp up quite as nicely (maybe my oven’s just weird?).
- The mixture keeps a day in the fridge, but after that the texture gets, well, ‘mystery mush’…
If You’re Feeling Adventurous… Variations I’ve Tested (and Survived)
- Add thin slices of tomato or a layer of sautéed mushrooms inside the sandwich—so good.
- Swap out cheese for a smoky gouda or sharp provolone if you’re feeling posh.
- Once tried throwing in diced jalapeños. Turns out too much heat killed the cheese vibe, so… maybe just a little unless you’re into that.
- For the gluten-free crowd, rice flour worked (on second thought, a bit gritty, but not awful). Oat flour is my favorite backup.
What You Need—And What You Can Improvise
- Box grater – Can use a food processor, but a regular cheese grater is fine. (Or sneakily chop with a sharp knife. Takes longer, but hey.)
- Colander or sieve – Or just let it drain in a bowl if that’s all you’ve got. Stack a plate on top and weigh it down with a can if you want.
- Nonstick skillet or frying pan – I use cast iron on special occasions; nonstick most days. If you only have a pot… well, maybe don’t. (But let me know if you try!)
How to Store (But It’ll Disappear Fast, Promise)
Store leftover cooked sandwiches wrapped in foil in the fridge for up to two days—though honestly, in my house it never last more than a day! You can reheat in a skillet or (confession time) microwave for 30 seconds. Loses a bit of crisp but still delish.
What To Eat It With (According To My Family)
We usually pair ours with tomato soup (the kind in the red can counts, no shame), or if I’m feeling energetic, a big side salad. My sister dunks it in spicy ketchup like it’s her job.
What I’ve Learned (The Hard Way)
- Press out the water. I once tried rushing this step and regretted it, bread got as soggy as a wet dog.
- Avoid high heat; the outside burns before the cheese melts. Learned that one the hard way too, yikes.
- Don’t be stingy with the butter. Crisp = happiness.
Your Zucchini Grilled Cheese Questions (And My Not-So-Perfect Answers)
- “Can I make this vegan?” Sure thing! Swap eggs for a flaxseed mix and cheese for your favorite vegan blend—though, full disclosure, I find vegan cheese is hit or miss so pick one you already like. Minimalist Baker has a guide on vegan grilled cheese that’s legit helpful.
- “My mixture looks runny. Did I mess up?” Probably not—just add more flour or, if you have panic mode activated, a bit of breadcrumbs. It’ll work out.
- “Can I freeze these?” Eh, not the sandwich, but the cooked patties freeze okay (wrap tight, let thaw fully). Textures take a hit, but on a busy day… who cares?
- “What bread is best?” Country loaf or sourdough is amazing, but sometimes I just use plain sandwich bread—it’s not gourmet, but it gets the job done. Actually, a hearty wheat bread is pretty nice too.
- “Can I skip the flour?” Yes—but they might not hold together as well. Almond meal works in a pinch, or even crushed crackers (true story, did this at a cabin once). Here’s a handy grilled cheese tip list you might like, too.
- “How do I stop the patties sticking?” Use extra oil, let the pan get hot first. Or just be patient and wait for the crust to form before flipping—that old trick.
- “Can this be prepped ahead?” Yes, the patty mixture waits in the fridge for a day. Any more than that and well, it starts getting weird. Maybe make a double batch if you’re feeding a crowd, but don’t blame me if everyone fights over the last one!
—Oh, quick side note: if you’re ever in a rush and can’t find your grater (or it’s in the sink, story of my life), just chop the zucchini really fine. Works, mostly. And if you get curious, there’s a whole rabbit hole of grilled cheese experiments online if you want to geek out like I do sometimes.
So, that’s my totally un-fancy, but very real, Zucchini Grilled Cheese. Let me know if you try it with something wild—I’m always up for a new twist!
Ingredients
- 2 medium zucchinis, grated
- 8 slices whole grain bread
- 1 cup shredded mozzarella cheese
- 1 cup shredded cheddar cheese
- 2 tablespoons grated Parmesan cheese
- 2 tablespoons mayonnaise
- 2 tablespoons unsalted butter, softened
- 1/2 teaspoon garlic powder
- Salt and black pepper to taste
Instructions
-
1Place the grated zucchini in a cheesecloth or clean towel and squeeze out excess moisture. Season with salt and pepper.
-
2In a medium bowl, combine the shredded mozzarella, cheddar, Parmesan cheese, garlic powder, and prepared zucchini. Mix well.
-
3Spread a thin layer of mayonnaise on one side of each bread slice. On the other side, evenly divide the zucchini cheese mixture among 4 slices and top with the remaining bread, mayonnaise side out.
-
4Heat a large skillet or griddle over medium heat. Add the butter and allow to melt. Place the sandwiches onto the skillet and cook for 3-4 minutes per side, or until bread is golden brown and cheese is melted.
-
5Cut sandwiches in half and serve hot.
Approximate Information for One Serving
Nutrition Disclaimers
Number of total servings shown is approximate. Actual number of servings will depend on your preferred portion sizes.
Nutritional values shown are general guidelines and reflect information for 1 serving using the ingredients listed, not including any optional ingredients. Actual macros may vary slightly depending on specific brands and types of ingredients used.
To determine the weight of one serving, prepare the recipe as instructed. Weigh the finished recipe, then divide the weight of the finished recipe (not including the weight of the container the food is in) by the desired number of servings. Result will be the weight of one serving.
Did you make this recipe?
Please consider Pinning it!!

