Let’s Be Real – Why Cinnamon Rolls, and Why Now?
You know that feeling when you wake up on a Sunday, and the only thing (besides coffee, obviously) that’ll get you out from under the blanket is the thought of something warm and sweet waiting in the kitchen? That’s pretty much why I bake these cinnamon rolls so often. Actually (mini confession): I started making them years ago after totally botching a store-bought tube—didn’t even unroll properly, sad times. But once I got the hang of homemade? Oh boy, total game changer. The house smells like the inside of a bakery, and my family starts hovering near the oven like moths to a lamp. I once tried to hide an extra roll for myself… let’s just say they always know.
Why You’ll Want to Make These Again (and Again)
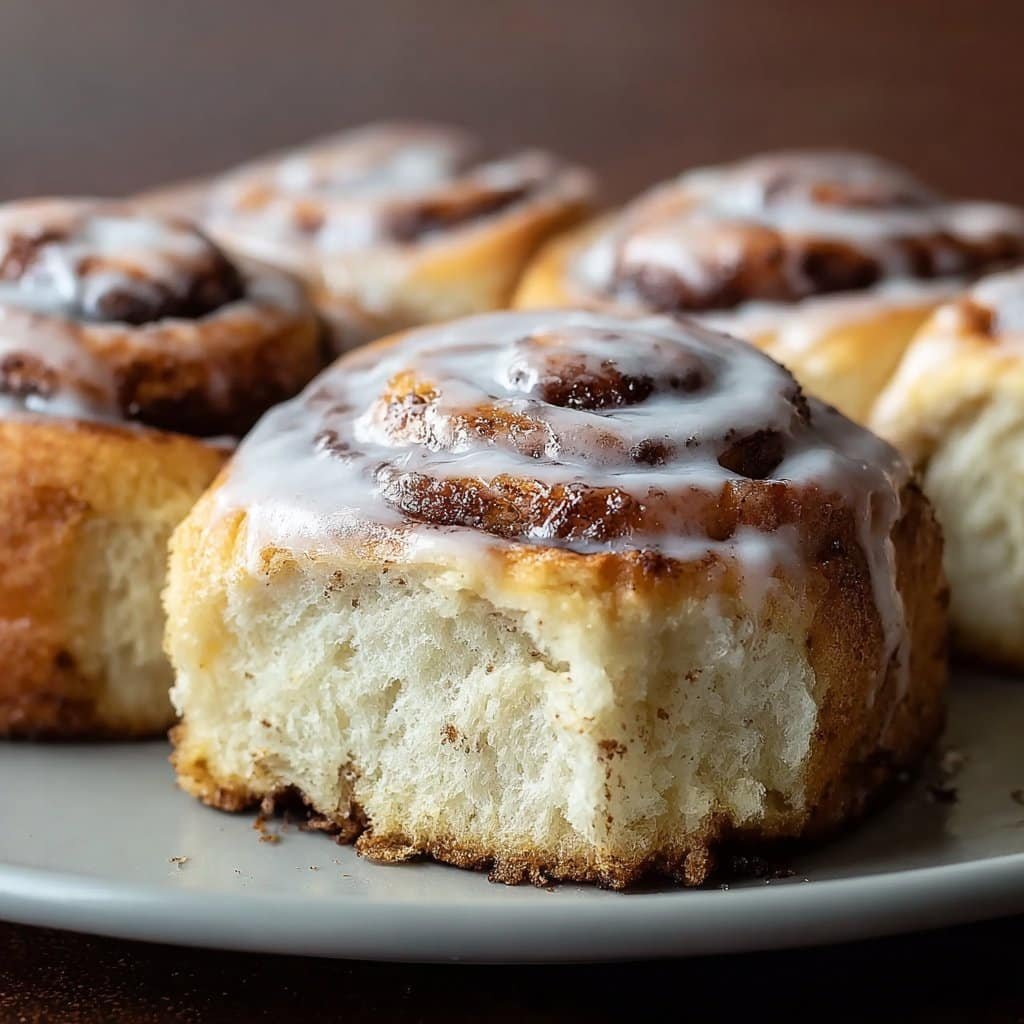
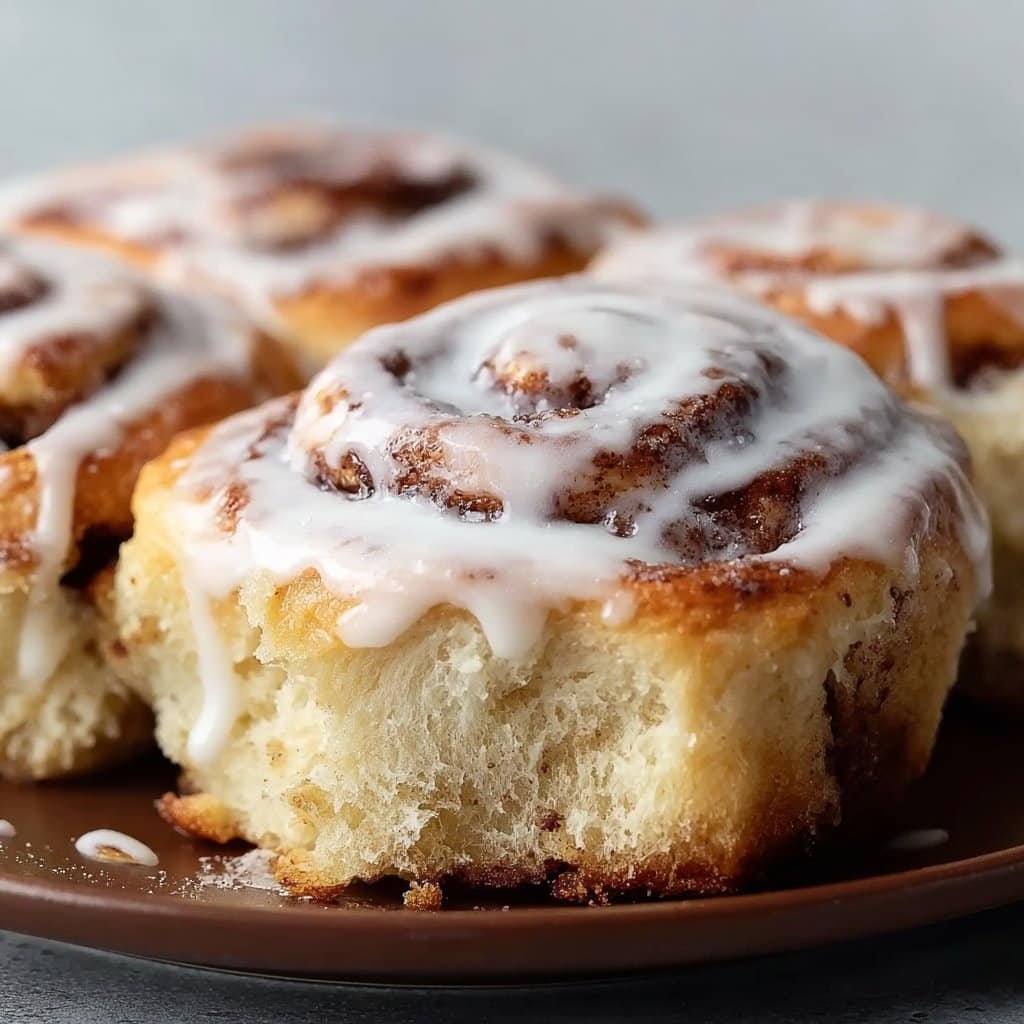
I make this whenever my kiddos drag their friends home after football, or when I need a soft, gooey hug in bread form (which; let’s be honest, is more often than I’d admit). My family goes bonkers for these because the rolls are ultra fluffy and the glaze is that perfect gooeyness that drips between your fingers. Side note: There was a time I managed to underbake them so badly we pretty much invented cinnamon roll pudding (not my proudest moment), but that’s how I figured out my oven always needs a few extra minutes. So don’t fret if yours are a shade darker or lighter—they’ll probably still get gobbled up.
Ingredient Lineup—With a Few Cheeky Substitutions
- For the dough:
– 3 and 1/2 cups all-purpose flour (if I’m in a pinch, bread flour works too—it’s a wee bit chewier)
– 1 packet instant yeast (My gran swears by Dr. Oetker, but the grocery store own-brand is fine. Honestly)
– 1/4 cup white sugar
– 1 tsp salt
– 2/3 cup warm milk (I’ve used oat milk once when I ran out. Worked, but not exactly the same vibe)
– 2 large eggs
– 1/3 cup soft butter (Sometimes swap in margarine if that’s all I’ve got. No one noticed.) - For the filling:
– 1/2 cup soft butter (a bit more never hurts, not that I’d ever admit it)
– 1 cup packed brown sugar
– 2 and 1/2 tbsp cinnamon (I heap it—I can’t help myself) - For the glaze:
– 1 and 1/2 cups powdered sugar
– 2-3 tbsp milk
– 1 tsp vanilla extract (fake or real—I won’t judge, but there is a difference)
Let’s Roll! My Not-So-Serious Cinnamon Roll Instructions
- Wake up (or, you know, just start)
If it’s early, make yourself a cuppa first. Add yeast and a sprinkle of sugar to the warm milk—leave it for ~5 minutes until it looks frothy and a bit weird. That means it’s working. - Dough wrangling
Toss flour, more sugar, and salt into a big bowl. Egg goes in next, then pour in your frothy milk-yeast mix and soft butter. Mix with a wooden spoon, your hands, or the dough hook if you’ve got a stand mixer. It’ll look messy at first—like, alarming. Just trust the process. - Knead Like You Mean It
5 to 8 minutes of kneading (by hand—good workout, or use a mixer if your arms are tired). Dough should feel smooth-ish and springy. Then plop it into a greased bowl, cover, and let it chill out somewhere warm until it doubles in size—about an hour. (Actually, I once left mine too long and it overflowed like some science experiment. Don’t do that.) - Butter Up and Roll It Out
Punch the dough—therapeutic!—then roll into a rectangle. Spread on the soft butter, layer on that brown sugar-cinnamon magic, and try not to eat all the filling as you go. I fail about half the time. - Roll, Slice and Rise (Again)
Tightly (ish) roll it up from the long side, then slice into roughly 12 pieces. Use dental floss for slicing if you want—makes you feel like a pro (don’t use minty floss though; ask me how I know). Place slices in a greased tin, leaving a bit of space to rise and do their thing. Let rise, covered, another 30-40 minutes. - Bake and Smell the Joy
Oven to 350°F (175°C). Bake for 25-30 minutes, until lovely and golden on top. If they go a bit too brown, loosely tent with foil; if they look pale, give them an extra five. Whatever you do, don’t eat them straight from the oven—burnt tongues are a thing. - Glaze Time!
Whisk glaze ingredients in a small bowl—add milk gradually until smooth but still thick enough to cling (think pourable, not runny). Drizzle over warm rolls. Just go wild.
Just Some Notes (from Honestly Too Many Tries)
- Don’t worry if your rectangle is more blob than rectangle—no one will see it once they’re baked.
- I find these taste even better the next day, though rarely have leftovers (might be wishful thinking).
- I tried subbing honey for the brown sugar once—not my best idea; got kind of soggy.
Roll Variations I’ve Tried—Some Wins, Some Fails
- Swapped brown sugar for coconut sugar—actually kinda nice, a bit less sweet.
- Added raisins. The kids made faces, but I liked it. More for me.
- Made them ‘mini’ by slicing thinner—they were cute, but they dried out fast. Wouldn’t repeat.
- There’s a version I found here that recommends orange zest in the filling—might try that next time, let you know.
Don’t Panic if You’re Missing Some Gear
All you really need is a rolling pin and a baking dish. Once, I used a wine bottle to roll the dough—worked a treat, just clean it first. If you don’t have floss for slicing, a sharp, greased knife works—just squish the log gently so they don’t totally flatten. Or wonkiness is charm, right?
Status: Highly Unlikely to Have Leftovers
Keep in an airtight container on the counter and they’re pretty happy for a day or two. They’ll dry out after that, but a quick zap in the microwave with a damp paper towel revives them nicely (though honestly, in my house it never lasts more than a day!).
How I Serve ‘Em (And Yes, I Have Opinions)
Look, nothing beats a warm roll straight out of the pan, but sometimes we split them and toast under the grill, then add even more glaze (my husband thinks this is overkill, he’s wrong). Around Christmas we’ll scatter a bit of chopped pecan over the top. One time I even plopped a scoop of vanilla ice cream on a hot one for dessert—no regrets.
Pro Tips—Learned the Hard Way
- I once tried to rush the rise by sticking the dough near the heater… ended up baking little rocks. Let ‘em rise naturally. Patience is tasty!
- I used cold butter in the filling once—not a good move. Needs to be soft, sort of like play dough.
- If you’re measuring flour by eye (which is how I started)—undercount, not over. Too much dries ‘em out. Use a proper cup if you can, but improvise if you can’t be bothered.
Real Talk: FAQ (Yes, I Get These!)
- My dough isn’t rising—what’s up?
- Probably your yeast needs a pep talk (or it’s too old). I now keep mine in the fridge… and always proof it first. Or, maybe the milk was too hot; I’ve killed more yeast that way than I can count.
- Can I make these ahead?
- Absolutely, just prep the rolls, stick ‘em in the fridge, and bake the next day. I’ve left them overnight and they still worked great.
- Can I freeze? (the rolls, not myself)
- Yup! I wrap ‘em after baking and cooling, then freeze; reheat from frozen, though sometimes the glaze goes a little funky. I just add more, honestly.
- Are these super sweet?
- Well, yes—they’re cinnamon rolls after all. But you can cut back on filling sugar by a smidge if you want. (Or heap it on. Who am I to judge?)
- What if I don’t have instant yeast?
- You can use active dry yeast, just proof it first and let the dough rise a bit longer.
- Do you have other bread recipes you trust?
- I’ve had great luck with these soft dinner rolls if you’re looking for less of a sugar rush.
If you tried these, let me know how it went! Or if you made a wild substitution that worked. Always up for experimenting (within reason, I did once add chili flakes—let’s not talk about it).
Ingredients
- 3 1/2 cups all-purpose flour
- 1 packet (2 1/4 tsp) active dry yeast
- 1 cup warm milk
- 1/3 cup granulated sugar
- 1/3 cup unsalted butter, softened
- 1 large egg
- 1/2 teaspoon salt
- 1/2 cup brown sugar, packed
- 2 tablespoons ground cinnamon
- 4 tablespoons unsalted butter, melted (for filling)
- 4 ounces cream cheese, softened
- 1/3 cup powdered sugar
- 2 tablespoons milk
Instructions
-
1In a large bowl, combine warm milk and yeast. Let sit for 5 minutes until foamy. Add sugar, softened butter, egg, and salt. Mix in flour gradually to form a soft dough.
-
2Knead the dough on a floured surface for 5-8 minutes until smooth and elastic. Place in a greased bowl, cover, and let rise in a warm place until doubled in size, about 1 hour.
-
3Punch down the dough and roll out into a 16×12 inch rectangle. Brush with melted butter, then sprinkle with brown sugar and cinnamon.
-
4Roll up the dough tightly from the long side and cut into 12 even rolls. Place rolls in a greased 9×13 inch baking dish. Cover and let rise for 30 minutes.
-
5Preheat oven to 350°F (175°C). Bake rolls for 20-25 minutes or until golden brown. Let cool for 10 minutes.
-
6Prepare the icing by beating together cream cheese, powdered sugar, and milk until smooth. Spread icing over warm cinnamon rolls before serving.
Approximate Information for One Serving
Nutrition Disclaimers
Number of total servings shown is approximate. Actual number of servings will depend on your preferred portion sizes.
Nutritional values shown are general guidelines and reflect information for 1 serving using the ingredients listed, not including any optional ingredients. Actual macros may vary slightly depending on specific brands and types of ingredients used.
To determine the weight of one serving, prepare the recipe as instructed. Weigh the finished recipe, then divide the weight of the finished recipe (not including the weight of the container the food is in) by the desired number of servings. Result will be the weight of one serving.
Did you make this recipe?
Please consider Pinning it!!

