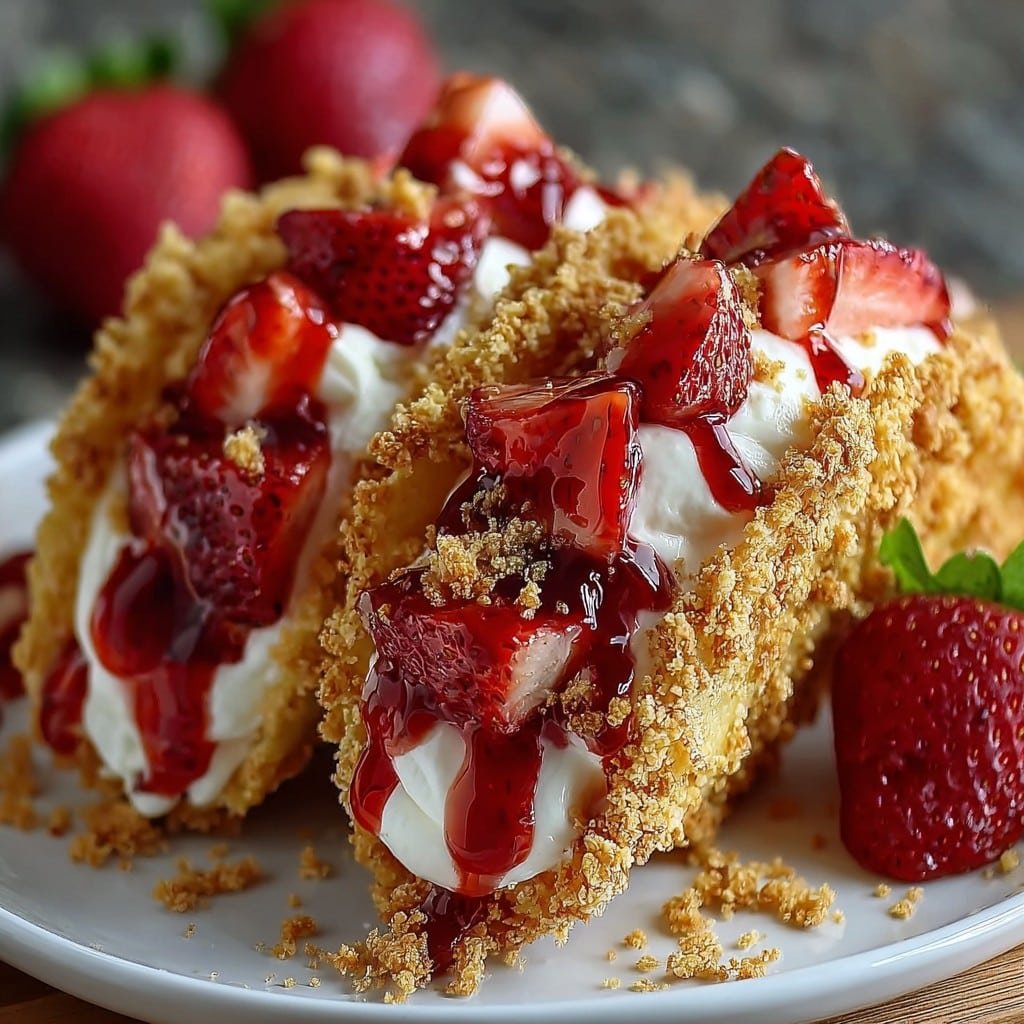
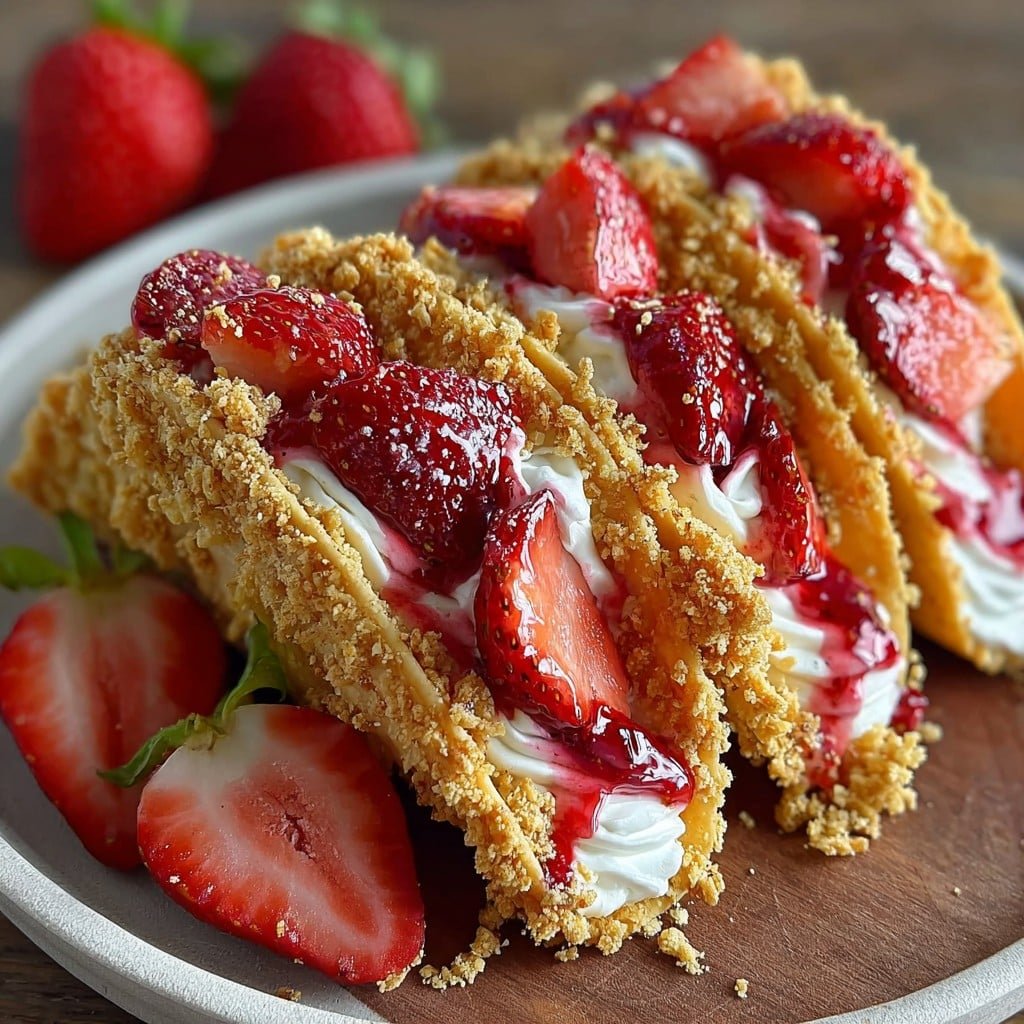
Strawberry Crunch Cheesecake Tacos
Let’s Talk Strawberry Crunch Cheesecake Tacos
I have to admit, the first time I made Strawberry Crunch Cheesecake Tacos, it was one of those “kitchen chaos” days. My youngest had just dumped half the strawberries on the floor, and my husband kept sneaking the cream cheese right off the spoon (I see you, Dan). But when that first crunchy, creamy bite happened, well… I pretty much forgot all about the mess. It tastes like a carnival and a summer picnic all rolled into one, with the bonus of a legit excuse to eat dessert in taco form. Which, honestly, is just fun (if you’re sick of regular-old cake, give these a go).
Why I’m Obsessed With These
I make these when I want to see everyone’s eyes light up. My daughter calls them “cheesecake crunchies” and asks for them every. single. birthday. They’re that good. My family loves these because they’re unexpected, sweet, and have just enough crunch to keep things interesting—as opposed to more standard cheesecake, which (let’s be real) can sometimes be a bit much on a hot day. There’s hardly any patience in this house and waiting for them to chill is the hardest part; sometimes I just serve them half-hardened. It happens. (Side note—getting strawberry dust everywhere is half the battle, but it’s worth it for those smiles.)
Here’s What You’ll Need (or, Use What You’ve Got!)
- Taco Shells: I usually use store-bought mini flour tortillas because my homemade ones never form the right size, but corn works if that’s your thing. If you’re in a hurry, those sweet waffle cone taco shells? They’ll do in a pinch, no judgment here.
- Cream Cheese (8 oz block): Full fat makes these dreamy. My grandmother swears by the brick version—if all you have is the whipped tub, it’ll still work (just a tad softer).
- Powdered Sugar (about a cup): Give or take, I don’t think it matters if you go slightly over. Sometimes I use less if my strawberries are really sweet that day.
- Heavy Cream (a glug, roughly half a cup): Or honestly, whatever leftover milk hiding in your fridge; the heavier, the dreamier, but not a deal breaker.
- Strawberries (at least a pint): Fresh is fun, but defrosted frozen berries have rescued me more than once. My friend Becky uses halved raspberries sometimes and it’s equally good.
- Strawberry Crunch: Ah, the star! I make mine with Golden Oreos plus a packet of strawberry gelatin powder (like Jell-O, not the stuff for making jelly). Graham crackers + freeze-dried strawberries also works, but it’s a bit less vivid.
- Butter (2-3 tbsps, melted): Salted or not. I honestly can’t taste the difference once mixed in—use what you have.
- Vanilla (a splash): Not essential but I always add it. One of those things you miss if you forget.
How I Actually Make Strawberry Crunch Cheesecake Tacos
- Taco Shells: Preheat your oven to 350°F. Brush tortillas with a little melted butter, sprinkle with sugar (if you want), and drape each one over two bars of your oven rack to form that classic taco shape. Bake for 8-10 minutes—watch out, they brown quickly! Sometimes mine are a little lopsided, but it adds character.
- Strawberry Crunch: Toss Golden Oreos (about 15) and 2 tbsps of that strawberry gelatin powder into a zip-top bag. Smash with a rolling pin (great stress relief—also noisy, so sorry neighbors), dump in melted butter, and mix until crumbly and pink/red. If it clumps, just break it up with a fork.
- Cheesecake Filling: In a bowl, beat the heck out of the cream cheese and powdered sugar until fluffy. Add heavy cream and vanilla; beat until it’s thick, like, holds really soft peaks. This is where I sneak a spoonful just to check for “quality control.”
- Assemble: Spread the inside of each taco shell with the cheesecake mix. I usually use a piping bag or a sturdy ziplock with the corner snipped off (don’t overthink it; a butter knife works too). Top with chopped strawberries and sprinkle with strawberry crunch. Jam as much as you want in there—it’s impossible to overdo it, I promise.
- Chill (Or Not): You’re meant to refrigerate for at least an hour so everything firms up, but I’ll admit it: we’ve eaten them basically straight away. Just expect a bit of crumble chaos if you do!
Notes From My Messy Countertop
- I tried baking the shells longer to make them super crisp—ended up too hard to bite, honestly (good for dental work, maybe?). So stick with 8-10 minutes, or they get tough.
- If your filling seems runny, chill it before assembling. Learned that the hard way when mine oozed everywhere.
- Don’t overthink the shape; nobody ever complained about an imperfect taco.
Variations I’ve Actually Made (or Attempted)
- Chocolate crunch instead of strawberry (just use cocoa powder and Oreos). Pretty tasty, but for me the flavor didn’t pop, maybe not enough contrast.
- Lemon zest and a little lemon juice in the filling—gives a bright, summery vibe, like a British tea party. But don’t pour in too much or it won’t set properly (been there).
- Nutella swirl: okay, this one was a mess, but my daughter thought it was hilarious.
What Kitchen Stuff Do You Actually Need?
- Stand mixer or hand mixer: Handy, but not strictly necessary; I whipped everything with a big fork once, my arm ached but it worked.
- Rolling pin: Or, as I sometimes do, use a wine bottle. Hey, use what you have! (Careful though, slippery…)
- Baking sheet: If you don’t want to use your oven rack, crumple some foil into logs as taco forms and balance tortillas over them.
How To Store ‘Em (If You Have Any Left)
These keep in the fridge in a closed container for about 2 days, but the shells soften up a bit after the first day. Still good, just more like a soft taco thing. But to be completely honest, in my house, they rarely see the sunrise.
How I Usually Serve These
I pile them up on a big platter, scatter extra strawberry crunch on top for good measure, and let everyone grab their own. Sometimes we drizzle a little chocolate syrup over the top if we’re feeling fancy. My mum always insists on a cup of tea alongside (some habits run deep!).
Humble Pro Tips (Learned The Slightly Painful Way)
- Let the tacos cool completely before filling or the cream cheese melts everywhere—I once rushed and, well, it was chaos.
- Use a ziplock bag with the corner cut off to pipe the filling. Regular spoons tend to make things look…let’s call it rustic (which is totally fine, really).
- Don’t make them too far ahead if you want crunch. I once did them in the morning for an evening party and oops, soggy shells by dessert.
Questions Folks Actually Asked Me
- Can I freeze these?
- I tried it once—didn’t love the texture after thawing. So I’d say probably not worth it, but if you do, let me know how it turns out.
- Can I use canned whipped cream as the filling?
- You can, but honestly it melts super fast and tastes more like strawberry tacos than cheesecake. Still, kids will eat anything in a taco, right?
- What could I use instead of strawberry crunch?
- I’ve used crushed freeze-dried berries and graham cracker crumbs, also toasted coconut once—ended up pretty good! Just don’t skip the crunch entirely (it makes the whole thing).
- Are these crazy sweet?
- I’d say medium sweet. If you like more tartness, add some lemon zest to the filling or more fresh berries on top. Or just plop in extra cream cheese. There’s honestly no wrong way.
- Where do I find the taco forms?
- Those specialty taco racks can be pricy—for one-off kitchen gear, Amazon has options, but also check out this DIY oven rack trick on Cup of Zest. Or foil. Or skewers. Improvise, that’s half the fun.
For more fun cheesecake taco inspiration, you might want to peek at Delish’s take or the homemade strawberry crunch at Sugar Spun Run (I borrowed some tricks there myself, not ashamed to admit it!).
Anyway, if you give these a whirl, let me know how it goes—or if you end up inventing your own wild flavor. There’s always another taco Tuesday around the corner—I mean, technically every day can be a taco day, right?
Ingredients
- 6 small flour tortillas
- 1 cup cream cheese, softened
- 1/2 cup powdered sugar
- 1 cup heavy whipping cream
- 1 teaspoon vanilla extract
- 1 cup strawberries, diced
- 1/2 cup Golden Oreos, crushed
- 2 tablespoons unsalted butter, melted
- 1/4 cup strawberry gelatin powder
Instructions
-
1Preheat oven to 375°F (190°C). Brush both sides of the tortillas with melted butter and shape them over the rungs of a baking rack to form taco shapes. Bake for 8-10 minutes until golden and crisp. Let cool.
-
2In a medium bowl, beat softened cream cheese with powdered sugar and vanilla extract until smooth and creamy.
-
3In a separate bowl, whip heavy cream until stiff peaks form. Gently fold the whipped cream into the cream cheese mixture until fully combined.
-
4Prepare the strawberry crunch topping by mixing crushed Golden Oreos and strawberry gelatin powder together.
-
5Fill each cooled taco shell with the cheesecake mixture. Top with diced strawberries and sprinkle generously with the strawberry crunch topping.
-
6Serve immediately for best texture, or refrigerate until ready to enjoy.
Approximate Information for One Serving
Nutrition Disclaimers
Number of total servings shown is approximate. Actual number of servings will depend on your preferred portion sizes.
Nutritional values shown are general guidelines and reflect information for 1 serving using the ingredients listed, not including any optional ingredients. Actual macros may vary slightly depending on specific brands and types of ingredients used.
To determine the weight of one serving, prepare the recipe as instructed. Weigh the finished recipe, then divide the weight of the finished recipe (not including the weight of the container the food is in) by the desired number of servings. Result will be the weight of one serving.
Did you make this recipe?
Please consider Pinning it!!

