Let’s Talk About Spicy Salmon Sushi Bake (and My Chaotic Kitchen)
Okay, confession time: the first time I made this Spicy Salmon Sushi Bake, I was trying to impress my cousin Janet. She’s one of those people who makes perfect little sushi rolls and acts as if it’s no big deal—a real show-off in the kitchen. Meanwhile, my attempts usually end with me muttering under my breath and eating more rice than I should. But then I discovered this magical sushi bake thing—basically all the flavor, a fraction of the fuss, and you serve it hot from the oven. Plus, you get that cozy, slightly ridiculous casserole feel. I do think Janet still judges me for not rolling, but hey, this bake is a total crowd-pleaser (and a heck of a lot kinder to my clumsy hands).
Why I Keep Making This Even on Weeknights
I make this Spicy Salmon Sushi Bake when I want to feel fancy but also don’t want to actually roll sushi (so, like, every other Saturday). My family goes wild for it, probably because it’s creamy, spicy, and—let’s be real—a little indulgent. Plus, if I have leftover salmon languishing in the fridge (it happens more than I care to admit), this is its redemption arc. Oh, and honestly, it’s a solid hit at potlucks too (except for the one time I forgot the sriracha and just dumped ketchup in… don’t be like me).
My Go-To Ingredients (With a Few Cheeky Substitutions)
- 2 cups cooked sushi rice (or, you know, whatever short-grain rice is handy; I’ve even snuck in some regular old jasmine rice in a pinch)
- 2 tablespoons rice vinegar—seasoned or not, Grandma insists on Marukan but honestly, use what’s in your cupboard
- 1 tablespoon sugar (I just eyeball it, usually a generous pinch)
- 1/2 teaspoon salt
- 250g (about 9 oz) cooked salmon—baked, grilled, or even leftover teriyaki salmon from last night. (Canned will work in a real hurry, though shhh, don’t tell Janet)
- 1/3 cup mayonnaise (Japanese Kewpie is dreamy, but regular Hellmann’s does just fine)
- 1 to 2 tablespoons sriracha (or more if you like to live dangerously)
- 1 tablespoon cream cheese, softened (on second thought, 2 is even better, but I may have a problem)
- 1 tablespoon soy sauce
- Optional: 2 teaspoons toasted sesame oil (I sometimes forget this and it still tastes great)
- 3 sheets roasted nori, cut into small squares (or just rip ’em, honestly)
- 1/4 cup green onions, thinly sliced (or spring onions if you’re feeling fancy)
- 1 tablespoon toasted sesame seeds
- Avocado slices, extra sriracha, and sliced cucumber for serving (if you feel like putting on airs)
Here’s How I Throw This Together
- First, prep your rice: While it’s still warmish, mix rice vinegar, sugar, and salt together. Pour it over the rice and fold gently. (I usually give it a taste here—sometimes too much vinegar, sometimes not enough, but it always works out.) Let it cool a bit.
- Next, get the salmon mixture going: Flake your salmon with a fork in a big bowl. Mix in mayo, sriracha, cream cheese, soy sauce, and toasted sesame oil. Mash it all together till it’s sort of a pink, slightly questionable-looking paste. (Don’t worry—it looks weird now, but trust me.)
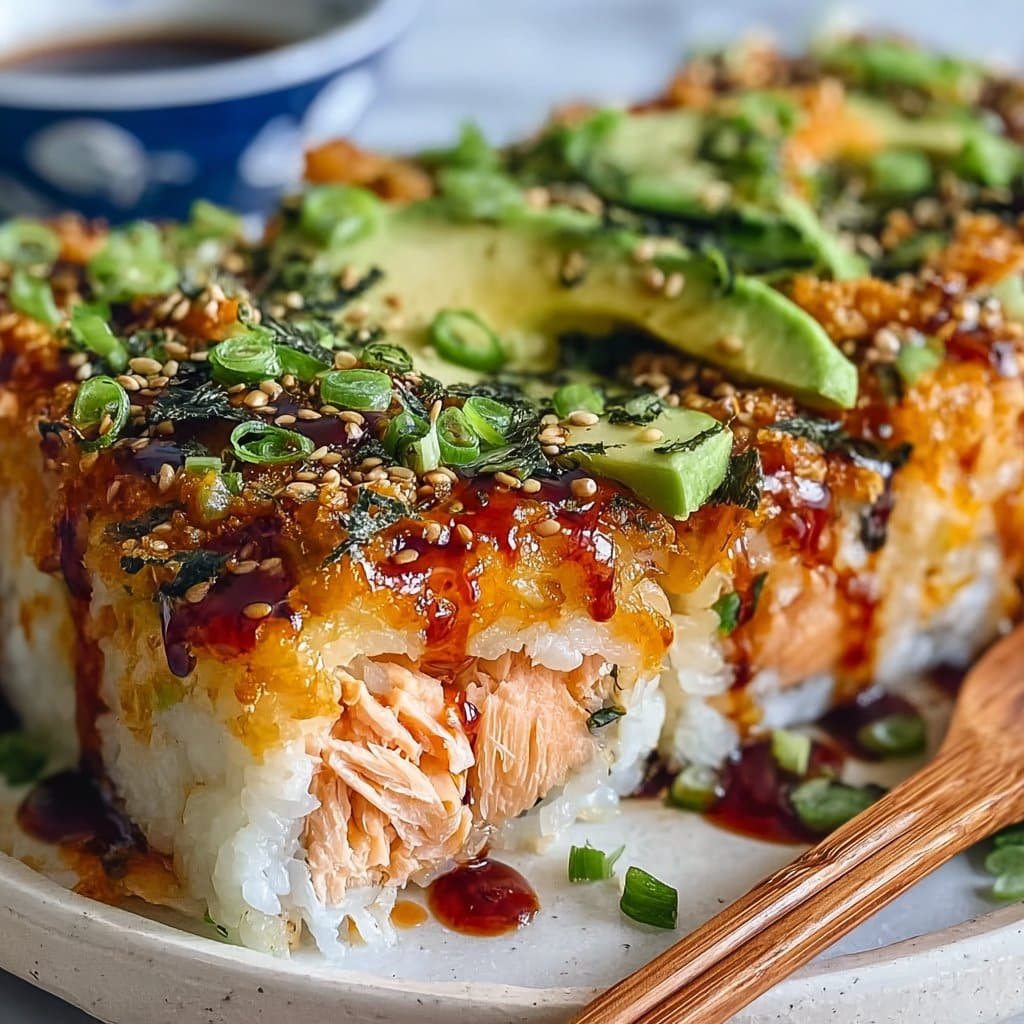
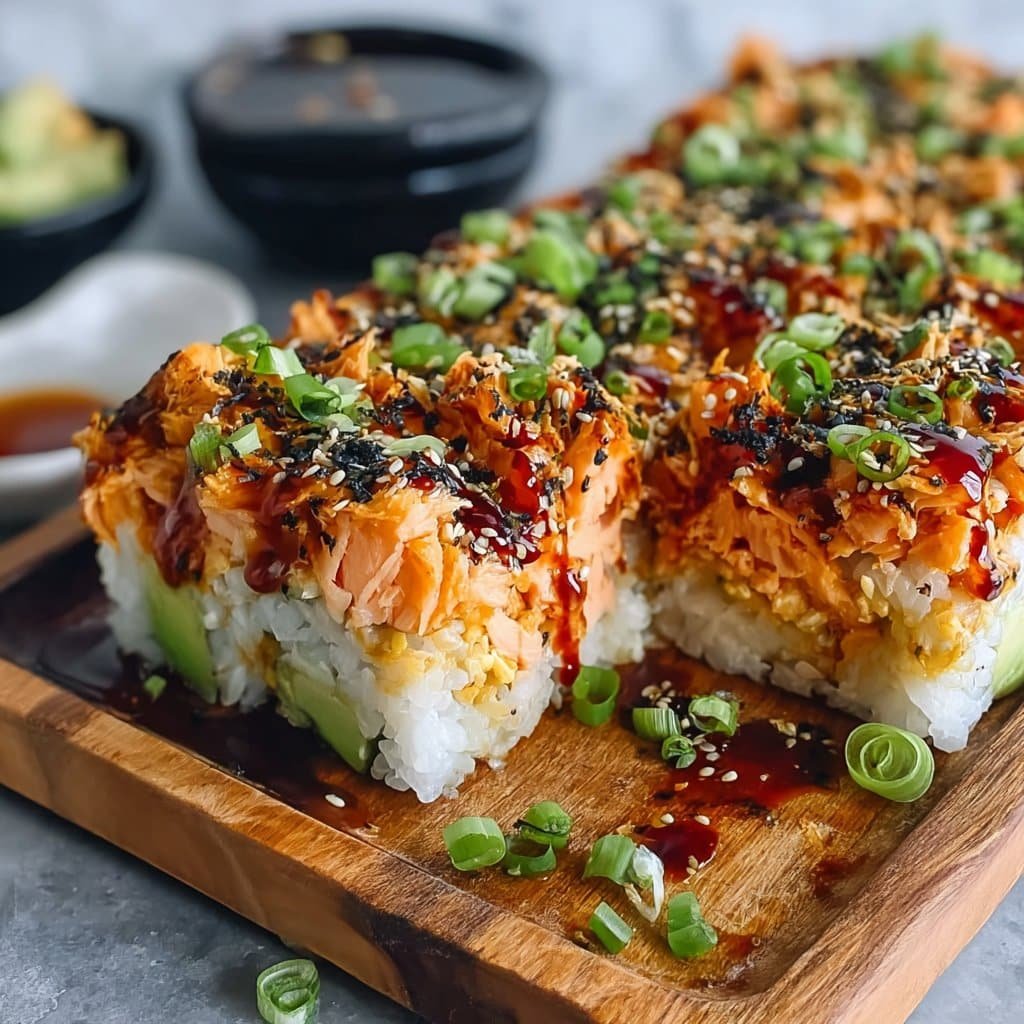
- Layer it up: Spread the seasoned rice in a greased or parchment-lined 8-inch baking dish—or whatever you have, I’ve used a pie plate before. Press it down gently. Top with the salmon mix and smooth it out as well as you can. Sometimes I drizzle a bit of extra mayo and sriracha in little zigzags because, why not?
- Pop it in the oven: Bake at 400°F (about 200°C) for 15-18 minutes. You want it hot and bubbly, not dried to a crisp. Occasionally I get distracted by a phone call (or a wandering dog) and it goes a little brown on top—still delicious.
- Add toppings and dig in: Sprinkle with green onions and sesame seeds. Hand everyone some nori squares or rip ’em off yourself. Scoop a bit of the sushi bake, wrap it in nori, and pop it in your mouth. Optional, but highly recommended: a wedge of avocado or a few cucumber slices on the side. This is usually the part where I eat at least two servings before anyone else gets a chance—it’s a hazard of being the cook, right?
Little Notes from My Personal Sushi Bake Experiments
- This actually tastes even better the next day—if, miraculously, there are leftovers. The flavors just sort of chill out together.
- Once, I got lazy and didn’t season the rice at all. It came out a bit bland. Not inedible, just… meh. So, season the rice, even if you’re tired.
- If you eat it straight out of the oven, watch your tongue (ask me how I know… actually, don’t)
Wild and Not-So-Wild Variations
- Crab sticks instead of salmon work like a charm—kind of like the famous California roll, but baked. But once I tried with cooked shrimp and… not my favorite, a little rubbery for my taste.
- Make it dairy-free with vegan mayo and skip the cream cheese—though you’ll lose some richness. (I’ve done it for a lactose-intolerant friend; she was happy, I missed the creaminess.)
- Sometimes I swirl in some eel sauce instead of sriracha—fancier, slightly sweeter, and great if you find Sriracha a bit punchy.
If You Don’t Have a Proper Baking Dish…
I swear by my battered old glass pan for this, but you can honestly use any oven-safe dish you can find. No lie, I once used a disposable foil tray, and it turned out totally fine. (If you’re baking for just yourself, a loaf pan makes the cutest little sushi bake for one.)
Got Leftovers? Here’s How I Store It (If It Lasts)
Seal it up in an airtight container and pop it in the fridge—it’s good for up to two days, though honestly, in my house it’s usually gone the same night. I wouldn’t freeze it; the texture gets a bit odd, almost like reheated fish pie (not in a good way).
Serving It Up: How We Do It at My House
We just shovel scoops straight onto nori squares at the table, then pile on avocado and cucumber if we’ve got them. Sometimes, if I’m feeling very extra, I’ll lay everything out DIY-style and let everyone build their own—kids love that part, though it does get a bit messy!
My Top Pro Tips (Learned the Hard Way)
- Don’t overbake! I once tried to make it crispier, left it in an extra ten minutes, and ended up with something that could probably be used for home insulation. Trust the process, even if it looks a bit too soft when you take it out—it’ll firm up as it cools.
- Get good nori if you can. Cheap seaweed tastes like, well, the sea in the worst way. I like this simple guide from Just One Cookbook for picking nori.
- If you want more sushi bake inspo, I think Chopstick Chronicles has some wild ideas. I tried their beef version—but I’m still partial to salmon.
FAQ from Folks Who’ve Actually Tried This
- Can I use raw salmon instead?
- I’d cook it first, honestly—just a quick roast. I tried it with raw once but it didn’t set up quite right, and the texture was kind of off.
- Is this super spicy?
- Not unless you go wild with the sriracha… but it’s easy to dial up or down. I usually go middle of the road—enough heat for grown-ups, not so much that my niece protests (though she once asked for ketchup on it, so… take that with a pinch of salt).
- What if I don’t have cream cheese?
- Skip it—or use Greek yogurt, or even a squirt of sour cream. Sometimes I just leave it out and add a bit more mayo. No need to panic!
- Can I prep it ahead?
- Actually, yes! Assemble everything early, stick it in the fridge, then bake when you’re ready. Just give it a little extra time if it’s cold straight from the fridge. But, if you’re like me, you’ll get hungry and just eat it half-cold anyway.
- Why isn’t my rice sticking together?
- It probably needed more vinegar or less rinsing before cooking—though it usually doesn’t matter too much. Once you pile that spicy salmon on top, no one will notice except maybe Janet.
Brief detour—totally unrelated, but if you’ve never tried pickle juice in your potato salad, drop everything and do it. That’s all. Now, back to spicy salmon joy.
Give this a try next time you’re craving sushi but want to keep your kitchen (and your fingers) intact—the messier, the better, I say! And don’t forget to enjoy your fame when everyone asks for seconds.
Ingredients
- 2 cups cooked sushi rice
- 12 oz skinless salmon fillet, cooked and flaked
- 1/4 cup mayonnaise
- 2 tbsp sriracha sauce
- 2 tbsp cream cheese, softened
- 1 tbsp soy sauce
- 1 tsp sesame oil
- 1 avocado, sliced
- 2 sheets roasted seaweed (nori), cut into squares
- 2 green onions, sliced
- 1 tbsp toasted sesame seeds
Instructions
-
1Preheat the oven to 400°F (200°C). Lightly grease an 8×8-inch baking dish.
-
2Spread the cooked sushi rice evenly into the bottom of the prepared baking dish. Drizzle with soy sauce and sesame oil.
-
3In a large bowl, mix together the flaked salmon, mayonnaise, sriracha sauce, and cream cheese until well combined.
-
4Evenly spread the spicy salmon mixture over the rice layer. Top with sliced green onions and toasted sesame seeds.
-
5Bake for 20 minutes or until heated through and the top is slightly golden.
-
6Serve the sushi bake hot with sliced avocado and roasted seaweed on the side for scooping.
Approximate Information for One Serving
Nutrition Disclaimers
Number of total servings shown is approximate. Actual number of servings will depend on your preferred portion sizes.
Nutritional values shown are general guidelines and reflect information for 1 serving using the ingredients listed, not including any optional ingredients. Actual macros may vary slightly depending on specific brands and types of ingredients used.
To determine the weight of one serving, prepare the recipe as instructed. Weigh the finished recipe, then divide the weight of the finished recipe (not including the weight of the container the food is in) by the desired number of servings. Result will be the weight of one serving.
Did you make this recipe?
Please consider Pinning it!!

