Let Me Tell You About These Cookies
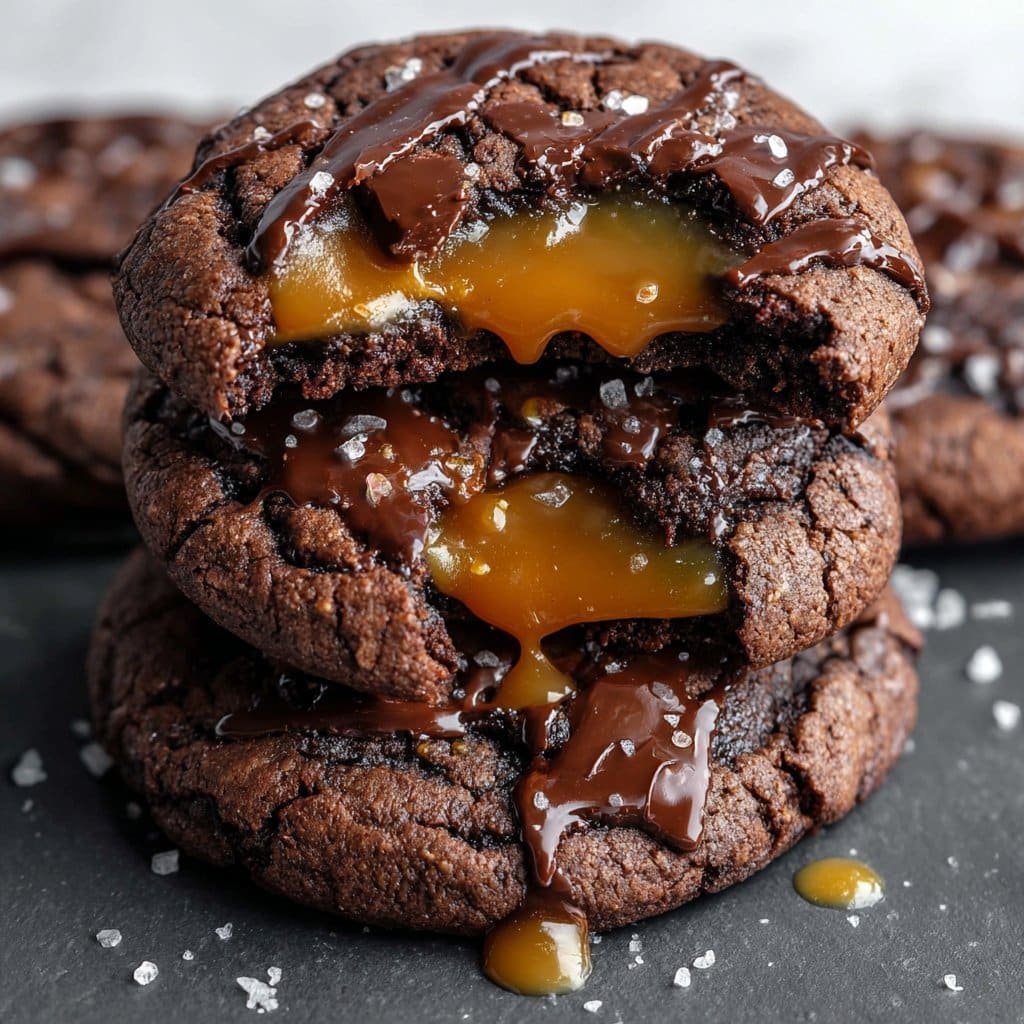
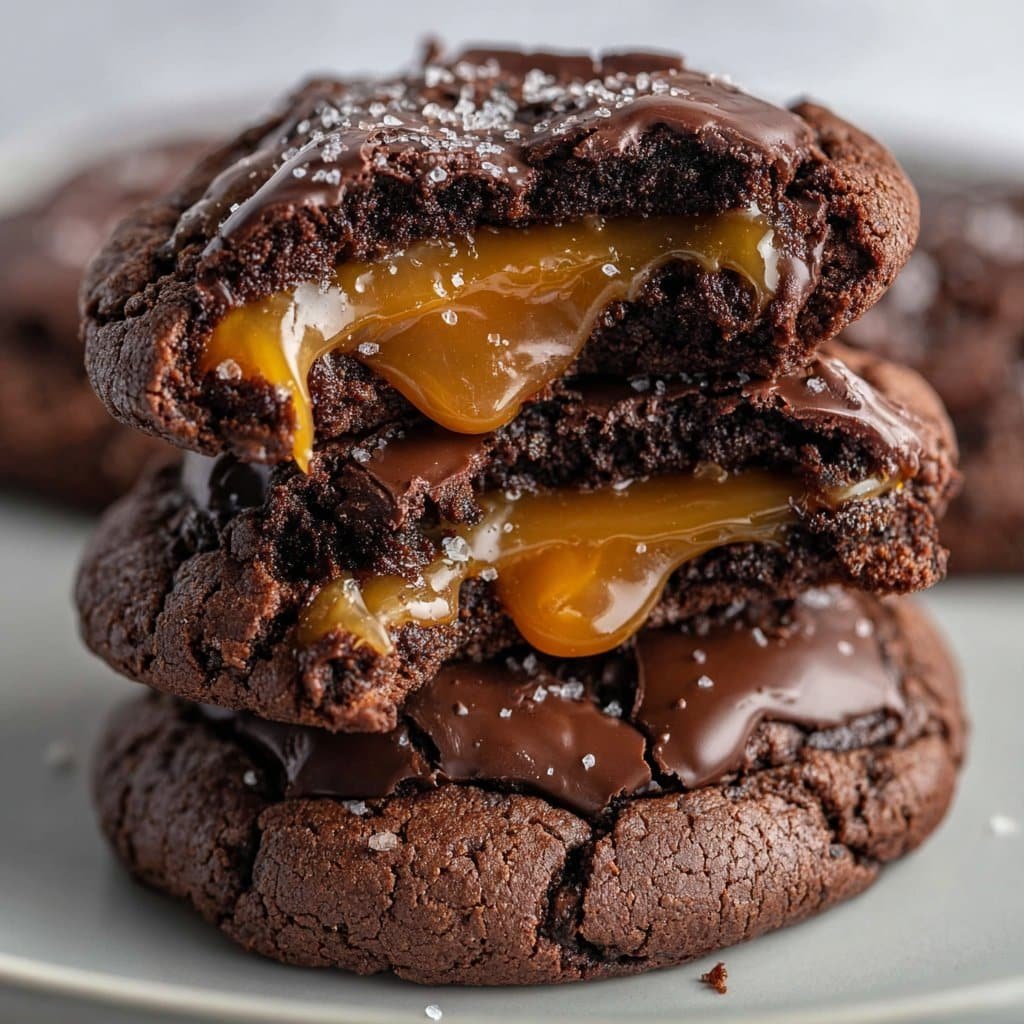
If there’s ever been a recipe that’s pulled me out of a midweek slump, it’s this Salted Caramel Chocolate Cookie Recipe—also, if I’m being honest, it’s gotten me out of a couple of botched birthday emergencies. The first time I baked these, I was actually running late and forgot to soften my butter (hate it when that happens), but somehow it all came together. My brother still brags about how he inhaled a whole tray before anyone else could even see them. That’s sibling rivalry at its best, right? There’s something about biting into a warm, gooey cookie with melted chocolate and salted caramel bits that feels a bit like you’re winning at life—at least for that delicious moment.
Why I Keep Making These (And You’ll Probably Want To, Too!)
I make these when I want to impress my mates but don’t feel like fussing with layered cakes or endless dough-chilling. My family pretty much expects them at every get-together. (It’s now a running joke that no one remembers my birthday cake, only the cookies.) Plus, as someone who cannot be trusted with a caramel saucepan—seriously, there’s a burned pan in my shed as proof—these are a breeze, since you can just buy the caramel candies. No shame there.
What You’ll Need (And My Usual Substitutions)
- 200g plain flour (if I don’t have plain, I’ve used self-raising and just skipped the baking soda—didn’t notice a huge difference, to be honest)
- 1/2 tsp baking soda (Grandma insisted on Arm & Hammer, but my store brand works fine; sometimes I even forget to add it… sorry, Grandma)
- 140g unsalted butter, room temp (Or, if you’re me, not quite defrosted, straight from the microwave…)
- 100g light brown sugar (if I’m out, dark brown makes a richer, but slightly more caramel-y cookie. Not a real problem!)
- 80g granulated sugar
- 1 large egg
- 1 tsp vanilla extract (Taylor & Colledge is great, but I use the cheap one more often than not)
- 150g chocolate chips or chopped chocolate (Honestly, just grab whatever’s in the cupboard: I’ve used a 70% dark, milk, and once even a leftover chocolate bunny—kind of a wild card but it worked)
- 100g caramel candies, chopped (Werther’s Soft are my go-to, but supermarket own-brand are fine, and I’ve even tried soft toffees)
- 1/2 tsp sea salt for sprinkling (I use Maldon when I’m feeling posh; table salt when I’m not)
How to Make ‘Em – My No-Nonsense Approach
- Preheat your oven to 180C (or 350F). Line a couple trays with baking parchment (I ran out once and just greased the tray—fine if you like a few stuck bits!).
- Whack the butter and both sugars into a bowl. Cream them together with a wooden spoon or mixer. This is a good moment to taste it—just a tiny bit though (you know you want to).
- Crack in the egg, glug in the vanilla. Stir until it looks smooth. Don’t panic if it kind of splits for a second; it sorts itself out when you add the flour.
- Tip in the flour and baking soda. Stir it up. At this point, it gets a bit tough—a workout for the arms. Actually, sometimes I switch to my hands. Don’t worry, it’s messy fun.
- Toss in the chocolate and caramel bits. Stir. Lick the spoon (optional, unless you’re me—then it’s required).
- Scoop out golf ball sized blobs onto the trays. Leave a bit of space; these do spread. Don’t try to make them perfect—lumpy cookies are good cookies.
- Bake for about 10-12 minutes. They’ll look just golden at the edges, but maybe too soft in the middle—this is good. They firm up as they cool! (I used to leave them in longer, and they ended up too crunchy. Lesson learned.)
- Sprinkle with that sea salt while they’re still warm. Leave to cool for 5 mins on the tray, then transfer to a wire rack… or just eat one straight away. I won’t judge.
Things I’ve Learned (Sometimes The Messy Way)
- If your caramel candies are super hard, zap them in the microwave for 10 seconds before chopping. Less knife drama.
- Tried refrigerating the dough—gets a bit chewier, but honestly, I rarely have the patience (see: hungry family/personal lack of impulse control).
- Don’t bake on a really hot day unless you like your chocolate chips puddling everywhere (learned from a July heatwave…)
Cookie Experiments (Some Good, Some… Not So Much)
- Added chopped pecans once—delicious! Made them taste like turtle candies.
- Used white chocolate chips instead—sweet, but somehow less wow, so I went back to dark/milk. Maybe you’ll like it though?
- Tried using caramel sauce instead of candies… Giant mess. Would not recommend unless you fancy washing sticky trays for eternity.
What You’ll Need—But Only If You’ve Got It
- Mixing bowl
- Wooden spoon or an electric mixer (if you can be bothered—if not, elbow grease works)
- Baking trays—if not, use a pizza tray (no one’s judging), just make sure to space things out
- Baking parchment, or butter up your tray if that’s what you’ve got
- Wire rack—Actually, a chopping board works if you’re in a pinch
Storing These Beauties
Seal in a tub or cookie tin; they’ll keep for three days, maybe four, but honestly, in my house they never last more than a day! Once, I managed to hide a couple at the back of the bread box. They were still lovely and soft the next day—maybe even better?
How We Serve ‘Em (And the Odd Quirk)
I love these still-warm, with a scoop of ice cream (vanilla because I’m basic like that). My weird uncle dunks them in his morning coffee, which I secretly think is brilliant; don’t tell him that though. If you’re feeling ~extra~ serve with a drizzle of homemade salted caramel (Sally at Sally’s Baking Addiction has a great one, though I still buy mine half the time). Or go wild and sandwich two cookies around some peanut butter.
The “Don’t Rush This” Lessons
- I once tried to swap out soft butter for melted because I was in a hurry—ended up with super-flat, greasy cookies. Not my best look.
- Let them cool on the tray for those few minutes even if it’s agony—otherwise, you’re just crumbling warm dough. Learned the hard way.
- Oh, and don’t bake on the bottom oven shelf—they brown too fast.
FAQ – Questions I Actually Get Asked
- Can I use store-bought caramel sauce?
- In theory, sure, but I’ve found it just makes a caramel lake—so much mess. If you want caramel that stays put, stick with candies.
- How do you keep the caramel bits from melting everywhere?
- Ah, the age-old mystery! Cutting them into bigger chunks helps. And, if a bit escapes and crisps up on the tray, that’s not a disaster, it’s a bonus (I call those ‘the chef’s tax’).
- Can the dough be frozen?
- Oh absolutely. Freeze the blobs on a tray, then chuck in a bag for later. Bake from frozen—just add a minute or two to the timer. Saves your sanity on a busy day.
- Are these really salty?
- Not unless you go wild with the salt. It’s just a sprinkle really, but you can skip it if that’s not your jam.
- What if I don’t have chocolate chips?
- Honestly, I once chopped up a clearance Easter bunny. Use whatever chocolate you’ve got lurking (and yes, it really works!).
P.S. If you’re a recipe tinkerer like me, check Smitten Kitchen’s brownie cookies for inspo—a little messier, but so good. Also, if you’re new to sea salt on cookies, Serious Eats’ salt guide explains the difference (I still mix ’em up sometimes—no big deal).
Alright, that’s probably more cookie wisdom than you’d ever want form one person, so happy baking—and don’t forget to save at least one for yourself!
Ingredients
- 1 1/2 cups all-purpose flour
- 1/2 cup unsweetened cocoa powder
- 1/2 teaspoon baking soda
- 1/2 teaspoon salt
- 1/2 cup unsalted butter, softened
- 3/4 cup brown sugar
- 1/4 cup granulated sugar
- 1 large egg
- 1 teaspoon vanilla extract
- 1 cup semisweet chocolate chips
- 18 soft caramel candies
- 1 tablespoon coarse sea salt
Instructions
-
1Preheat oven to 350°F (175°C) and line two baking sheets with parchment paper.
-
2In a bowl, whisk together flour, cocoa powder, baking soda, and salt.
-
3In a large bowl, cream butter, brown sugar, and granulated sugar until light and fluffy. Beat in the egg and vanilla extract.
-
4Gradually add the dry ingredients to the wet ingredients, mixing just until combined. Stir in chocolate chips.
-
5Scoop about 1 tablespoon of dough for each cookie, flatten slightly, and place a caramel candy in the center. Wrap dough around caramel and shape into a ball. Place on the baking sheet, spacing 2 inches apart.
-
6Bake for 11-12 minutes or until edges are set. Sprinkle cookies with coarse sea salt immediately after baking. Let cool on the pan for 5 minutes before transferring to a wire rack.
Approximate Information for One Serving
Nutrition Disclaimers
Number of total servings shown is approximate. Actual number of servings will depend on your preferred portion sizes.
Nutritional values shown are general guidelines and reflect information for 1 serving using the ingredients listed, not including any optional ingredients. Actual macros may vary slightly depending on specific brands and types of ingredients used.
To determine the weight of one serving, prepare the recipe as instructed. Weigh the finished recipe, then divide the weight of the finished recipe (not including the weight of the container the food is in) by the desired number of servings. Result will be the weight of one serving.
Did you make this recipe?
Please consider Pinning it!!

