Let’s Just Dive In—Earthquake Cake Memories
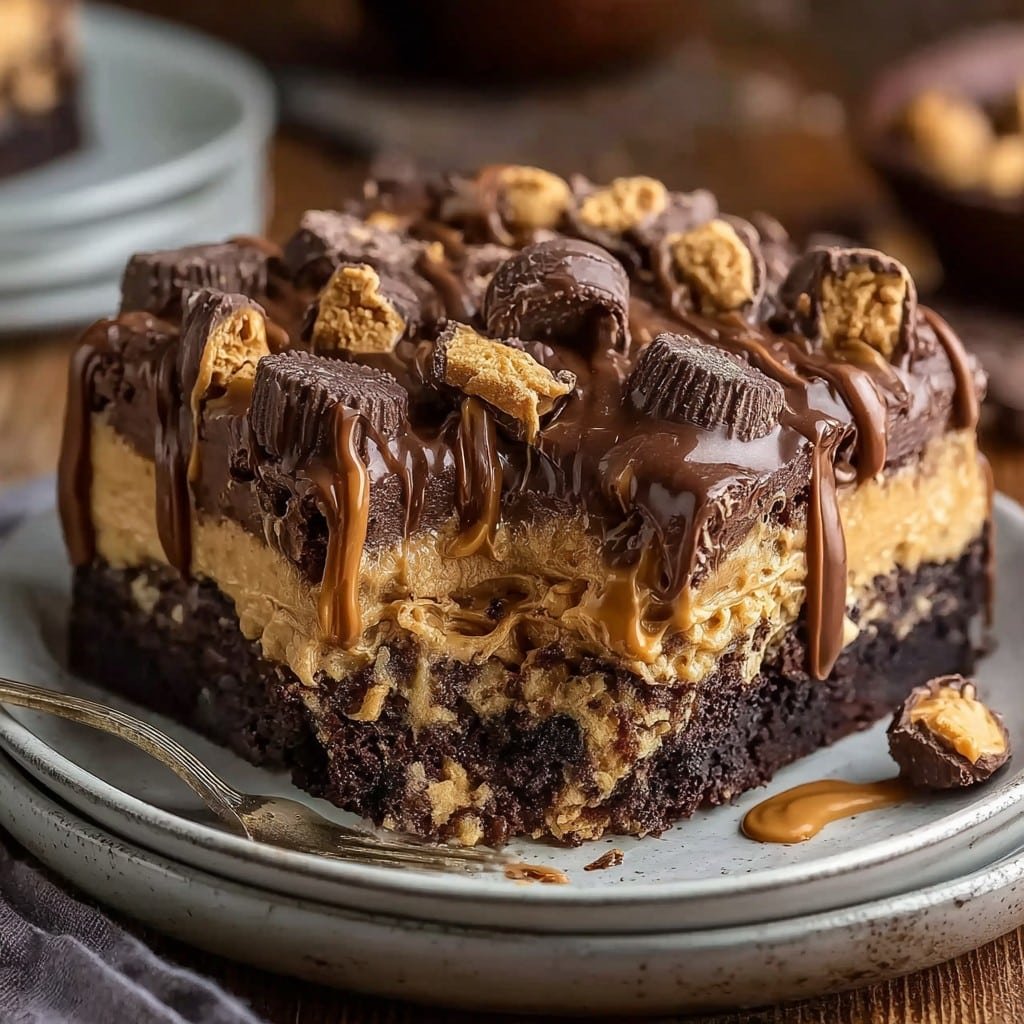
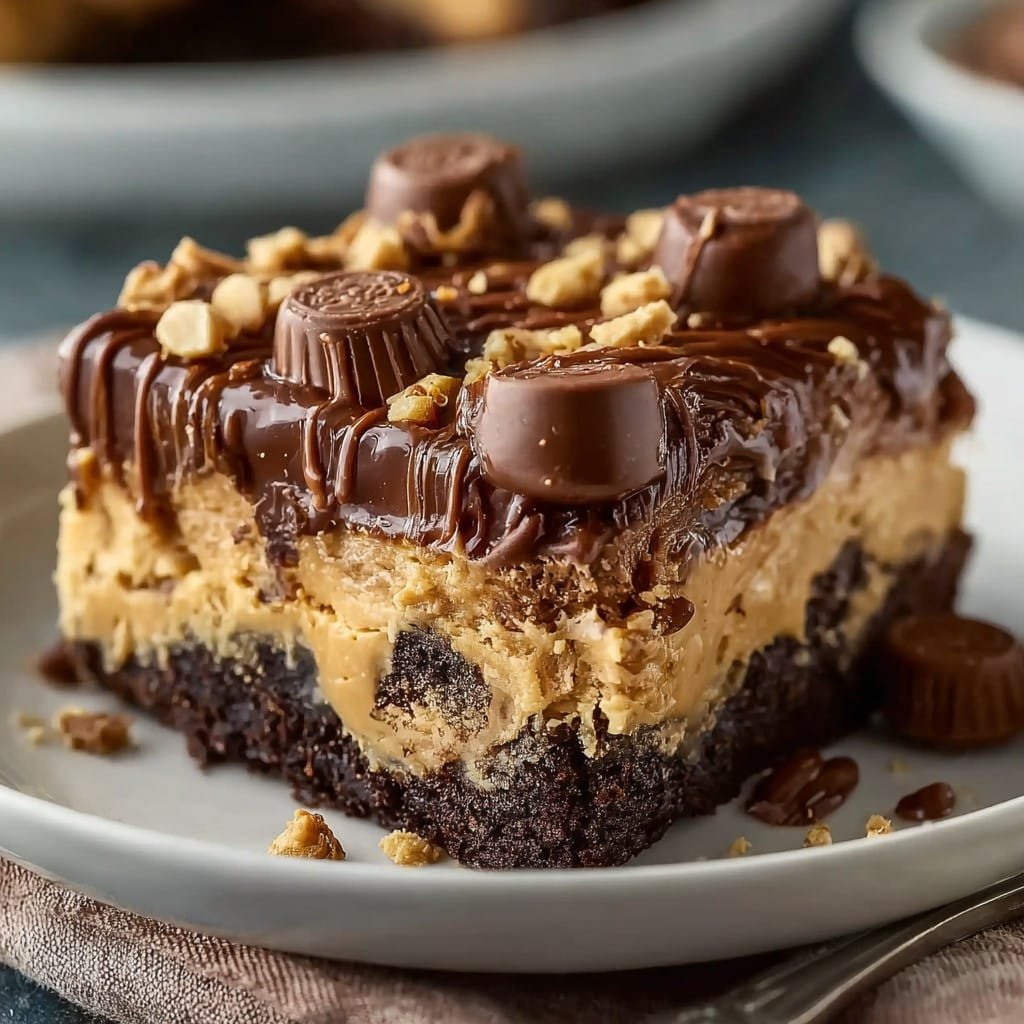
You ever crave that thing that’s part cake, part candy-bar chaos, and entirely too good to eat alone (but you absolutely do, sometimes)? That’s me with this Reese’s Peanut Butter Earthquake Cake. First time I made it was for my cousin’s birthday, though I admit, most folks never got a bite. My sister Marcy still suspects I purposely kept the corner piece for myself. Maybe I did—who’s counting? Cake’s a bit of a mess, but honestly, that’s half the charm. And don’t let the name scare you: it’s not going to break your table, just maybe your willpower.
Why I Keep Coming Back To This (And Maybe You Will Too)
I make this whenever there’s an excuse, big or small—rainy Sundays, birthdays, basically anytime I run into a sale on Reese’s. My family goes bonkers for it because you get swirls of peanut butter, chocolate, and gooey cheesecake all in one go. I used to get mad when the peanut butter layer sort of melted and vanished the first few times, but now I just call it “part of the earthquake,” which sounds way more intentional. I dunno, it’s just… way more fun than your average sheet cake, and far less serious. (If your cake erupts, you did it right… at least, that’s what I tell myself.)
What You’ll Need (& What I Swap In When I’m Lazy)
- 1 box chocolate cake mix (Devil’s Food is great, but supermarket own-brand works—my grandma always insisted on Duncan Hines, but honestly, whatever’s on sale)
- 1/2 cup vegetable oil
- 3 eggs (I’ve used 2 when I’m low, the texture changes but it’s honestly fine—call it rustic!)
- 1 cup water
- 8 oz cream cheese, softened (my friend Sarah swears by the whipped kind for easier mixing, I can’t tell the difference)
- 1/2 cup unsalted butter, melted (salted if you want to live dangerously)
- 2 cups powdered sugar (I never remember to sift, and nothing bad has happened so far)
- 3/4 cup creamy peanut butter (crunchy if you want some texture; I’ve done both—nobody noticed except maybe me)
- 1 cup mini chocolate chips (regular ones don’t melt as nicely, but they’ll do in a pinch)
- 1 cup chopped Reese’s Peanut Butter Cups (plus more for topping—measured with my heart, frankly)
Here’s How It Comes Together (Messy Is Good, Promise)
- Preheat your oven to 350°F (175°C). Grease a 9×13 inch pan. I use butter most times just for the smell, but spray is faster if the kids are getting antsy.
- Mix up the cake layer: in a big bowl, dump in cake mix, eggs, oil, and water. Combine just until it looks mostly smooth—lumps are fine, trust me.
- Pour the cake batter into your pan and spread it so it almost reaches the edges. No need for rulers, just eyeball it.
- In another bowl, beat together cream cheese and melted butter until creamy, then add powdered sugar and beat again. This is where I usually sneak a taste—just watch the sugar clouds.
- Drop spoonfuls of the cream cheese mix on top of the batter. Doesn’t have to be even. (It honestly looks like somebody dropped clouds all over the batter—don’t panic.)
- Blob the peanut butter in between the cream cheese dollops. I kinda swirl them together with a butterknife. Or a fork. Whatever’s in reach.
- Scatter chocolate chips and chopped Reese’s cups everywhere. More = better, I think, except maybe on very humid days (they get sticky, but hey, who cares?)
- Bake 40–45 minutes, until things are set but there’s still a bit of wobble in the middle. Don’t overthink it. A toothpick shoved in near the edge should come out cake-y. Centers will be gooey. Let it cool—I never wait long enough, and then complain about hot chunks falling apart. Still tastes awesome though.
Some Semi-Useful Notes (Mistakes Were Made)
- If your cream cheese swirl looks “off” right after baking, just hide it with more Reese’s on top once it cools. Nobody’s ever complained.
- Forgot to soften cream cheese? I microwave it for 10 seconds at a time—sometimes it half-melts but it’s fine, just whisk extra.
- I think this actually tastes better the next day. Or maybe that’s just my sweet tooth talking.
Variations I’ve Actually Tried (And One I’d Avoid)
- I swapped the chocolate cake mix for yellow once—didn’t hate it, but it’s not as dramatic. Devil’s Food just hits different, know what I mean?
- Crunchy peanut butter + caramel chips in place of some chocolate chips: fun for a change, though my son called it “too much stuff.” Maybe he’s right.
- Tried using white chocolate chips once—looked cool, tasted a little too sweet for me, but you might love it!
- Once I tried a gluten-free cake mix and it… didn’t really hold together. On second thought, stick to regular or use your favorite tested GF brand (my friend swears by King Arthur).
Equipment Corner (Workarounds Welcome!)
- 9×13 baking pan (I once used two 8×8 pans and made “personal earthquakes”—totally works, just needs less baking time)
- Hand mixer or stand mixer, but a whisk and a little elbow grease are fine—I’ve done it on holiday once without real tools
- Measuring cups/spoons, but I admit sometimes I just eyeball the chips and the Reese’s cups
How To Store (If There’s Any Left…)
Cover the pan with foil or pop the whole thing into a big airtight container. Fridge is best if it’s hot out; counter is fine otherwise. In my house, it never lasts more than a day, so sometimes I just leave it out—haven’t had issues. If, miraculously, you have leftovers after 48 hours, I’d refrigerate them. This site here (The Kitchn) gives more details about keeping cake, though most don’t even get that far.
How We Serve (And Why My Mom’s Way Wins)
This is basically a fork-in-pan kind of cake. But, when I’m feeling civilised, I cut big squares and serve warm with vanilla ice cream or even just a drizzle of heavy cream overtop. My mom insists it’s best with a cup of strong coffee, and honestly, she’s probably right (as moms usually are). Recipe I found years back at Sally’s Baking Addiction inspired my own twists, by the way.
Pitfalls I’ve Tumbled Into (Aka Pro-ish Tips)
- Don’t skip the greasing—the crust will stick like nobody’s business. I learned that the, erm, sticky way.
- I once tried to rush the cooling stage—had a gobbly mess. Actually, I find letting it cool at least 30 minutes helps the bits set. Still tastes great if you cave in early, but it’ll look like a chocolate landslide.
- If you’re melting butter, watch it like a hawk—burnt butter made my cream cheese swirl taste weird (nutty’s fine, burnt is not).
Wait—Can You Answer…?
- Can I use a homemade cake mix? Oh, absolutely! Just use your go-to and skip the boxed stuff. (I’m not judging either way.)
- What’s the best peanut butter? Depends. I usually use Jif, but any brand will work, really. I tried super-natural once and it separated a bit, but a good stir fixed it.
- Can I freeze it? You probably could, but the texture gets a little odd after. I’d eat it fresh if possible. If not, wrap tight and freeze for up to a month. Just don’t expect bakery shelf life, you know?
- Allergies? Yeah, if you’re avoiding peanut butter, this isn’t the cake! Maybe swap for cookie butter or something else, though I haven’t tried it yet. On second thought, maybe just make… cookies?
- What if I don’t have enough Reese’s? Add more chocolate chips or chop up any chocolate candy you have around. Pretty sure M&Ms would be bonkers, in a good way.
- What’s the messiest part? Cutting it too soon! Trust me—I’ve had it collapse like a mudslide more than once.
So that’s my trusty, messy, always-a-hit Reese’s Peanut Butter Earthquake Cake. And, if you give it a whirl (or just eat the batter, not that I’m recommending it), tell me how your version goes! Cake’s for sharing, in every sense.
Ingredients
- 1 box chocolate cake mix (15.25 oz), plus ingredients to prepare
- 8 oz cream cheese, softened
- 1/2 cup unsalted butter, melted
- 2 cups powdered sugar
- 1/2 cup creamy peanut butter
- 1 cup mini chocolate chips
- 1 cup chopped Reese’s Peanut Butter Cups
- 1/2 cup milk
Instructions
-
1Preheat oven to 350°F (175°C). Grease a 9×13-inch baking dish.
-
2Prepare the chocolate cake mix according to package instructions. Pour the batter into the prepared baking dish.
-
3In a medium bowl, beat together the cream cheese, melted butter, powdered sugar, peanut butter, and milk until smooth and creamy.
-
4Spoon large dollops of the peanut butter mixture over the cake batter, then swirl gently with a knife.
-
5Sprinkle the mini chocolate chips and chopped Reese’s Peanut Butter Cups evenly over the top.
-
6Bake for 38-42 minutes or until the cake is set and a toothpick inserted into the center comes out with some moist crumbs. Let cool before serving.
Approximate Information for One Serving
Nutrition Disclaimers
Number of total servings shown is approximate. Actual number of servings will depend on your preferred portion sizes.
Nutritional values shown are general guidelines and reflect information for 1 serving using the ingredients listed, not including any optional ingredients. Actual macros may vary slightly depending on specific brands and types of ingredients used.
To determine the weight of one serving, prepare the recipe as instructed. Weigh the finished recipe, then divide the weight of the finished recipe (not including the weight of the container the food is in) by the desired number of servings. Result will be the weight of one serving.
Did you make this recipe?
Please consider Pinning it!!

