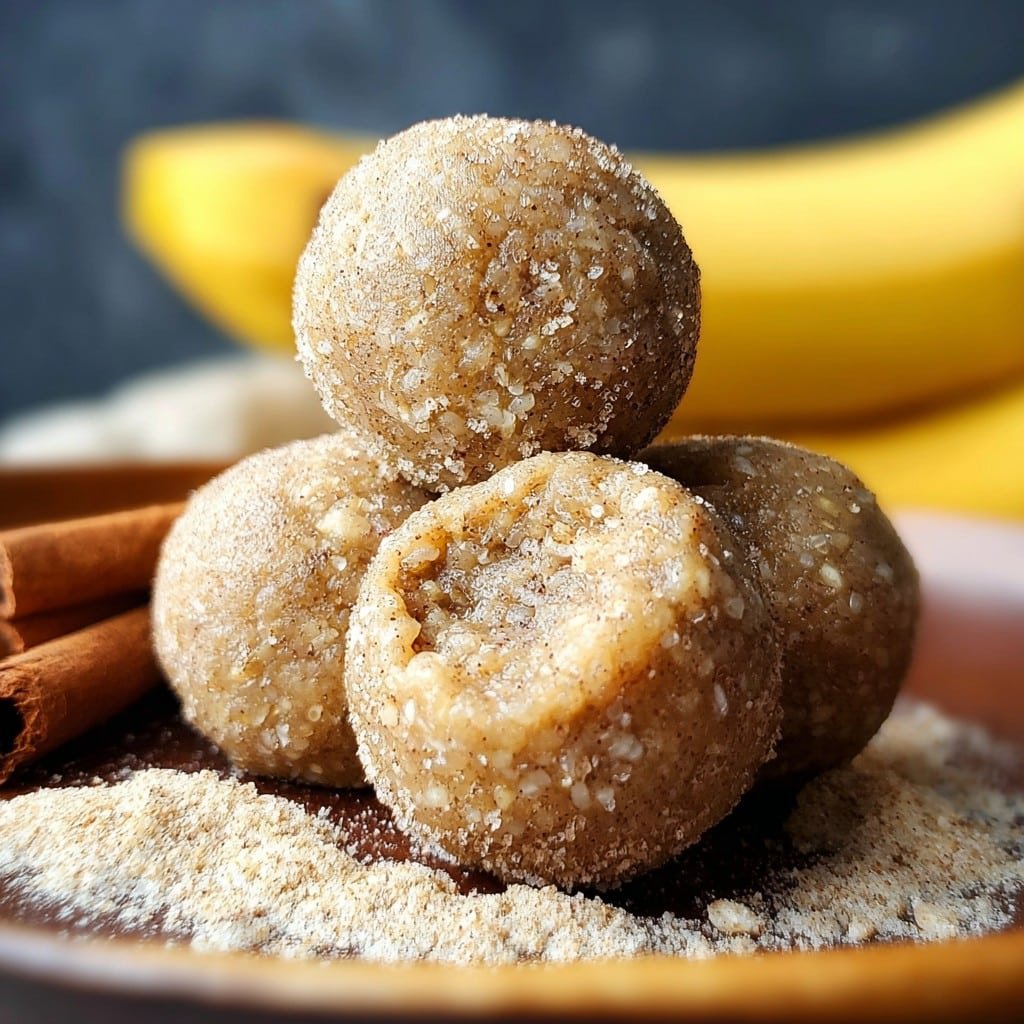
So, These No-Bake Banana Cinnamon Energy Bites Saved My Breakfast…Again
Let me tell you (with slight embarrassment), I first made these banana cinnamon energy bites about two years ago when I accidentally bought way too many bananas. We’re talking that classic supermarket slip up, where you think, “I’ll totally eat all this fruit!” and then two weeks later, half of it is turning brown and giving you the side eye. Anyway, these came to the rescue, and, honestly? Now I actually buy extra bananas on purpose. Funny how life does a U-turn, right?
I once tried to bring a batch of these to a family camping trip, and my brother-in-law polished off half of them before we even got to the site. Can’t say I’m mad though. (He still owes me a round of campfire s’mores as payback.)
Why I Keep Coming Back to These Little Balls of Joy
I make these bites when my mornings are trying to sprint before I’ve even had coffee (which is, nearly always). My family just loves them because, well, they’re bite-sized, they’re not messy (except when a certain small person insists on mashing them between their hands), and they’re sweet but not too sweet—plus, not gonna lie, they’re great road trip snacks. If you, like me, have ever stared at a pile of near-zombie bananas and thought, “now what?”—these are the answer. I used to overthink energy bites, but I’ve finally accepted they’re forgiving. Even if you throw things in out of order (which I do, more than I’d like to admit), it all comes out edible in the end. Plus, there’s no oven to clean afterward, so that’s a big win in my book!
What You’ll Need (But Seriously, Don’t Stress About Perfection)
- 1 big ripe banana (or 2 smaller ones – sometimes I use the brownest ones, and it’s fine, really)
- 1 cup rolled oats (I’ve swapped with quick oats in a pinch—my grandma swore by Quaker but honestly, store brand is fine too)
- 2/3 cup unsweetened shredded coconut (or, skip it and add extra oats—I do when I’m low on coconut)
- 1/3 cup nut butter (runny peanut butter is my go-to, but almond, cashew, sunflower seed; all work, no shame in preferring smooth to crunchy!)
- 2 tbsp honey or maple syrup (if your banana is super ripe, you could maybe use a touch less)
- 1 tsp cinnamon (generous, if you’re like me and love extra warmth)
- 1/4 cup mini chocolate chips (optional, but I never skip them—life’s too short, right?)
- Pinch of salt (sometimes I forget, but it does perk things up)
- (Optional) 1 tbsp chia seeds or flaxseed (I tried chia once and it added a nice crunch—totally not a must though)
How I Throw These Together (It’s Actually Pretty Fun)
- First, grab a mixing bowl and toss the peeled banana in there. Mash it up with a fork until it looks like baby food—don’t worry if it’s a bit lumpy, that’s normal.
- Add the nut butter, honey (or maple syrup), and cinnamon. Give it all a good mix. This is usually where I sneak a taste—just checking for “quality assurance”, you know?
- Pour in your oats, coconut, chocolate chips, and anything else you’re using (like chia). Stir it by hand or with a spoon; it will get a bit sticky, but that’s part of the fun—I tried using my stand mixer once and, to be honest, it made more mess than it saved. Just use your hands (wash them first, obviously!).
- If it looks too wet, just toss in an extra handful of oats. Too dry? A spoon more nut butter. It’s super forgiving.
- Once everything’s combined, pop the bowl in the fridge for 20-30 minutes (if you have the patience for it). This helps make the mixture less sticky. Some days I skip this because, well, hangry kids.
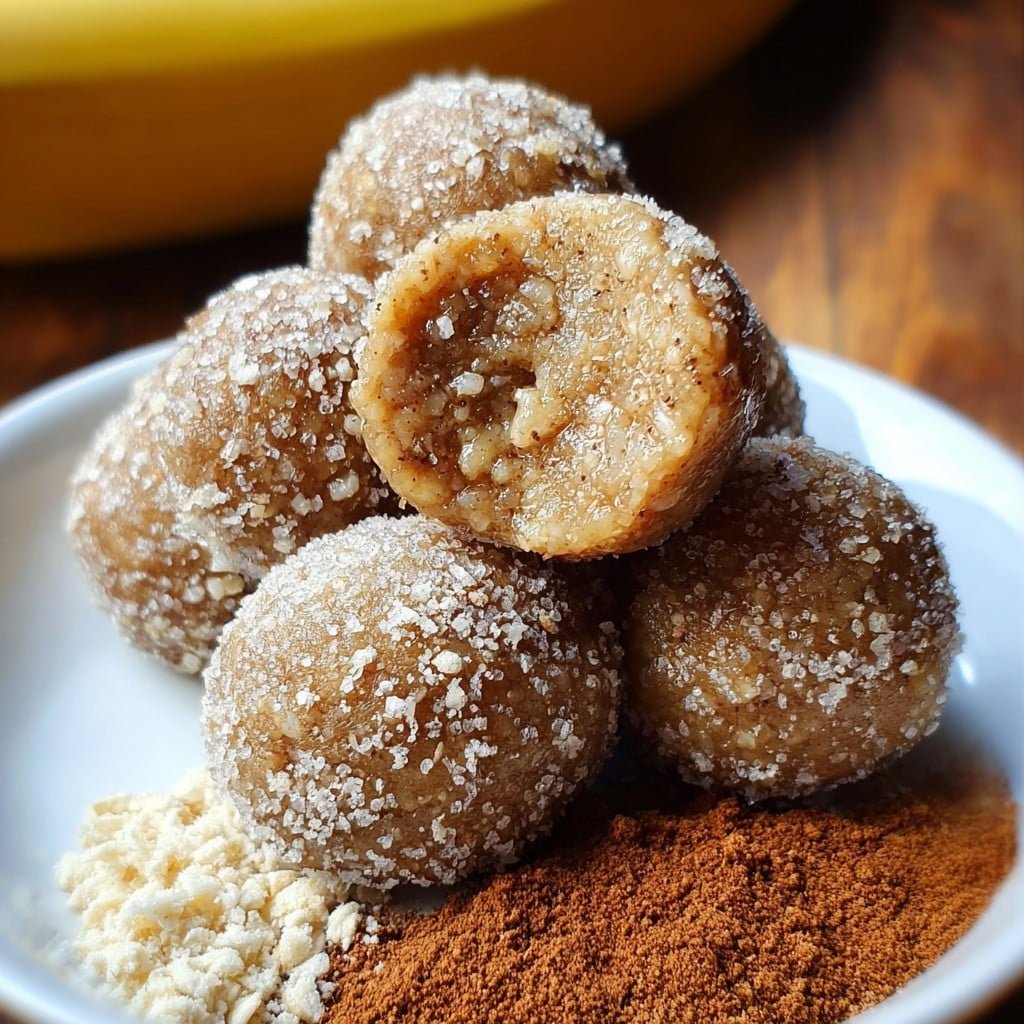
- Scoop out chunks (about a tablespoon each) and roll them into balls. Or sorta lumpy blobs, no need for precision. If they stick too much, wet your palms barely—trust me on that one.
- Eat right away or store them for later, if they make it that long. Voila!
Notes from My Kitchen Chaos
- Once I tried mashing the banana with an immersion blender—ended up cleaning banana goo off my ceiling. Fork works best, hands down.
- The bites firm up more after a few hours in the fridge. Patience wasn’t my friend at first, but it’s worth the wait. (Though my kids usually sneak a few anyway…)
- If you want to make these gluten-free, just use certified GF oats. Easy.
- I genuinely think these taste better the next day. Don’t ask me why.
How I’ve Changed Things Up—And That One Time It Flopped
I once swapped in mashed sweet potato instead of banana (no bananas in sight!). It… sorta worked, just a bit odd with the cinnamon. I’ve done dried cranberries instead of chocolate chips—that was pretty decent. Adding espresso powder made them way too adult, though; the kids made faces. If you want a more classic energy bite, just stick with oats and nut butter; sometimes simple wins.
What You Need—Or What I Improvise With
- Big bowl
- Fork (way underrated, never trust a fancy gadget for mashing bananas)
- Mixing spoon (or just use your hands, they’re built-in tools!)
- If you fancy, a small cookie scoop—but even a regular spoon does the trick
If you don’t have a scoop, just pinch off bits by hand. More fun anyway (and fewer dishes!).
Keeping ‘Em Fresh (Though They Vanish Fast)
Stash the bites in an airtight container in the fridge—they’ll last up to five days (maybe a week but, I dunno, mine never last that long… usually gone by the next morning!). You can also freeze them; I just defrost a couple at a time. If you bring them in your lunch, toss in an ice pack so they don’t get smooshy.
How I Like to Serve These (And That One Silly Family Habit)
Okay, picture this: Sunday mornings, coffee in hand, energy bites on a mismatched plate (I don’t own matching anything), and everyone sort of nabbing them as they pass the kitchen. Or, if I’m feeling extra, I roll them in extra coconut or cinnamon and dust off the old tiered cake stand. You could even crumble them into Greek yogurt for a quick breakfast parfait—kind of fancy. Saw that trick somewhere, tried it, it was a win.
Stuff I Learned the Hard Way
- I tried rushing the fridge step once—big mistake. The bites stuck to everything and fell apart, so yeah, chill ’em if you can.
- Once I measured the honey over the bowl and way over-poured. Drizzle it in separately to avoid a syrupy mess.
- Actually, I find it works better if you don’t over-handle the dough; keeps things from getting greasy.
FAQ – Real Questions I’ve Actually Been Asked
- Do I have to use coconut? (from my cousin, who claims she’s allergic)
- Nope! Just chuck in more oats or even finely chopped nuts instead. It will still taste great.
- Can you freeze these energy bites?
- Yup, totally. I just put them in a baggie or container (sometimes with wax paper in between) and freeze for up to a month. You don’t even have to thaw them fully—they’re kinda good cold.
- Can I use overripe bananas?
- I always do! As long as they’re not actually fermented. That happened once—let’s never speak of it again.
- What’s the best nut butter?
- Whichever you like. Honestly, sometimes I use whatever’s cheapest at the shop, but the creamy ones mix easier. Once tried a crunchy almond butter, it was…challenging; still edible though!
- Are these actually healthy?
- Probably, yeah. They’ve got fruit, whole grains, and nuts. But I still wouldn’t eat ‘em for every meal. (Learned that lesson when my son tried.)
Okay, I’ll stop now. But if you try these, let me know how you tweak them! Feel free to grab more healthy snack ideas from here—I steal inspiration from them all the time. Enjoy, and may your bananas always be just the right side of brown.
Ingredients
- 1 medium ripe banana, mashed
- 1 1/2 cups rolled oats
- 1/2 cup almond butter (or peanut butter)
- 1/4 cup honey or maple syrup
- 1/2 teaspoon ground cinnamon
- 1/4 cup mini chocolate chips or cacao nibs
- 1 teaspoon vanilla extract
- Pinch of salt
Instructions
-
1In a large bowl, mash the banana until smooth.
-
2Add almond butter, honey, vanilla extract, and salt to the bowl; mix until well combined.
-
3Stir in rolled oats, ground cinnamon, and mini chocolate chips until the mixture comes together.
-
4Refrigerate the mixture for 15 minutes to firm up, making it easier to handle.
-
5Scoop out tablespoon-sized portions and roll into balls using your hands.
-
6Store energy bites in an airtight container in the refrigerator for up to 1 week.
Approximate Information for One Serving
Nutrition Disclaimers
Number of total servings shown is approximate. Actual number of servings will depend on your preferred portion sizes.
Nutritional values shown are general guidelines and reflect information for 1 serving using the ingredients listed, not including any optional ingredients. Actual macros may vary slightly depending on specific brands and types of ingredients used.
To determine the weight of one serving, prepare the recipe as instructed. Weigh the finished recipe, then divide the weight of the finished recipe (not including the weight of the container the food is in) by the desired number of servings. Result will be the weight of one serving.
Did you make this recipe?
Please consider Pinning it!!

