If You Like Silly Pizza, Just Wait Till You See This
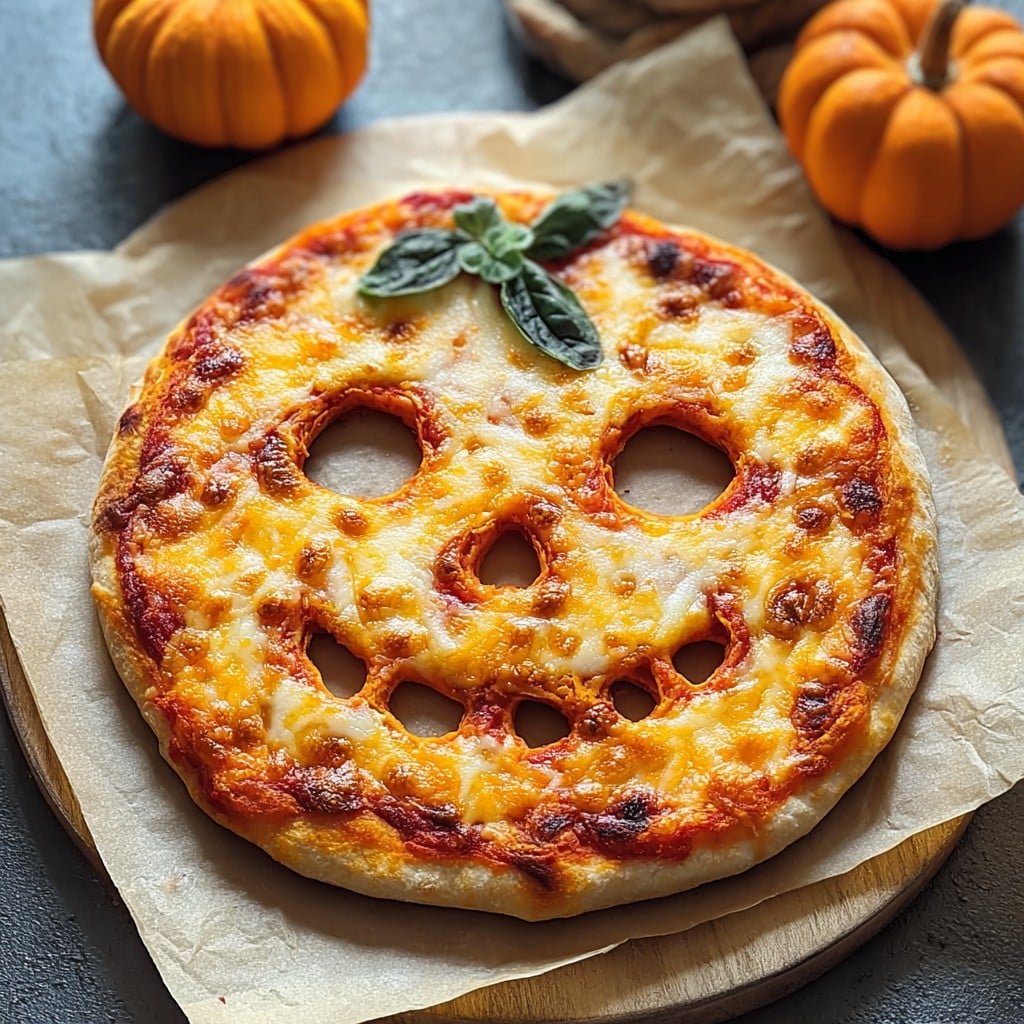
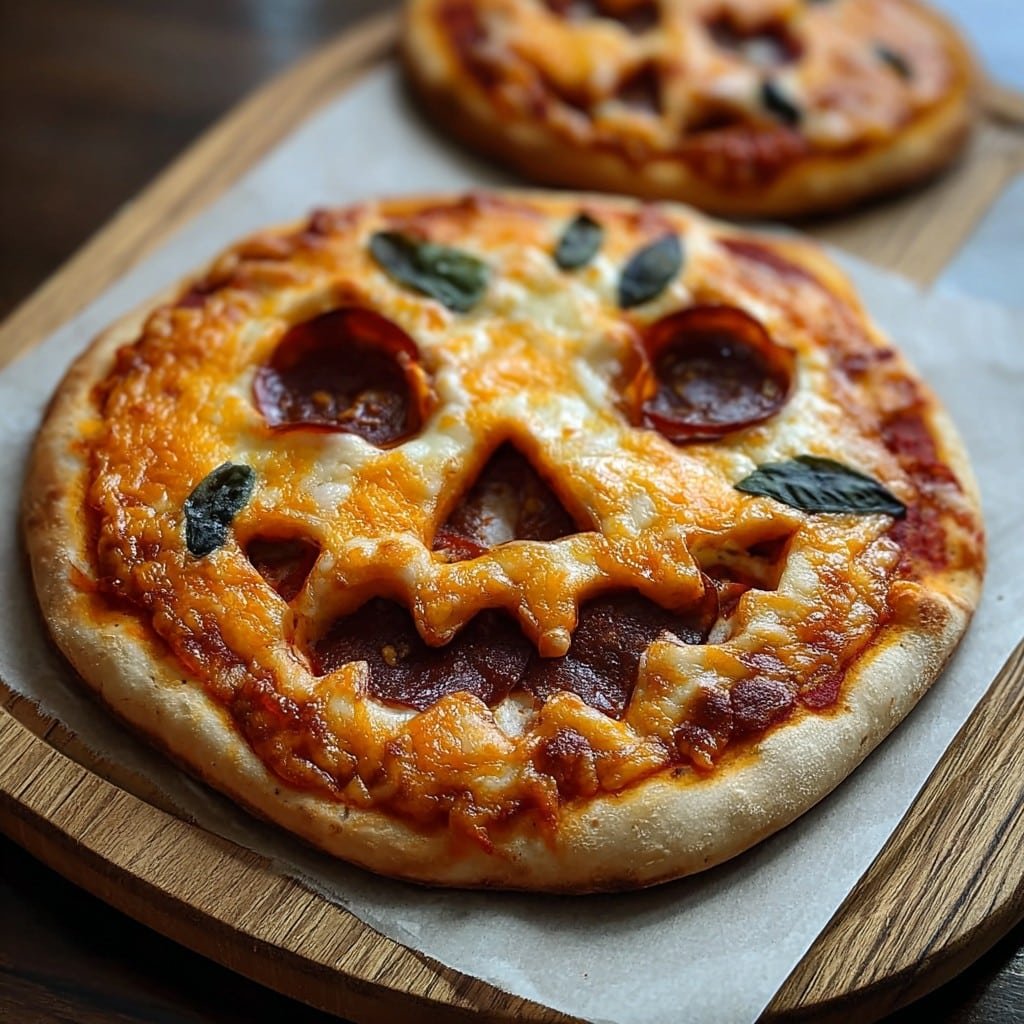
Oh friend, you have not truly lived until you’ve cut into a pizza staring right back at you! I remember the first time I baked a Jack-O’-Lantern pizza—my kids nearly fell off their chairs laughing at the crooked olive smile (I, uh, still can’t slice a pepperoni straight to save my life). Halloween at our house is all about messy hands and someone inevitably licking the sauce spoon when my back is turned—so, honestly, this pizza is just perfect for the chaos.
There was that time my neighbor peeked in while I was decorating the face and asked, “Is that… supposed to be a pumpkin or did it just get startled?” She wasn’t wrong, but I think that’s half the fun.
Why This Recipe’s a Crowd-Pleaser (In My House, Anyway)
I make this cheesy Jack-O’-Lantern pizza every October (and sometimes in March when we need a giggle). My family goes bananas for it because—well, it’s pizza shaped like a pumpkin. What’s not to love? Honestly though, the best bit is everyone pitches in with the toppings, so it’s kind of a free-for-all.
Last year, the edible teeth were a disaster and, yes, I may have burned the crust once while I was busy fishing the cat out of the pantry—but hey, that’s life. Speaking of life: even if you’re not really into Halloween stuff, this pizza is just fun to make (and to eat, obviously; never met a pizza I didn’t like).
Here’s What You’ll Need (Substitutions Welcome!)
- 1 ball of pizza dough—store-bought is totally fine (honestly, the premade refrigerated stuff from Trader Joe’s gets me through most weeks, but homemade is great if you’ve got the time!)
- 1/2 to 2/3 cup pizza sauce (sometimes I just blitz up jarred marinara with garlic when I’m feeling lazy… tastes good either way)
- 1 1/2 cups shredded mozzarella cheese (sometimes I mix in cheddar for a sharper flavor—my grandmother always insisted on the orange cheese for Halloween vibes, but I say do what you feel)
- A handful of pepperoni slices for the mouth (or you could use salami—one time I forgot both and just used extra olives; honestly, no complaints)
- Black olives for eyes and maybe nose (unless you hate olives; try bell peppers, or if you’re fancy, roasted mushrooms)
- Bell pepper strips for eyebrows, teeth, or pumpkin ‘stem’ (green’s classic, but yellow’s fun too)
- Olive oil, a splash for brushing
- Optional: Cornmeal for dusting your pan—it gives that crispy crunch, but not essential
How I Throw This Together (With a Few Bumps)
- Preheat your oven to the hottest it’ll go—like, 475°F is good, or 250°C if you’re across the pond. (If your oven takes a year to heat up like mine, start early.)
- Dust a cookie sheet or pizza stone with some cornmeal (or just flour if you’re out; I’ve baked straight on parchment in a pinch). Take the dough and shape it into a rough pumpkin—or, at least, something vaguely round with a little stem at the top. Don’t get hung up on making it perfect. The wobblier, the better, I think.
- Brush the shaped dough lightly with olive oil (cheating helps it crisp and keeps it from going pale).
- Spread pizza sauce—but not right to the edges, unless you love burnt sauce on your pan (I speak from experience here). Actually, sometimes I spoon on a bit extra in the center because melty cheese likes to migrate.
- Sprinkle on your cheese—a good thick layer, or lighter if you’re, you know, being virtuous. Sometimes I sneak a bit of the cheese when the kids aren’t looking. Sorry, not sorry!
- Here comes the fun bit: Arrange your toppings into a spooky or silly face. Olives for eyes, pepperoni for a goofy grin, and bell pepper for crazy eyebrows or pointy teeth. Don’t stress if it looks more like a squashed turnip—it’s Halloween, not a beauty contest.
- Slide the pizza into the oven and bake about 12–15 minutes, until bubbling and golden (but watch the stem—it browns fast, and more than once I’ve served up a pizza with a mysteriously missing top…)
- Let it cool for a minute, mostly so you don’t burn the roof of your mouth (I never wait long enough). Slice and serve; laughter optional, but very likely.
Random Notes Form the Trenches
- If your dough keeps springing back, let it sit covered for 15 minutes. It chills out.
- Run outta olives? Capers work if you mash them into little blobs for eyes. It’s weird, but it does the trick.
- I once put the cheese on before the sauce by mistake—don’t recommend.
- If your family likes things hot, try throwing on a few jalapeño slices; mine promptly pick them off, but that’s just my lot.
How I’ve Messed With This Recipe (and Failed, Once)
- I tried making a mini version with English muffins for a school party—turned out great, except the faces melted into some sort of abstract art. But kids loved them anyway!
- Swapping in BBQ sauce for classic pizza sauce? Thumbs up from my brother, but I still prefer the regular stuff.
- One year, I used slices of apple instead of bell pepper (don’t do this, unless you like hot fruit on pizza… which is totally fine, I guess, but not for me)
About the Equipment (You Don’t Need Fancy Gear)
All you really need is a large baking sheet or a pizza pan; if you’ve got a pizza stone, awesome! If all you have is a flimsy old tray (like me for years), just bake it a bit longer and maybe dust with more flour so it doesn’t stick. A sharp knife for slicing faces helps—or kitchen scissors if your knife’s seen better days.
Oh, and if you don’t have a rolling pin, an empty wine bottle gets the job done—trust me.
Storing Leftovers (A Rare Event!)
Pop any slices you manage not to eat right away into an airtight container in the fridge. They’ll stay tasty for up to two days, I guess. Honestly, in my house it never lasts more than a day because someone always nabs a midnight snack. If you want to reheat, a quick stint in the oven crisps things up; microwave works too, but the crust goes a bit soft.
Serving Suggestions from My Kitchen
I usually serve this with little bowls of carrot sticks and ranch—or, when I’m feeling wild, with chips and a store-bought guac (I know, for pizza, but trust me, kids love it). On Halloween, we like to eat in costumes and have a vote for the scariest pizza face. Loser cleans up—unless it’s me. Then there’s no vote.
Real Talk: Pro Tips from My List of Mistakes
- I once tried to rush the rising step by putting the dough near the oven vent—it sort of half-cooked and turned tough. Give your dough time to relax.
- For a richer pumpkin color, go heavy on cheddar mixed in with the mozz—otherwise, it looks a bit pale and sad, honestly.
- If you layer on too many toppings, the pumpkin shape disappears and it just looks like a regular (but delicious) pizza. Been there, done that.
Questions I Actually Get About This Recipe
- Can I use gluten-free dough?
- Yup! You just have to be a bit more gentle when shaping it. Actually, I find it works better if you pat it into shape rather than stretching (otherwise it tears, and there’s nothing more annoying than a collapsing pumpkin).
- Do I really have to pre-bake the crust?
- I don’t, but if you like an extra-crispy bottom, 4 minutes in the oven before adding sauce makes a difference. Or not; depends how fussy you’re feeling.
- What’s the best sauce to use?
- Oh, honestly? Whatever you’ve got handy. I sometimes use this quick blender sauce from Sally’s Baking Addiction. Or, on second thought, you could try the classic Serious Eats pizza sauce recipe—both are great.
- Can I freeze leftovers?
- Sure, but the crust softens a bit. I think this tastes better the next day (fridge-cold or reheated in a skillet), but freezing works if you wrap it tight.
- How can I make the pumpkin shape look better?
- Ah, practice (and lower your standards, honestly). Sometimes I trace a pumpkin shape on parchment as a guide. But, it’s all in the spirit of fun, right?
This Pizza’s For Life, Not Just for Halloween
So, next time October hits (or if you’re just desperately seeking silly comfort food), give this Jack-O’-Lantern pizza a whirl. Is it perfect? Nope. But it’s got charm (and cheese) by the bucketload. Plus, if you mess it up, just call it “spooky” and everyone’ll go along with it.
Ingredients
- 1 ball refrigerated pizza dough (about 12 oz)
- 1 cup pizza sauce
- 2 cups shredded mozzarella cheese
- 20 slices pepperoni
- 1/4 cup sliced black olives
- 1/4 cup chopped orange bell pepper
- 1/4 cup chopped green bell pepper
- 1 tablespoon olive oil
- 1 tablespoon cornmeal (for dusting)
Instructions
-
1Preheat the oven to 450°F (232°C). Sprinkle a baking sheet or pizza stone with cornmeal.
-
2Roll out the pizza dough into a large pumpkin shape, about 12 inches wide. Transfer the dough to the prepared baking sheet.
-
3Brush the dough lightly with olive oil. Spread pizza sauce evenly over the dough, leaving a small border for the crust.
-
4Sprinkle mozzarella cheese over the sauce. Use pepperoni slices, black olives, and bell peppers to create a Jack-O’-Lantern face.
-
5Bake the pizza for 15-18 minutes, or until the cheese is melted and bubbly and the crust is golden brown.
-
6Remove from oven, let cool slightly, then slice and serve warm.
Approximate Information for One Serving
Nutrition Disclaimers
Number of total servings shown is approximate. Actual number of servings will depend on your preferred portion sizes.
Nutritional values shown are general guidelines and reflect information for 1 serving using the ingredients listed, not including any optional ingredients. Actual macros may vary slightly depending on specific brands and types of ingredients used.
To determine the weight of one serving, prepare the recipe as instructed. Weigh the finished recipe, then divide the weight of the finished recipe (not including the weight of the container the food is in) by the desired number of servings. Result will be the weight of one serving.
Did you make this recipe?
Please consider Pinning it!!

