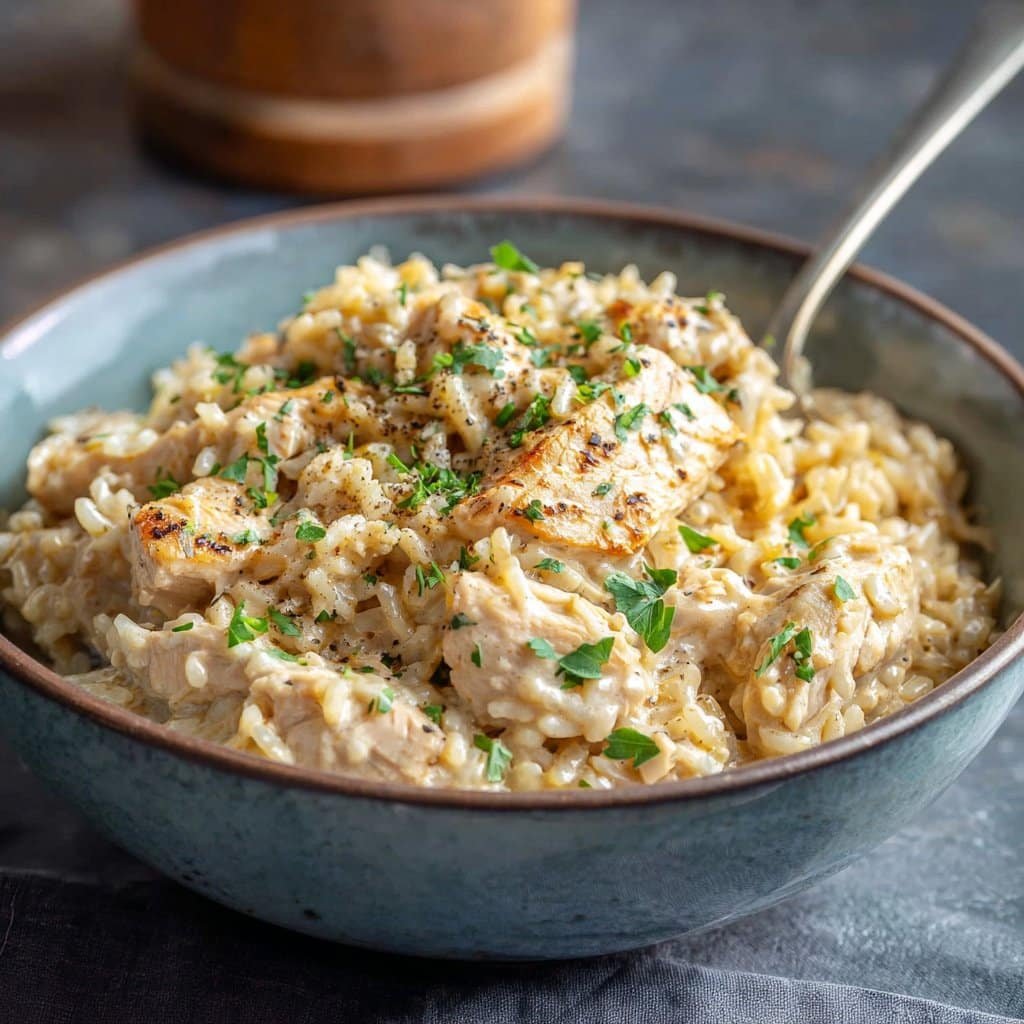
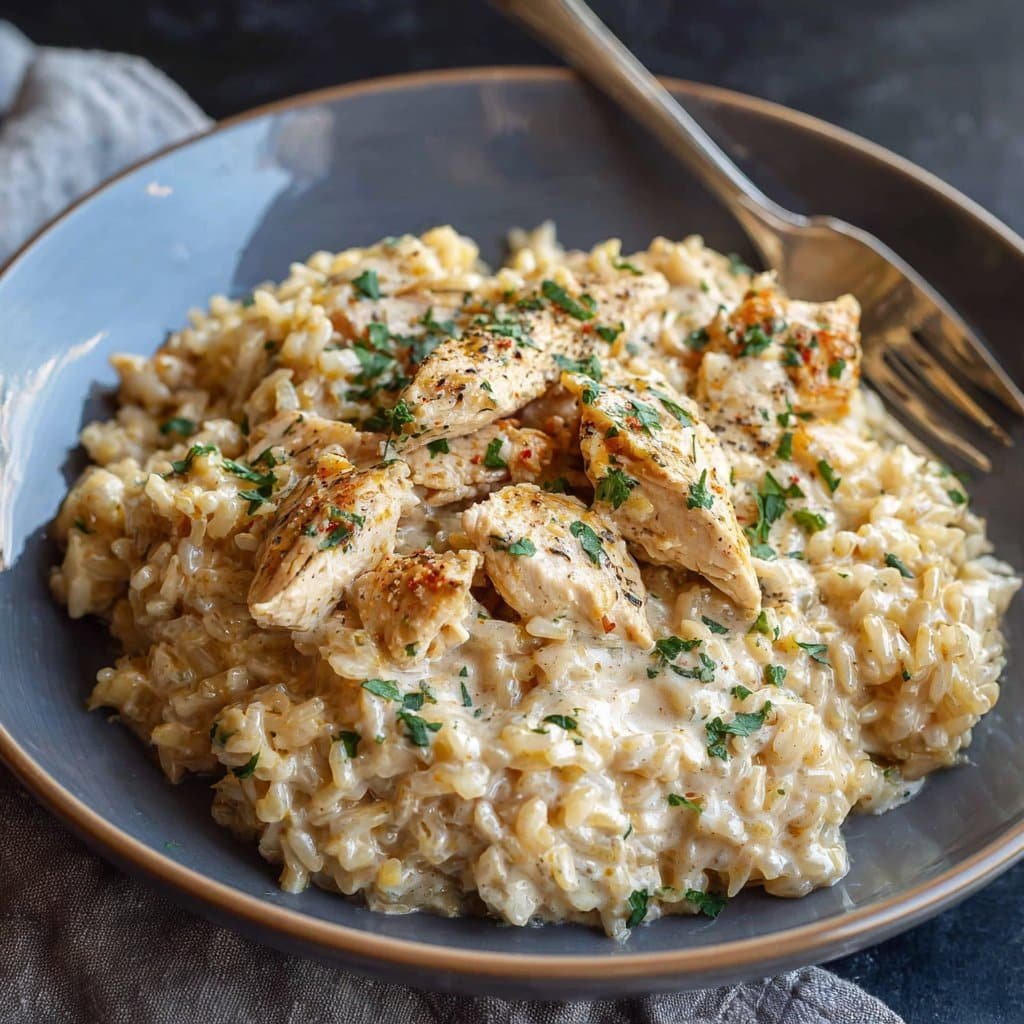
About This Cozy Dinner (and the Day My Instant Pot Saved My Sanity)
You know those nights where just the thought of chopping onions makes you want to order takeaway? That’s exactly how I first stumbled into making this Instant Pot creamy chicken and rice. It was a muddy Tuesday, school shoes were lost (again), and the only thing left in the fridge was, well, not a lot—just some chicken, rice, and the remains of a sad little bag of peas. Somehow, thanks to my trusty old Instant Pot (which, by the way, was a wedding present I didn’t think I’d use!), dinner not only came together, but the whole family polished it off. Even my husband, who sometimes says rice is “boring.”
Honestly, it’s now my go-to when I want something warm, filling, and just—easy. Plus at the risk of sounding dramatic, there’s really nothing like the way creamy rice sticks to the spoon. Or maybe that’s just me rambling, but you’ll see what I mean.
Why You’ll Love This Recipe (or, Why I Keep Making It Week After Week)
- I make this when I realize it’s already 6pm and everyone’s asking when dinner is (argh).
- My kids go absolutely bonkers for this—okay, maybe not bonkers, but they clean their plates, which in my book is a miracle.
- It’s all in one pot, so washing up is minimal. That’s a game changer, right?
- Sneaky secret: you can mix in whatever veg you have lying about. I’ve even tossed in broccoli once and nobody noticed but me!
- I used to have issues with dry chicken until I figured out the right sauté time and now, no more cardboard chicken. Actually, sometimes I use thighs (so forgiving) if I’m not bothered to measure cook times perfectly.
What Goes In (And What I Swap In When I’m Out of Things)
- 2 large chicken breasts (or chicken thighs—my Aunt Sheila swears by thighs, and honestly, she’s not wrong)
- 1 cup white rice (I sometimes use basmati if I’m feeling fancy, but regular old long grain works)
- 2 cups chicken broth (or vegetable broth if that’s what’s lingering in the pantry—cube or liquid, either is fine)
- 1 cup frozen peas (or mixed veg, or just a handful of whatever’s there—I once tossed in corn. Turned out lovely)
- 1 small onion, chopped (I’ve used red, yellow, even shallots when I’m feeling cheffy)
- 2-3 cloves garlic, minced (I usually use the jar stuff, no judgment)
- 1/2 cup cream or half and half (milk works in a pinch, though it won’t be as rich—still does the job)
- 1 tbsp olive oil or butter (sometimes both because, you know, flavour)
- 1 tsp dried thyme or Italian herbs (fresh if you’ve got it, but I hardly ever do)
- Salt and pepper, to taste
How To Make It (With Real Talk Sprinkled In)
- Sauté the Base: Set the Instant Pot to sauté, glug in the oil or butter, add onions. Cook until they smell amazing—about 2-3 minutes. Chuck in the garlic last so it doesn’t burn. If you get distracted at this point and they get a bit brown, that’s okay. Brown means flavour (or so every TV chef says).
- Add Chicken: Toss in the chicken pieces, season with salt, pepper, those herbs. I usually let them sear on each side for about 2 minutes. This is where I sneak a taste of the onions. Don’t worry if the chicken’s not fully cooked—it’ll finish later, promise.
- Throw Everything Else In: Add rice, broth, and frozen peas. Give it a stir—don’t stress about it being perfect. Lid on, seal it. Set to Manual High Pressure for 7 minutes. Yes, only 7! (Feels like cheating, right?)
- Pressure Release: Let it release naturally for 5ish minutes, then carefully open the valve. Steam facial. My glasses fog up every single time.
- Now the Creaminess: Stir in your cream or milk. Don’t panic if it looks a bit gloopy—it comes together as you stir. I often give it an extra minute or two on keep warm. If it seems too thick, splash in more broth or milk. Too thin? Let it sit for a minute; rice is thirsty.
- Check seasoning. Taste! Maybe add a squeeze of lemon if you want to brighten things up, but that’s optional.
Notes From My Kitchen Experiments
- Once, I tried using brown rice, but it was a mess—I had to cook it longer and the chicken went tough. Stick with white rice unless you’re feeling adventurous.
- If it sticks a bit to the bottom, soak the pot with water right after dinner. Saves a whole load of scrubbing.
- This actually, and almost bizarrely, tastes even better the next day. Something about the rice soaking up the sauce—no idea why, but it does!
Random Variations I’ve Actually Made
- Mushrooms: Sauté them with onions for bonus umami—it’s earthy, in a good way.
- Lemon zest or a splash of white wine: Fancy! (But not necessary.)
- I once tried adding broccoli florets, but they turned kind of mushy. Maybe add them AFTER pressure cooking.
Equipment I Use (But If You Don’t Have It, That’s Okay)
- Instant Pot (obviously)—mine’s a 6qt, but an older model. If you’ve only got a stovetop pressure cooker, you can probably wing it—just watch the rice.
- Wooden spoon for stirring—I have one with a weird bend, but it just feels right. Don’t stress if you only have a spatula.
- A Chef’s knife, although a regular dinner knife once sufficed when everything else was in the dishwasher. Not ideal, but it happened.
How to Store Leftovers (Let’s Be Real, There Aren’t Many)
Spoon any leftovers (if you’re lucky enough to have some) into an airtight container. Chuck it in the fridge for up to 3 days. You can freeze it, but rice gets a bit dodgy after defrosting. Warm through in the microwave with an extra splash of broth or milk.
Though honestly, in my house it never lasts past lunch the next day—sometimes, it’s breakfast. Don’t judge.
How I Like to Serve It (And a Family Quirk)
I love a big ladle of this over a slice of white bread for a proper stick-to-your-ribs dinner. Sometimes, if I’m feeling extra, I add a sprinkle of cheese or a swirl of hot sauce. Oh, and on Sundays, my youngest insists on eating it with tortilla chips. No idea why, but it works.
Pro Tips (I Learned These the Hard Way!)
- Don’t skip the natural pressure release! Once, I tried to do a quick release and rice sputtered everywhere, which was a mess to clean and also scalding—lesson learned.
- If it looks weird after adding the cream, just keep stirring. I panicked the first time, but it always smooths out.
- Use enough liquid or you’ll get the dreaded “burn” warning. If that happens, just open it up, add more broth, scrape the bottom, and try again.
FAQs (Or, What My Friends Have Actually Asked Me)
- Do I have to use chicken breasts?
Not really! Thighs are juicier (and way more forgiving). Plus, they’re usually cheaper. - Can I make this dairy free?
Sure, just skip the cream and use oat milk or unsweetened almond milk. It’s not quite as creamy, but it still works—I promise. - Can I double the recipe?
Yep! Just make sure you don’t fill past your Instant Pot’s max—trust me, I’ve tried, and it’s a pain to clean up the overflow. - What if I don’t have an Instant Pot?
You could try a stovetop in a Dutch oven. Sauté, add everything in, cover, simmer on low until rice is cooked. Not quite as hands-off, but doable. Also, here’s a solid rice cooking guide if you’re new to stovetop. - How do I keep the rice from getting mushy?
Don’t overcook it, and don’t skip the short natural release. I did once, and it turned to baby food, basically. Unless that’s what you’re after, then go ahead! - Where’d you get your Instant Pot?
I got mine on sale at Target, but I’ve seen good deals at Amazon too. (Not sponsored, I just like a bargain!)
P.S. If you want to get fancy, I sometimes browse these chicken ideas and daydream, but in real life, this one’s got my heart. Hope you enjoy it as much as we do. Let me know if yours came out a bit wonky the first time—it happens. Now, off to find that elusive left shoe again…
Ingredients
- 2 boneless, skinless chicken breasts, cut into 1-inch pieces
- 1 cup long-grain white rice, rinsed
- 2 cups low-sodium chicken broth
- 1 cup frozen mixed vegetables (peas, carrots, corn)
- 1/2 cup heavy cream
- 1/2 cup shredded cheddar cheese
- 1 small onion, diced
- 2 cloves garlic, minced
- 1 tablespoon olive oil
- 1 teaspoon salt
- 1/2 teaspoon black pepper
- 1/2 teaspoon dried thyme
Instructions
-
1Set the Instant Pot to sauté mode. Add olive oil, then cook the diced onion and minced garlic for 2 minutes until softened.
-
2Add the chicken pieces, salt, pepper, and dried thyme. Sauté for 2-3 minutes until chicken is lightly browned.
-
3Stir in the rinsed rice, chicken broth, and frozen mixed vegetables. Mix well to combine.
-
4Secure the lid and set the Instant Pot to pressure cook on high for 8 minutes. Allow a natural pressure release for 5 minutes, then carefully do a quick release.
-
5Open the lid and stir in the heavy cream and shredded cheddar cheese until creamy and well combined. Serve warm.
Approximate Information for One Serving
Nutrition Disclaimers
Number of total servings shown is approximate. Actual number of servings will depend on your preferred portion sizes.
Nutritional values shown are general guidelines and reflect information for 1 serving using the ingredients listed, not including any optional ingredients. Actual macros may vary slightly depending on specific brands and types of ingredients used.
To determine the weight of one serving, prepare the recipe as instructed. Weigh the finished recipe, then divide the weight of the finished recipe (not including the weight of the container the food is in) by the desired number of servings. Result will be the weight of one serving.
Did you make this recipe?
Please consider Pinning it!!

