Baked Mac and Cheese—Like a Warm Hug in a Dish
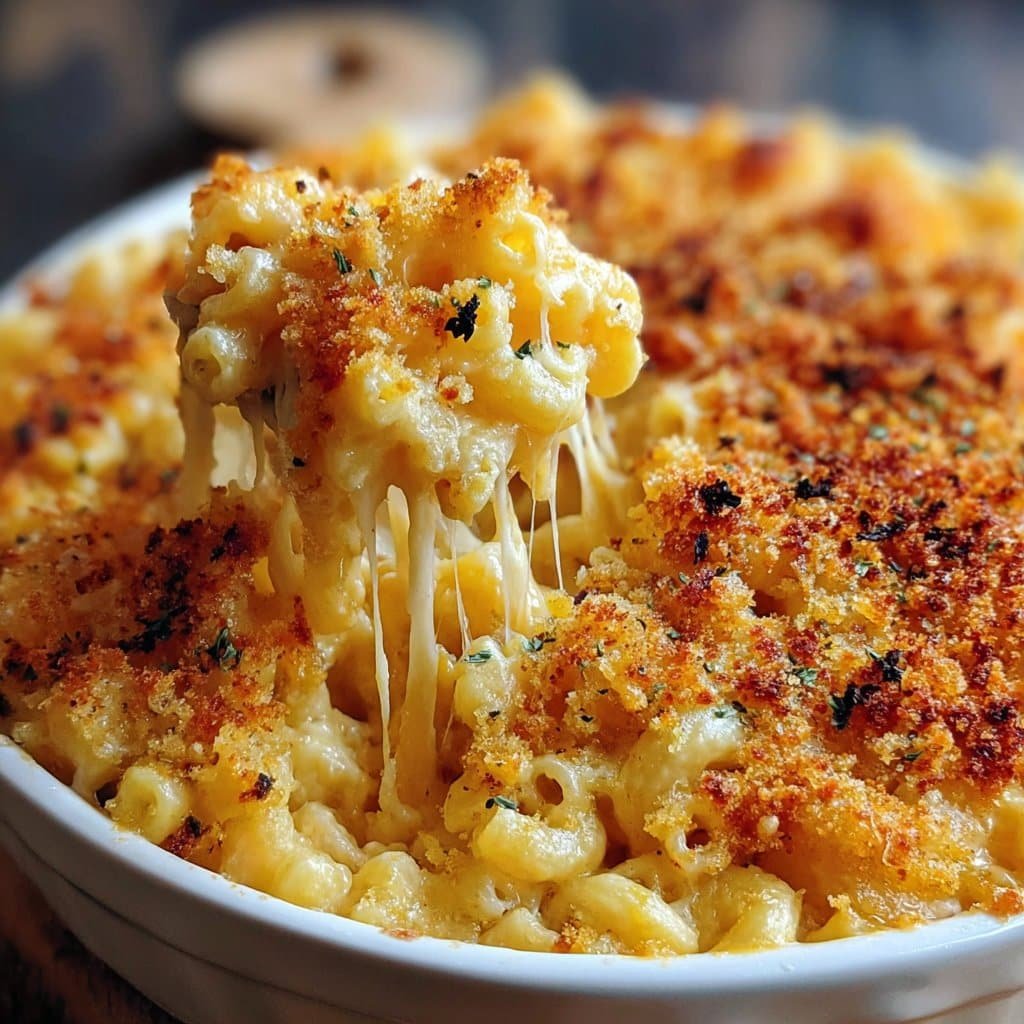
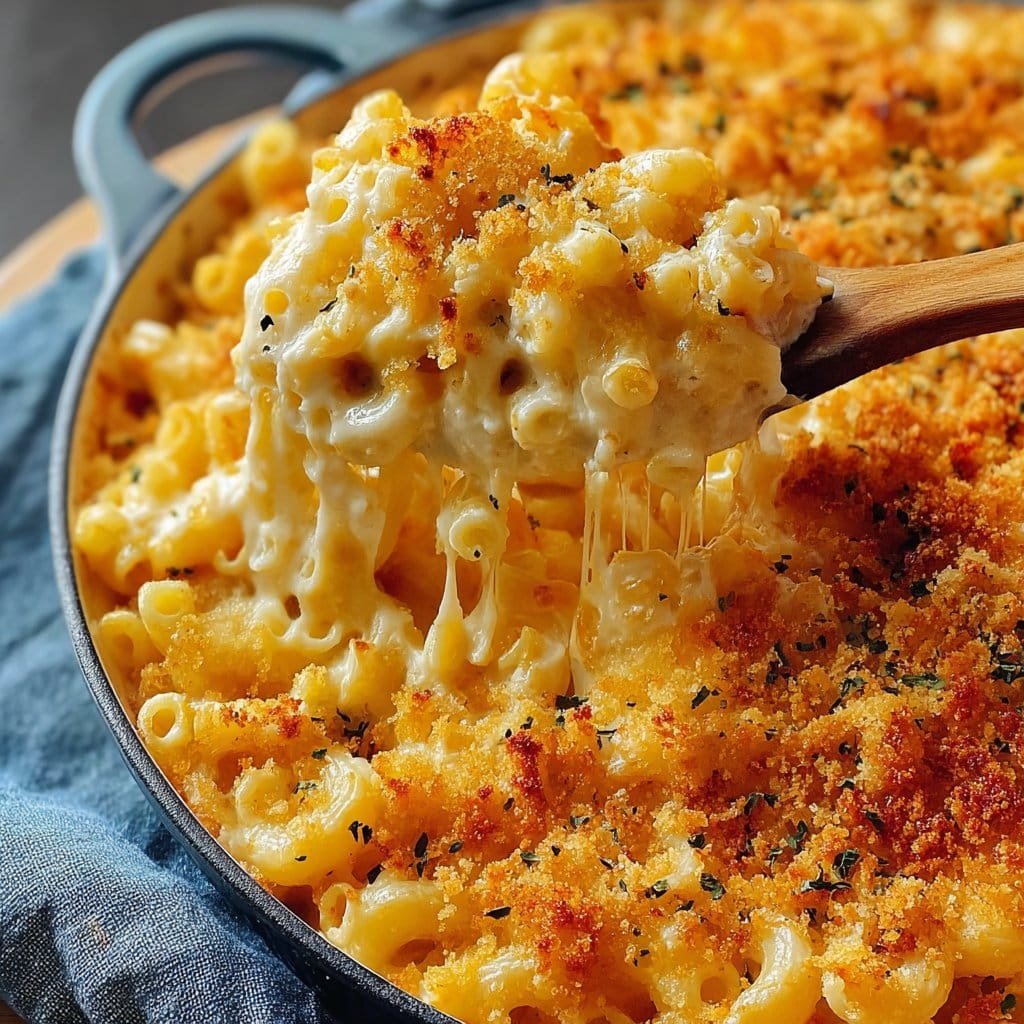
When I think of my happiest, laziest evenings, honestly, it almost always involves a bubbling tray of baked mac and cheese. My cousin Lily and I once tried to out-eat each other’s portions (hint: there were zero real winners), and every time I make this, I get a whiff of that kitchen memory. The cheese pulls, the crunchy top—sometimes I say I’ll share, but let’s be real, it’s practically mine till it’s gone.
Why You’ll Love This (Or At Least Not Regret Trying It)
I make this when the weather is crummy, or when my week’s gone sideways and all I want is carbs. My family goes genuinely bananas for this—especially my nephew, who’s still in the “won’t eat anything green” phase. (I’ve hidden spinach in here before… didn’t go unnoticed. Will not repeat.) The real kicker? You can make it as fancy or as basic as you want. Seriously, if you can boil water and stir with enthusiasm, you’re halfway there—no need for cheffy airs.
Ingredient Lineup (And My Lazy Day Substitutions)
- 2 cups elbow macaroni (or spiral pasta, penne—I grab whatever form is closest to hand)
- 2 1/2 cups shredded sharp cheddar (my grandma swears by Cabot, but I once used cheddar slices and it worked, oddly enough)
- 1/2 cup grated Parmesan cheese (sometimes I skip it; don’t judge)
- 1/4 cup butter (or margarine, though it’s less buttery—go figure)
- 1/4 cup all-purpose flour
- 2 1/2 cups milk (whole is best, but I’ve used half-n-half plus water once when the fridge was weirdly empty)
- 1/2 teaspoon salt (or just a couple shakes if you’re not into measuring)
- 1/4 teaspoon black pepper
- 1/4 teaspoon paprika (completely optional, but adds a nice color. Sometimes I go wild with smoked paprika!)
- 1 cup panko or regular breadcrumbs for topping (or crush up chips if you’re in a pinch. I’m not proud but I’ve done it)
Let’s Get Cooking: Step-by-Step (With Room for Chaos)
- Preheat your oven to 350°F (that’s 175°C for anyone else outside the States). Butter a 9×13 inch baking dish. Or just spray it—I’ve done both; it’s always fine.
- Boil your pasta: Heavily salt the water (like, sea water level). Cook the macaroni until just barely tender. If it’s slightly undercooked, all the better—it’ll finish in the oven. I always set a timer because I’ve spaced out far too many times and ended up with mush. (Not my finest moments.)
- Make the roux (fancy word for paste): In a medium saucepan, melt the butter over medium heat. Whisk in the flour, and keep stirring until it’s bubbly and just starting to look golden. It kind of smells like toast here!
- Whisk in the milk: Slowly, so you don’t get those weird lumps. If you do, well, you can usually beat them out by sassing the sauce with your whisk. Bring to a gentle simmer and cook until it thickens up, about 4–5 minutes. This is where I usually sneak a tiny spoonful because I can’t resist—watch your tongue, it’s hot!
- Add your cheeses: Remove the pan from the heat and dump in the cheddar and most of the Parmesan (save a bit for the top if you want). Stir until gloriously melty and smooth. Add salt, pepper, paprika.
- Combine it all: Toss the drained pasta into the cheese sauce. Stir until every single piece is covered. Don’t stress if it looks a little runny—it’ll thicken as it bakes.
- Into the baking dish: Pour everything in, spread evenly, then sprinkle over breadcrumbs, extra cheese, and maybe even a shake more paprika.
- Bake uncovered for about 25–30 minutes. Top should be golden and maybe a bit crispy at the edges. Sometimes I broil it for 2-3 extra minutes if I want max crunch (just watch, it goes form perfect to charcoal so fast!).
- Let it sit for about 10 minutes—or as long as human patience allows. That cheese needs to set a little.
Notes (Lessons My Stomach Has Taught Me)
- Letting it cool a bit before serving means cleaner slices—but have I actually waited? Rarely.
- If you use pre-shredded cheese, the sauce is a bit less creamy. Not bad, just different. Sometimes I can’t be bothered to grate, so I do it anyway.
- I once had to use almond milk in a pinch. It was edible, but I prefer cow’s milk for creaminess.
Not-So-Classic Variations I’ve Tried (Some Winners, Some…Not)
- Bacon Bits: Stir in crispy bacon pieces before baking. This one’s a crowd-pleaser.
- Hot Sauce Swirl: A big spoonful in the cheese sauce if you’re wanting to spice things up.
- Veggie Mac: Steamed broccoli or even peas—I call it “healthy mac” though my nephew still spots them somehow.
- Once tried to make it with cottage cheese…I do not suggest it. Weird texture, not for me.
Gear You Need (And What to Do If You Don’t Have It)
- 9×13″ baking dish. I’ve used a big cast iron skillet when the dish is in the wash.
- Medium saucepan for the cheese sauce (if you only have a small one, make the sauce in batches—tedious but doable!)
- Colander (Or just tip the pasta over a lid and pray, which I have, more often than advisable)
How to Store It (If You Even Have Leftovers)
Store covered in the fridge for up to 3 days. It warms up in the microwave fine, but if you’re fancy, do it in the oven at 350°F for 15 mins with foil; it comes out less rubbery. Though honestly, in my house, it never lasts more than a day!
How I Like to Serve It (And So Might You)
I go for a big scoop, sometimes topped with a little extra grated cheese, or maybe some fresh chives if I’m feeling posh. Sometimes we serve it with baked beans (classic UK style) or a crisp green salad when we’re pretending to balance things out. My aunt always brings ketchup to the table for hers—no judgment.
Pro Tips—A.K.A. Learn from My Bloopers
- I once tried rushing the cheese sauce step; ended up with grainy bits. Go slow, it’s worth the wait, pinky swear.
- If you use too much flour, the sauce gets gluey. Two tablespoons is really enough!
- Actually, I find it works better if you layer some cheese between the pasta and topping. Double trouble in the best way.
Your Questions (Because People Really Ask Me These!)
- Can I use gluten-free pasta? Heck yes! Just don’t overcook or it’ll get mushy in the oven. Trust me, I learned that the hard way.
- Can I freeze it? Well, sort of… it’s possible, but I think it gets a bit dry after thawing. I’d rather make a small batch and finish it fresh, but see Sally’s tips for freezing if you’re determined.
- What’s the best cheese mix? I’m pretty basic and stick to sharp cheddar, but Monterey Jack or Gruyère are ace. See Serious Eats’ deep dive on mac and cheese science for wild combos.
- Can I skip baking? Sure, but you’ll miss that crispy top. Sometimes I just broil it quick if the oven’s already full of something else, like cookies—because hey, we multitask.
- Is it really better the next day? I tend to think so. The flavors hang out together overnight and the whole thing gets extra cozy.
Right, I could prattle on about mac and cheese all day, but the oven timer’s beeping and the cat’s meowing to try some (don’t worry, she’ll just look offended at the smell). Let me know how it goes—or if you found a magic ingredient I should try next time. Every kitchen has its surprises!
Ingredients
- 12 oz elbow macaroni
- 3 cups shredded sharp cheddar cheese
- 1 cup shredded mozzarella cheese
- 1/4 cup unsalted butter
- 1/4 cup all-purpose flour
- 3 cups whole milk
- 1/2 cup grated Parmesan cheese
- 1/2 teaspoon salt
- 1/2 teaspoon black pepper
- 1/2 teaspoon paprika (optional)
- 1 cup panko breadcrumbs
Instructions
-
1Preheat your oven to 350°F (175°C). Grease a 9×13-inch baking dish.
-
2Cook the elbow macaroni according to package instructions. Drain and set aside.
-
3In a large saucepan over medium heat, melt the butter. Whisk in the flour and cook for about 1 minute to form a roux.
-
4Gradually whisk in the milk until smooth. Bring to a simmer and cook for 3-5 minutes, stirring frequently, until slightly thickened.
-
5Add cheddar, mozzarella, and Parmesan cheeses to the sauce. Stir until cheeses are melted and sauce is smooth. Season with salt, pepper, and paprika.
-
6Combine cooked macaroni and cheese sauce, then pour into the prepared baking dish. Top with breadcrumbs and bake for 25-30 minutes, or until golden and bubbly.
Approximate Information for One Serving
Nutrition Disclaimers
Number of total servings shown is approximate. Actual number of servings will depend on your preferred portion sizes.
Nutritional values shown are general guidelines and reflect information for 1 serving using the ingredients listed, not including any optional ingredients. Actual macros may vary slightly depending on specific brands and types of ingredients used.
To determine the weight of one serving, prepare the recipe as instructed. Weigh the finished recipe, then divide the weight of the finished recipe (not including the weight of the container the food is in) by the desired number of servings. Result will be the weight of one serving.
Did you make this recipe?
Please consider Pinning it!!

