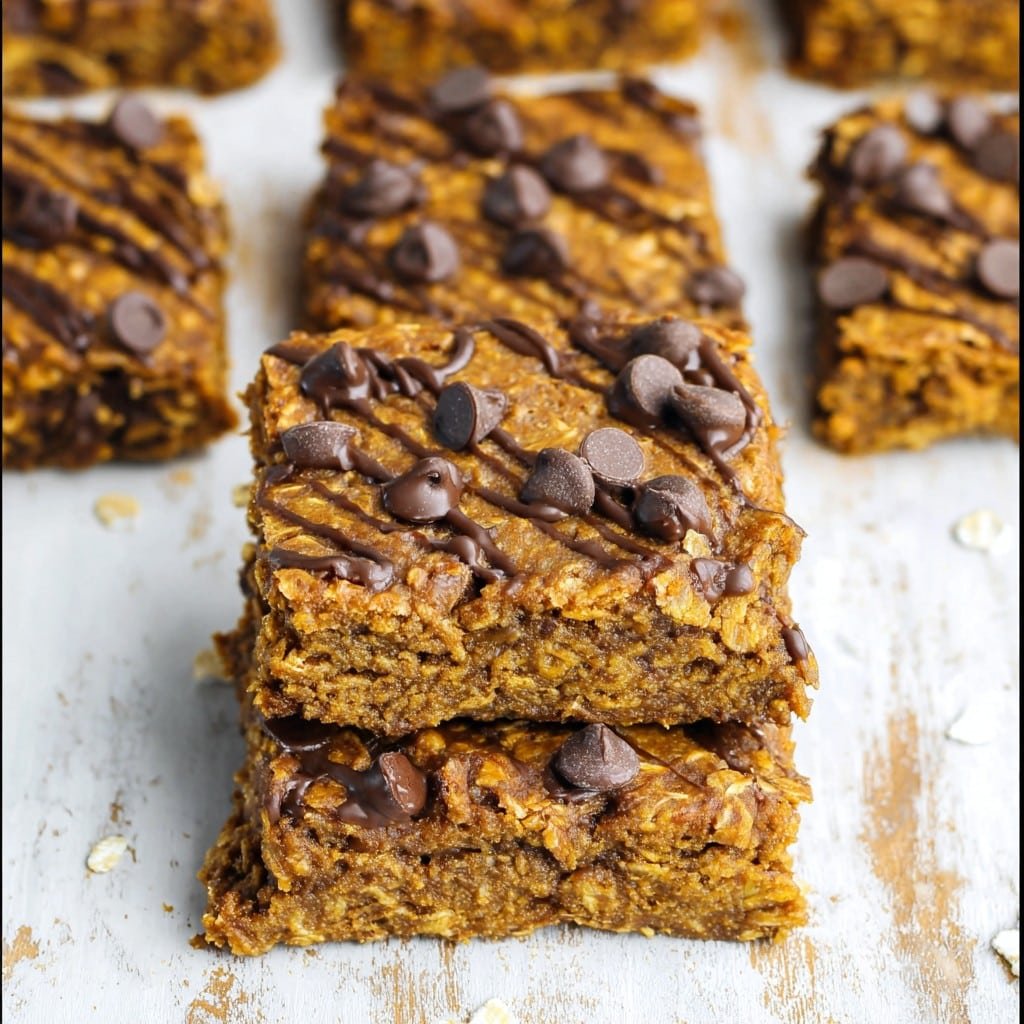
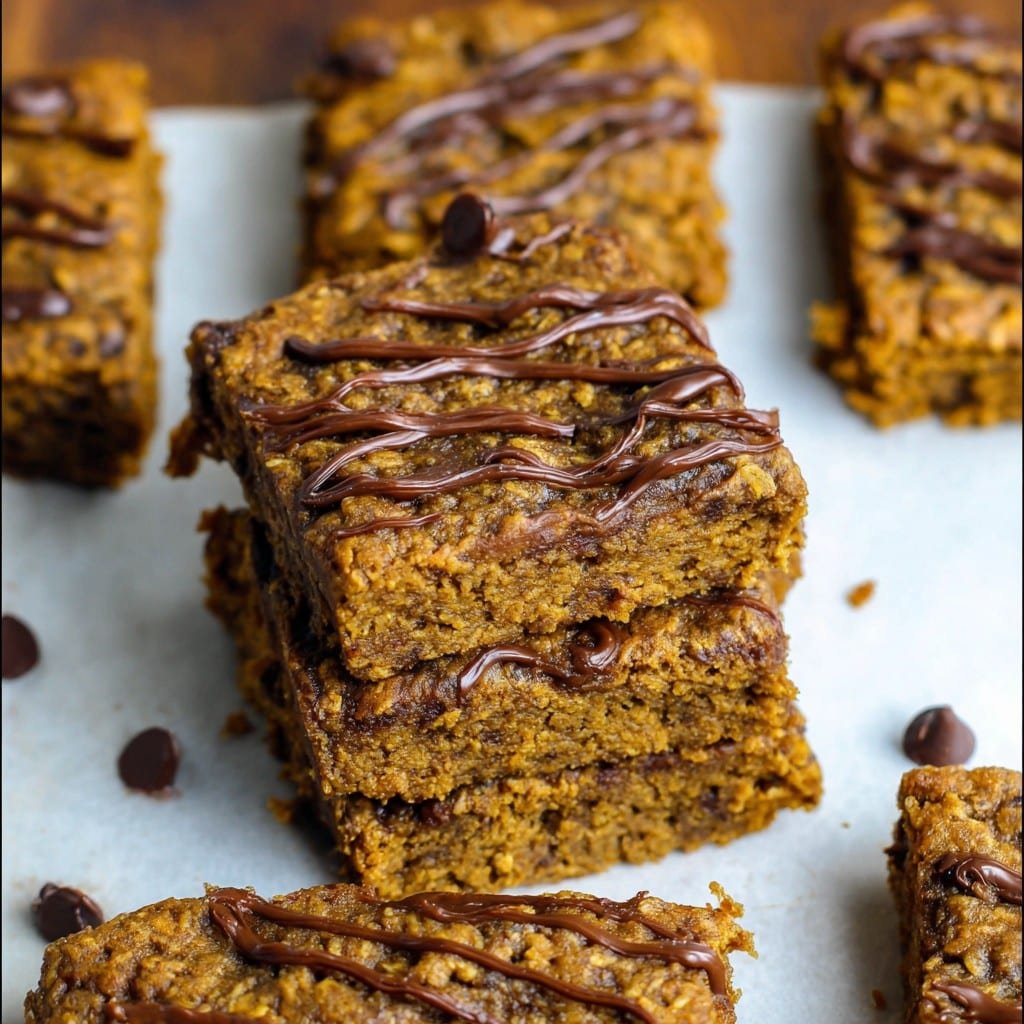
Healthy Pumpkin Oatmeal Bars
Let’s Talk Pumpkin Oatmeal Bars (and How I Fell for Them)
I still remember the first time I tried baking a batch of these pumpkin oatmeal bars—pure kitchen chaos. There were oats everywhere, I couldn’t find the right pan (turns out it was hiding behind my slow cooker, classic), and my dog tried to taste-test the pumpkin purée. But you know what? The bars turned out way better than expected, and just smelling them in the oven felt like autumn itself showed up in my kitchen for a hug. Now, every time the weather turns a bit chilly (or really, whenever I need a pick-me-up), I end up making a tray. Just don’t ask me how many times I’ve eaten half the pan before dinner time. Or do!
Why You’ll Love This Recipe (or at Least, Why I Do)
I make these whenever I’ve got an open can of pumpkin lurking in the fridge (which is, oddly, quite often). My family goes bonkers for them because they’re soft, just a bit chewy, and have enough spices to make your kitchen smell like a candle shop. Plus, they don’t make a huge fuss if I swap in chocolate chips (usually a hit), walnuts (not so much with the kids), or change up the nut butter just depending on what part of the pantry is accessible that day. There was a time I put raisins in instead of chocolate—still not sure if that was brave or just hungry. Also: they actually taste like pumpkin, not just cinnamon and nutmeg pretending to be pumpkin. Small win.
Stuff You’ll Need (But Keep It Loose)
- 2 cups rolled oats (Old-fashioned kind is my go-to, but quick oats in a pinch—no steel-cut though, I tried once and regretted it)
- 1 cup pure pumpkin purée (Sometimes I use the canned stuff, sometimes roast and mash my own, and honestly, canned is just easier most days)
- 1/2 cup nut butter (almond, peanut, or sunflower seed; my grandma always said Skippy only, but I’ll use anything cheap and cheerful)
- 1/4 cup maple syrup (Honey works too, agave in a jam—pun intended)
- 2 eggs (Or a couple flax eggs if you’re out—doesn’t set up quite as firm, but works okay)
- 1 tsp vanilla extract (The fancy stuff if I remember; otherwise, whatever’s in the cupboard)
- 1/2 tsp cinnamon, 1/4 tsp nutmeg, and a pinch of salt (Give or take. I toss in ginger if I have it.)
- 1/2 tsp baking powder
- 2/3 cup add-ins—chocolate chips, walnuts, pecans, or a handful of dried cranberries (sometimes I just pour whatever looks about right)
How I Throw It All Together (No Sweat)
- Preheat the oven to 350°F / 175°C. Grease an 8×8 inch pan or line with parchment if you’re feeling motivated (if not, a bit more clean-up really isn’t so bad).
- Grab a big bowl—bigger than you think, because oats have a way of jumping ship when you stir. Toss in the oats, baking powder, spices, and salt. Mix. I usually do this with a fork. Fancy whisks just make more dishes.
- In another bowl (don’t skip this one, or you’ll end up with sad little spice pockets), whisk together pumpkin purée, nut butter, eggs, maple syrup, and vanilla. Try not to eat this part with a spoon. But I won’t judge if you do.
- Pour the wet stuff into the dry. Now mix it up good; it’ll look a bit gloopy and that’s exactly right. Don’t be scared if it’s not perfectly smooth—oats do their thing in the oven.
- This is where I usually sneak a taste (it’s the eggs, I know, live a little). Then, stir in the chocolate chips (or whatever add-ins you like best… or, whatever’s not hidden behind something in the pantry).
- Spoon everything into your pan and smooth it out. It looks kind of homely before it bakes. Trust the process!
- Bake for about 25-28 minutes. Mine sometimes needs up to 30 if I went heavy handed with the pumpkin. You’ll know they’re done when the top feels set and a little toothpick (or skewer, or honestly even a chopstick) poked in the center comes out with just a crumb or two.
- Now the hard part: let ‘em cool at least 10–15 minutes. I know it’s torture. But (learn from my mistakes) cutting them too soon means crumb city. If you absolutely can’t wait, go for an edge piece with a fork. No judgment (I do it too).
Notes from My Kitchen (a.k.a. “Learned the Hard Way”)
- If your bars come out a bit dry, it’s probably too little pumpkin or too much baking time; try lowering your oven temp a smidge next time, or pull them out just a bit sooner (ovens are sneaky).
- Too gooey? Actually, I find it sets up better if you let it cool right in the pan. Patience is not my jam, but it does help.
- Don’t stress if you don’t have pure maple syrup. Brown sugar dissolved in hot water works too, in a pinch. I found this out when I once realized I’d used the last of my syrup on pancakes that morning. Classic me.
Things I’ve Tried: Variations and a Mishap or Two
- Swapping out all the nut butter for tahini—gives it a savory twist. Only do this if you like a strong flavor. My kids said it tasted “weird,” but honestly, I sort of liked it with tea.
- Doubling the spices if you want full autumn effect—absolutely banging. Though, the time I tripled them… let’s just say, one bite and you started sweating cinnamon.
- Vegan version: flax eggs plus vegan chocolate chips. Works, but not as fudgy. I kind of liked it the next day more (is that weird?). Oh, and tried coconut flour once—do not recommend. That one didn’t even fool my dog.
If You Don’t Have All the Equipment…
You’ll want an 8×8 baking pan, but last week I couldn’t find mine, so I stuck all the batter into a loaf pan and, you know what? It was fine. Just took about 10 minutes longer and the bars were chunkier. No mixer needed—just a wooden spoon is grand. If you don’t have parchment, a quick swipe of oil or butter is fine. Oh, and about that cooling rack all the food blogs rave about? Just let the pan chill on your stove top. It all works out in the end.
How to Store (If You even Need To)
Stick leftover bars in a sealed container at room temp for a day or two, or fridge for up to 5 (though honestly, in my house it never lasts more than a day!). If you do want to freeze them: wrap individually, and then just defrost (on the counter or zap for a few seconds). They’re still soft and yummy, though maybe a hair drier if you over-nuke ’em. Been there.
Serving These: My Not-Very-Fancy Traditions
I like a square with a little Greek yogurt on top for breakfast, or warmed up with a drizzle more maple (so what if it’s sticky?). My partner prefers his crumbled over vanilla ice cream, which I have to admit, is pretty genius. Oh—and for a totally British touch, I once packed them in a picnic and dunked a piece in my tea. No regrets. Goes well with coffee too. Check out Smitten Kitchen’s pumpkin bread or Cookie + Kate’s pumpkin muffins if you’re in the mood for more pumpkin things.
Pro Tips… Learned The “Fun” Way
- I once tried to cut the bars right out of the oven; learned my lesson. They totally fell apart.
- Don’t be too precious about mixing brands, or precise oat measurements. Actually, I find a little extra oat gives a better chew, but if that’s not your bag, go slightly under for a denser bar.
- Clean as you go, unless, like me, you prefer the “tiny mountain of dishes” approach. Just saying.
Some Real-Life Questions from My Friends
- Can you make this without eggs? Totally—flax eggs or chia eggs work. The bars will be a little less fluffy, but I’ve eaten worse.
- Can I skip the nut butter? You can, but they get kind of crumbly (in a not-great way). If allergies are the issue, sunflower seed butter isn’t bad. Or just try extra pumpkin, though it gets squidgy fast.
- Is this sweet enough for dessert? Maybe! They’re more snacky to me, but if you’re topping with ice cream or frosting, honestly, sky’s the limit. I like that they’re not crazy sweet.
- Can I add protein powder? You can—I slipped a scoop in once. Just reduce oats a touch unless you want doorstops (learned that the slow way).
- How do I stop mine from sticking? More parchment or a slick of coconut oil. If they do stick, honestly, just call it “rustic” and scoop out with a spoon.
So yeah, that’s my rambling love letter to healthy pumpkin oatmeal bars. They’re cozy, messy, unpredictable (like a Labrador, or a British summer), and make any day a little bit warmer. Go on, give ‘em a try, and let me know if your family is as shameless about eating the whole batch as mine. Or don’t—honestly, I get it.
Ingredients
- 2 cups old-fashioned rolled oats
- 1 cup canned pumpkin puree
- 1/3 cup pure maple syrup
- 1/4 cup unsweetened applesauce
- 2 large eggs
- 1 teaspoon vanilla extract
- 1 tablespoon pumpkin pie spice
- 1/2 teaspoon baking powder
- 1/4 teaspoon salt
Instructions
-
1Preheat the oven to 350°F (175°C). Line an 8×8-inch baking pan with parchment paper.
-
2In a large bowl, whisk together the pumpkin puree, maple syrup, applesauce, eggs, and vanilla extract until smooth.
-
3Add the rolled oats, pumpkin pie spice, baking powder, and salt. Mix until well combined.
-
4Pour the mixture into the prepared pan and spread evenly.
-
5Bake for 30 minutes, or until the bars are set and lightly golden. Let cool completely before cutting into bars.
Approximate Information for One Serving
Nutrition Disclaimers
Number of total servings shown is approximate. Actual number of servings will depend on your preferred portion sizes.
Nutritional values shown are general guidelines and reflect information for 1 serving using the ingredients listed, not including any optional ingredients. Actual macros may vary slightly depending on specific brands and types of ingredients used.
To determine the weight of one serving, prepare the recipe as instructed. Weigh the finished recipe, then divide the weight of the finished recipe (not including the weight of the container the food is in) by the desired number of servings. Result will be the weight of one serving.
Did you make this recipe?
Please consider Pinning it!!

