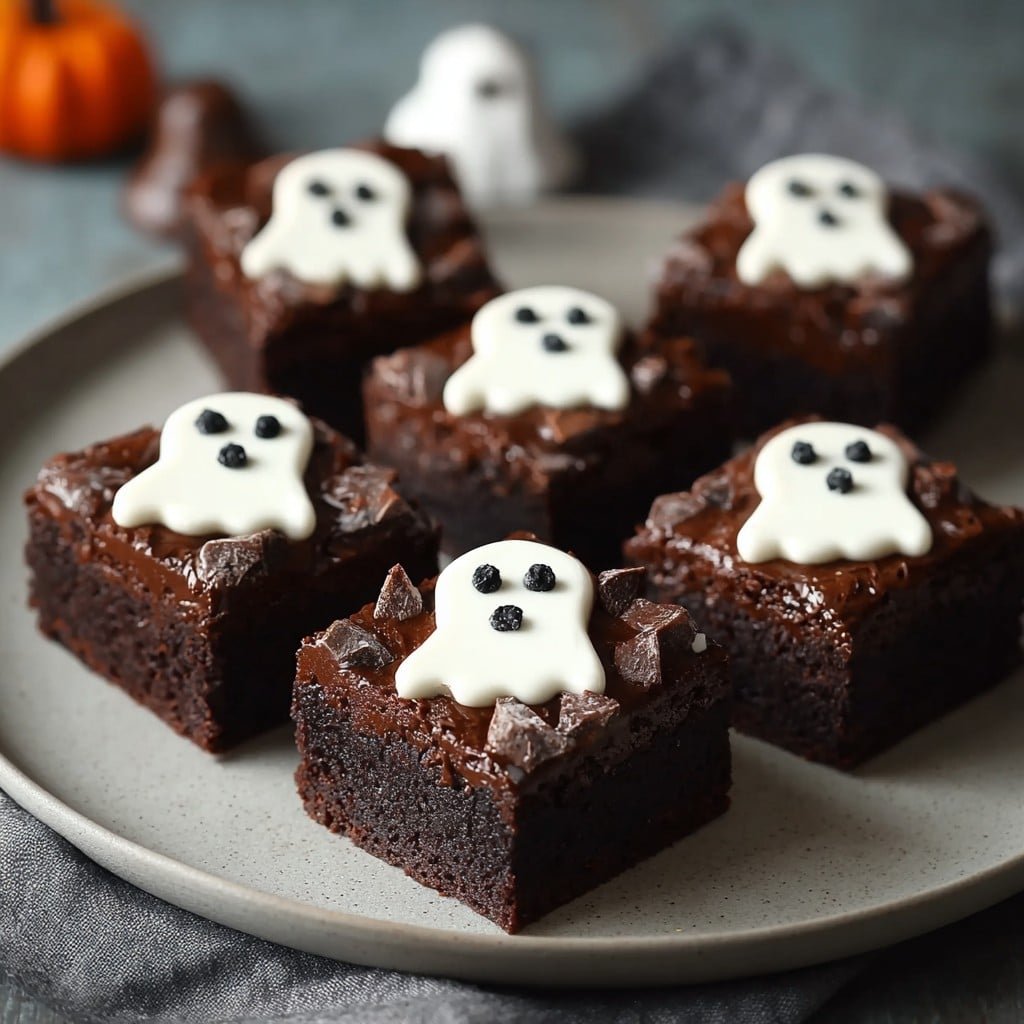
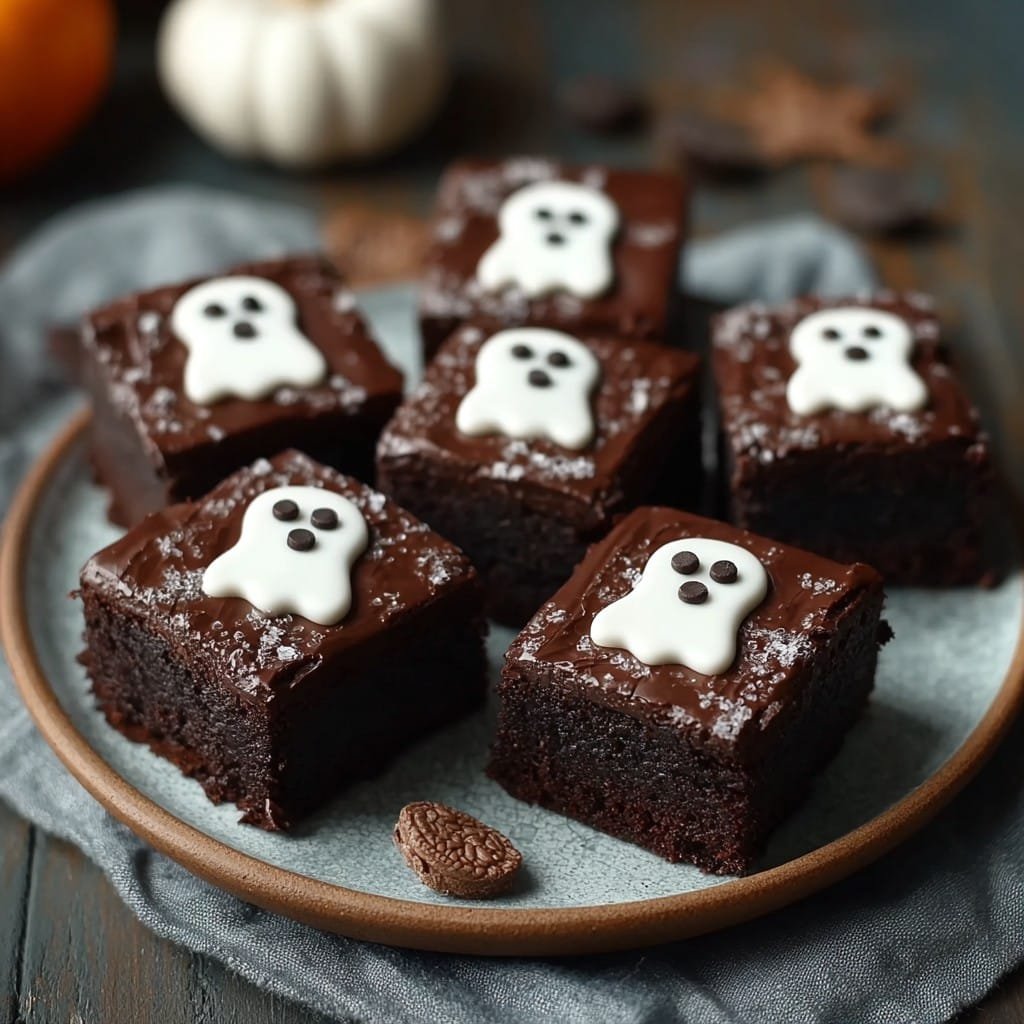
If you’d told me ten years ago I’d be piping chocolate ghosts onto brownies while my kids cackled and stole sprinkles, I’d have probably laughed. And yet, here we are: another October, another round of my slightly wobbly (but always delicious) Halloween Ghostly Ganache Brownies. My youngest once said they look more like melted snowmen than spirits, but I figure if a recipe makes everyone smile—mission accomplished. (Side note: one batch disappeared during a Scooby-Doo marathon, so they have been properly vetted by little ghouls and goblins.)
Why You’ll Love These (or at least, why I do)
- I make these when I need something impressive but not fussy—who really has time to carve fondant with tiny cutters?! Plus: chocolate.
- My family goes crazy for the extra bit of ganache (sometimes I double it, but then it’s chaos; my husband’ll spoon it straight from the bowl—it never makes it to the brownies).
- Also: if you’ve ever tried piping perfect ghosts and ended up with amorphous blobs, I’m right there with you. It’s part of the charm. Have you seen a real ghost? (Me neither.)
Stuff You’ll Need (Ingredients, mostly)
- 200g (about 1 cup) good dark chocolate – but honestly, any chocolate you love works. I’ve used Bournville, store-brand chips, even that mystery chocolate at the back of the pantry. You do you.
- 150g (3/4 cup) unsalted butter. Salted works too, just leave out the pinch of salt later.
- 250g (about 1 1/4 cups) granulated sugar (brown sugar is lovely if you want a caramel-y kind of brownie).
- 3 large eggs. I’ve done it with two—slightly less fudgy, but no one complained.
- 80g (2/3 cup) plain (all-purpose) flour. Whole wheat makes them denser, by the way…
- 1 teaspoon vanilla extract. My grandmother always used the fake stuff (shhh), but real is fab.
- Pinch of salt.
- For the ganache ghosts: 100g white chocolate (if you only have white candy melts, those work, but you’ll taste the difference), 40ml (about 2.5 tbsp) heavy cream.
- Chocolate chips or black writing gel for ghosty eyes.
How to Make ‘Em (Directions, with some wobbles)
- Preheat your oven to 180°C (350°F). Line a brownie tin (mine’s about 8×8 inches, but anything close is fine) with nonstick paper. Or just butter and hope, which usually works for me.
- Melt the butter and chocolate together in a saucepan, low heat. I’ve done it in a microwave too, short bursts so it doesn’t seize. Stir until it’s glossy and ignore the urge to drink it (okay, maybe just a finger dip).
- Add the sugar and vanilla; mix well. It’ll look grainy, which always seems wrong, but trust me, it comes together.
- Add the eggs, one at a time, beating after each. The mix should get shiny and thick—I usually pause here for a taste (yes, I know… raw egg. But it’s tradition.)
- Fold in the flour and salt gently, just until blended. Don’t overmix; unless you like cake-ish brownies, in which case go wild. Pour into your tin and smooth.
- Bake 22–28 minutes, depending on your oven (mine’s a bit moody, so I start peeking at 20). The top will look set, but a skewer should come out with some damp crumbs.
- Let the brownies cool almost completely before dealing with ganache; if you rush, the ghosts melt right off. Learn from my sticky messes of years past.
- For the ganache: gently heat the white chocolate and cream together (microwave or pan—just not too hot). Stir until silky and thick. If it’s runny, let it sit a while.
- Spoon or pipe (a ziptop bag with the corner snipped is my go-to, piping bags if I’m feeling fancy) little ghost shapes on top of the brownies. Don’t overthink it—lumpy ghosts are spookier! Dot on eyes with chocolate chips or gel. If you want to get cheeky, give ‘em a smile.
- Chill for 15–20 min to set. Or just eat them as is, if you can’t wait; no judgment.
A Few Notes, Because Perfection Isn’t the Goal
- I tried using marshmallow fluff as the ghost topping one year—total disaster. Stick with ganache, trust me.
- If your ganache splits or goes grainy, whisk in a splash more hot cream (or just declare it abstract art, which is what I did one very tired Tuesday night).
- I think these taste better the next day, but mine rarely make it to sunrise.
If You Fancy Switching Things Up (Variations)
- Peanut butter swirl? Lovely. Just blob a few teaspoons onto the batter before baking and swirl with a knife.
- Chilli flakes! Tried it once and it was… interesting. Spicy ghosts is probably a step too far, unless you have very adventurous eaters.
- Turn them into ‘mummies’ with extra dark chocolate zigzags, if ghosts get boring. (Is Halloween ever really boring, though?)
Kit You’ll Want (and what to do if you don’t have it)
- A saucepan (or a microwave—but watch like a hawk, white chocolate’s finicky).
- Baking tin, any shape really. I once used a loaf pan and just cut weird, tall slabs; it worked.
- Parchment or greaseproof paper—if you run out, butter and flour does okay, but makes for more scrubbing.
- Piping bag or plastic bag with a hole (I never find my piping tips when I need ‘em, so honestly, scissors are my friend).
How to (Try to) Store These
Airtight container, room temp for a couple days, or fridge if your house is warm. They’ll stay fudgy for about 3 days but honestly, in my house they rarely last until dinner. Freezer? Yeah, that works. Thaw at room temp for 20 min-ish—if you can wait that long.
This Is How We Eat ‘Em (Serving Ideas)
I love these cut in big squares, with extra ghostly ganache drizzled over. Sometimes we do them with a scoop of vanilla ice cream after trick-or-treating. My mum always serves them with a side of apple slices, because “health,” but I just call that balance. (Cuppa tea on the side is my personal fave; bit old-fashioned, but so cozy.)
Things I’ve (Regretfully) Learned (Pro Tips)
- I once tried skipping the cooling step before ghosting—those poor ghosts melted into sad puddles. Don’t rush it, it’s not worth the heartache.
- Sifting flour is nice but honestly, I rarely remember and never noticed a huge difference—smooth out any lumps you spot, though.
- Oh, and don’t use a hot knife to cut the brownies (unless you want sticky ghost goo everywhere, ask me how I know).
Questions I Actually Get Asked (FAQ)
- Do the ghosts stay put on the brownies? Pretty well—unless it’s a heatwave or you pile them five-high. Best to serve single layer if you care about their… integrity?
- Can I use box brownie mix? Yep! Honestly, if I’m pressed for time, I do. Just jazz up with the ganache ghosts and no one is the wiser. Sally’s Baking Addiction has a good homemade version if you want to go from scratch.
- What if I can’t find white chocolate? Try marshmallow topping, or even a thick cream cheese frosting, though structurally they’re a smidge less sturdy. See King Arthur Baking for more creative toppings.
- How spooky are these really? On a scale of 1 to Monster Mash, I’d say about a 5. But if you get the eyes a bit wonky, they’re extra ghostly (if you ask my lot, anyway).
- (And for the person who asked last year: no, you can’t use ketchup for the eyes. Please just… no.)
Honestly, baking should be fun—even when your ghosts look a little like friendly blobs. And, if you give this recipe a shot, let me know what worked (or, what didn’t—solidarity with kitchen mishaps!).
Ingredients
- 1 cup (225 g) unsalted butter, melted
- 1 1/4 cups (250 g) granulated sugar
- 3/4 cup (90 g) all-purpose flour
- 1/2 cup (60 g) unsweetened cocoa powder
- 1/2 teaspoon salt
- 3 large eggs
- 1 teaspoon vanilla extract
- 4 oz (115 g) semi-sweet chocolate, chopped
- 1/2 cup (120 ml) heavy cream
- 1/2 cup (100 g) mini chocolate chips (for garnish)
- 2 egg whites
- 1/4 cup (50 g) superfine sugar
- Black edible marker or melted chocolate (for ghost faces)
Instructions
-
1Preheat the oven to 350°F (175°C). Line an 8×8-inch baking pan with parchment paper.
-
2In a large bowl, whisk together melted butter and granulated sugar. Add eggs and vanilla extract, mixing until smooth.
-
3Sift in flour, cocoa powder, and salt. Fold gently to create a thick batter. Pour into prepared pan and bake for 28 minutes or until a toothpick comes out with moist crumbs. Let brownies cool completely.
-
4For the ganache, heat heavy cream until just simmering. Pour over chopped semi-sweet chocolate and let sit for 2 minutes. Stir until smooth. Spread ganache over cooled brownies.
-
5To make meringue ghosts, whip egg whites until soft peaks form. Gradually add superfine sugar and beat until stiff peaks form. Pipe small ghost shapes onto a parchment-lined baking sheet. Bake at 225°F (110°C) for 1 hour, then cool.
-
6Place meringue ghosts on the ganache layer. Use an edible marker or melted chocolate to draw ghost faces. Garnish brownies with mini chocolate chips if desired. Cut into squares and serve.
Approximate Information for One Serving
Nutrition Disclaimers
Number of total servings shown is approximate. Actual number of servings will depend on your preferred portion sizes.
Nutritional values shown are general guidelines and reflect information for 1 serving using the ingredients listed, not including any optional ingredients. Actual macros may vary slightly depending on specific brands and types of ingredients used.
To determine the weight of one serving, prepare the recipe as instructed. Weigh the finished recipe, then divide the weight of the finished recipe (not including the weight of the container the food is in) by the desired number of servings. Result will be the weight of one serving.
Did you make this recipe?
Please consider Pinning it!!

