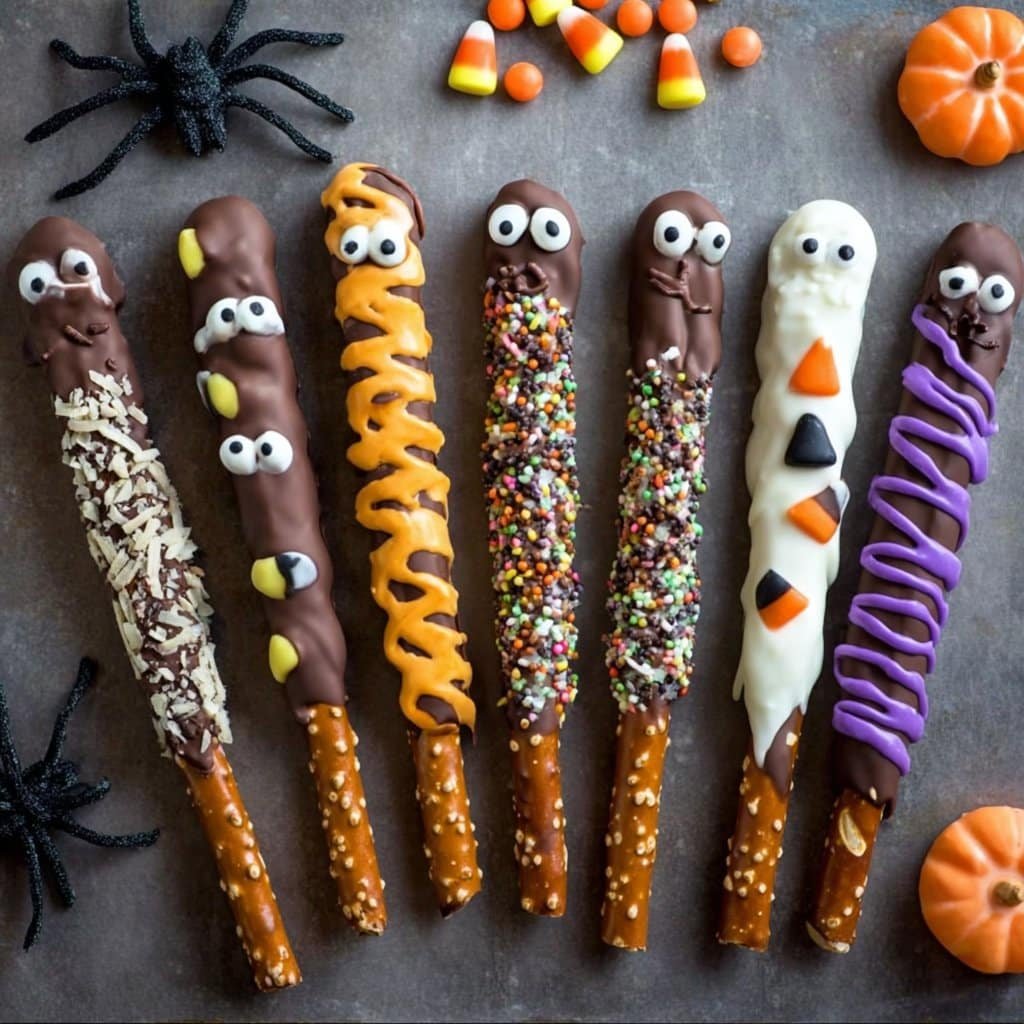
Okay, so here’s the thing—I have a bit of a weakness for snacks that are just as fun to look at as they are to eat, especially this time of year. Every Halloween, my mostly-neat kitchen gets a little wild, because the kids and I dive into making these chocolate dipped pretzel rods. Honestly, I started because I needed something fast but still homemade for the class party (you know the chaos!). Now it’s become an October ritual, and, fair warning, things can get delightfully messy. Once, my attempt at a ‘spiderweb’ design ended up looking more like, well, a tangled headphone cord. Taste over looks, right?
Why You’ll Love Making (And Eating!) These
I make these every Halloween because, honestly, they take hardly any time but look like you actually tried. My family goes absolutely bonkers for them (sometimes I have to fend them off before the chocolate even sets). If I’m being real, I do these when I can’t face baking a whole cake or I’m out of Puffs cereal. Plus, if you’ve ever cursed at sprinkles getting everywhere (they migrate—fact), you’ll appreciate that this is the sort of project where mess is basically part of the charm.
What You Need (Here’s Where You Can Swap Stuff In)
- 1 bag of pretzel rods (I use whichever brand is on sale—no fancy stuff necessary)
- 200g (about 7oz) chocolate chips (dark, milk, or white—sometimes I just chuck in whatever’s got left in my pantry)
- Assorted Halloween sprinkles (honestly, any kind—sometimes my kids sneak on heart sprinkles, and it’s fine)
- Edible eyes (optional, but fun!)
- 1-2 tablespoons coconut oil or shortening (if your chocolate seems a bit too thick; my grandmother swears by Crisco, but who’s checking?)
- Orange candy melts, purple or green if you’re feeling extra (I sometimes skip these if I can’t be bothered running to the shop)
How To Make ‘Em (With a Few Side Notes)
- Prep your layout: Line a tray with parchment paper. You’ll want to clear a decent bit of space—trust me, I’ve reached over and knocked stuff everywhere.
- Melt the chocolate: Either use a microwave (zap in 20-second bursts, stirring in between—don’t burn it, please!) or do the stovetop double-boiler thing. You do you. If it’s looking thick, add a blob of coconut oil and stir till glossy.
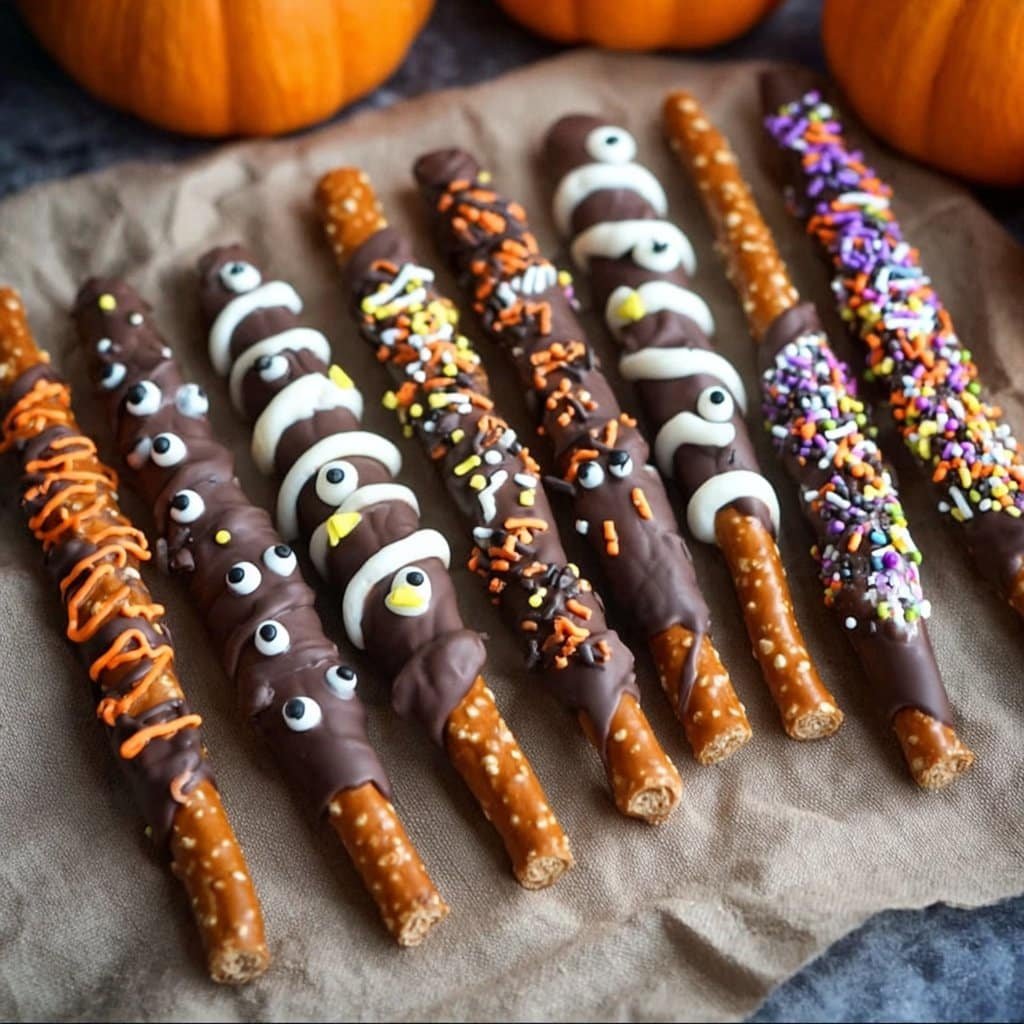
- Dipping time: Wild card moment—dip each pretzel rod about halfway into the chocolate. I usually help the shorter kids by spooning chocolate over the rods rather than dunking (less breakage, more giggles). Gently tap to shake off extra chocolate—on second thought, gentle is key or you might snap the rod right off.
- Decorate: Here’s my favorite part. Scatter on sprinkles, edible eyes, or drizzle with colored candy melts if you’ve got them melted. This is where I sneak a little taste “for quality control” (it’s tradition now).
- Let them set: Either leave them at room temp for about an hour (give or take), or stick the tray in the fridge if you’re impatient like me. Don’t worry if some look a little wonky—after all, Halloween’s all about weird, right?
If You’re Curious…Notes From My Kitchen Experiments
- I once tried melting the chocolate directly in a saucepan (save the washing up, I thought)—don’t do it, burned chocolate smells like disaster!
- If your sprinkles aren’t sticking, press them in gently right after you dip, but before the chocolate sets. If you wait too long, you’ll be chasing sprinkles across the counter, which is, you know, decent cardio at least.
- Sometimes the rods break. I just dip both halves and pretend they’re “mini bites.” Seems to work.
Ways To Change It Up (Some Worked, Some…Not So Much)
- I tried using white chocolate tinted with gel food coloring for an extra pop—works fine, but honestly, it sets up weird if you use liquid food coloring. Stick with the gels for less drama.
- Peppermint extract in the chocolate seemed cute in theory? But it tasted like brushing your teeth with pretzels. That’s a no from me.
- I sometimes roll the rods in crushed Oreos instead of sprinkles—super messy, but totally delicious.
Gear (Don’t Panic If You Don’t Have Everything)
- A microwave-safe bowl or a regular saucepan and heatproof bowl
- Fork or spoon (for drizzle effects)
- Parchment paper (or, if you’re out, just grease a baking tray—the usual slightly sticky outcome, but hey, it works)
- Tray or big plate
How To Store Them (If They Last!)
Honestly, these rarely last more than a day in my house (the kids can sniff them out like bloodhounds), but if you need to store, layer them in an airtight tin with parchment between layers. Will keep for 3-4 days easily, unless you live somewhere super humid (in which case, fridge is your pal).
How I Like To Serve (And My Family’s Traditions)
I’m a fan of standing these up in a Halloween mug or witches’ cauldron (found one at the dollar shop last year, still using it). My oldest insists on using them to stir hot chocolate, which turns your drink into a spooky mess but somehow better? Try it. Or just plop them on the snack table and watch them disappear.
Pro Tips From Someone Who’s Messed Up A Lot
- Don’t rush the setting step. I’ve tried stacking them on top of each other before the chocolate was firm—what a sticky disaster.
- If you’re working with kids, set up a “sprinkle control zone”—otherwise, be prepared to step on candy eyeballs for days.
- Let cupcakes or other snacks share the leftover chocolate—it’s win-win.
Your Top Questions (Because Folks Always Ask)
- Can I use pretzel twists instead of rods? Yep, but it’s a little trickier to dip, so expect messier hands (and more chocolate in your mouth—could be worse!).
- Is a microwave really okay for melting chocolate? For sure, just watch closely; I’ve scorched it before when distracted by a call.
- Do these freeze well? Eh, not really. The pretzels get kind of chewy—best to just make a fresh batch, honestly.
- Where do you buy edible eyes? My go-to is Wilton (here’s their website). Or try Amazon—there’s a ton of options there.
- Kids allergic to nuts—safe? Yes, as long as you check your chocolate and sprinkles (some have warnings), but you probably knew that. Always double check.
- What other kinds of chocolate work? Seriously, bark, chips, melting wafers, fancy couverture, or, in a pinch, even a stack of half-melted Halloween candy bars from last year. Not proud, but there it is.
Random note before I forget—has anyone else noticed that cleaning chocolate off countertops is just marginally easier than getting slime out of the carpet? I digress.
So, whether you’re making these for a party, a quick after-school treat, or simply to justify eating handfuls of chocolate, I hope you dive in and have a blast. If you end up with leftover sprinkles wedged in the sofa cushions, well, that’s just bonus holiday magic. Happy Halloween, mate!
Ingredients
- 12 pretzel rods
- 1 cup semi-sweet chocolate chips
- 1/2 cup white chocolate chips
- 1/4 cup orange candy melts
- 1/4 cup purple candy melts
- 1/2 cup assorted Halloween sprinkles
- 1 tablespoon coconut oil (optional, for thinning chocolate)
- Candy eyes for decoration (optional)
Instructions
-
1Line a baking sheet with parchment paper and set aside. Prepare all sprinkles and decorations for easy access.
-
2Melt the semi-sweet chocolate chips with 1/2 tablespoon coconut oil in a microwave-safe bowl in 20-second intervals, stirring until smooth. Do the same for the white chocolate chips, orange candy melts, and purple candy melts in separate bowls.
-
3Dip each pretzel rod about two-thirds of the way into the melted chocolate or colored candy melts, letting the excess chocolate drip off.
-
4Immediately decorate the dipped pretzel rods with Halloween sprinkles and candy eyes as desired while the chocolate is still wet.
-
5Place the decorated pretzel rods onto the prepared baking sheet. Allow the chocolate to set completely at room temperature or refrigerate for 10 minutes to speed up the process.
-
6Once set, serve immediately or store in an airtight container until ready to enjoy.
Approximate Information for One Serving
Nutrition Disclaimers
Number of total servings shown is approximate. Actual number of servings will depend on your preferred portion sizes.
Nutritional values shown are general guidelines and reflect information for 1 serving using the ingredients listed, not including any optional ingredients. Actual macros may vary slightly depending on specific brands and types of ingredients used.
To determine the weight of one serving, prepare the recipe as instructed. Weigh the finished recipe, then divide the weight of the finished recipe (not including the weight of the container the food is in) by the desired number of servings. Result will be the weight of one serving.
Did you make this recipe?
Please consider Pinning it!!

