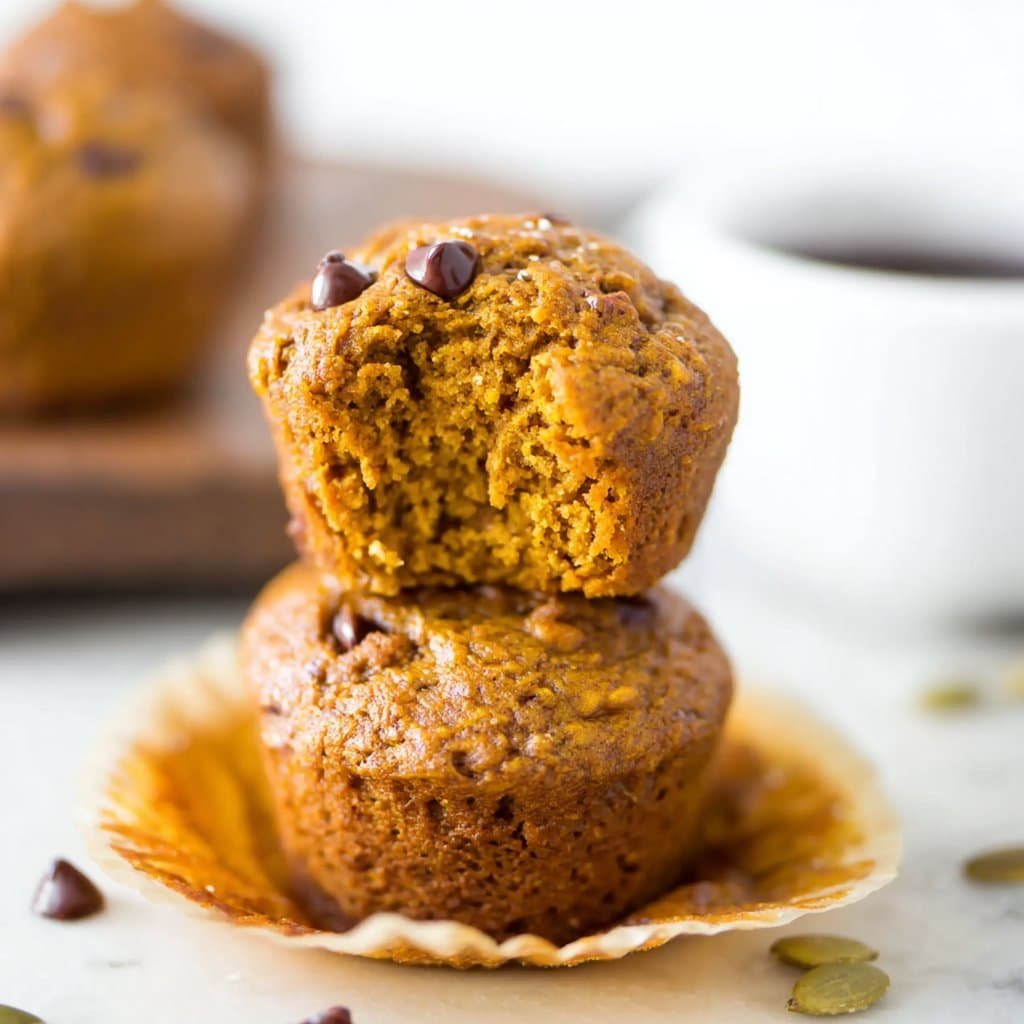
The Time I Kinda Burnt My First Muffin
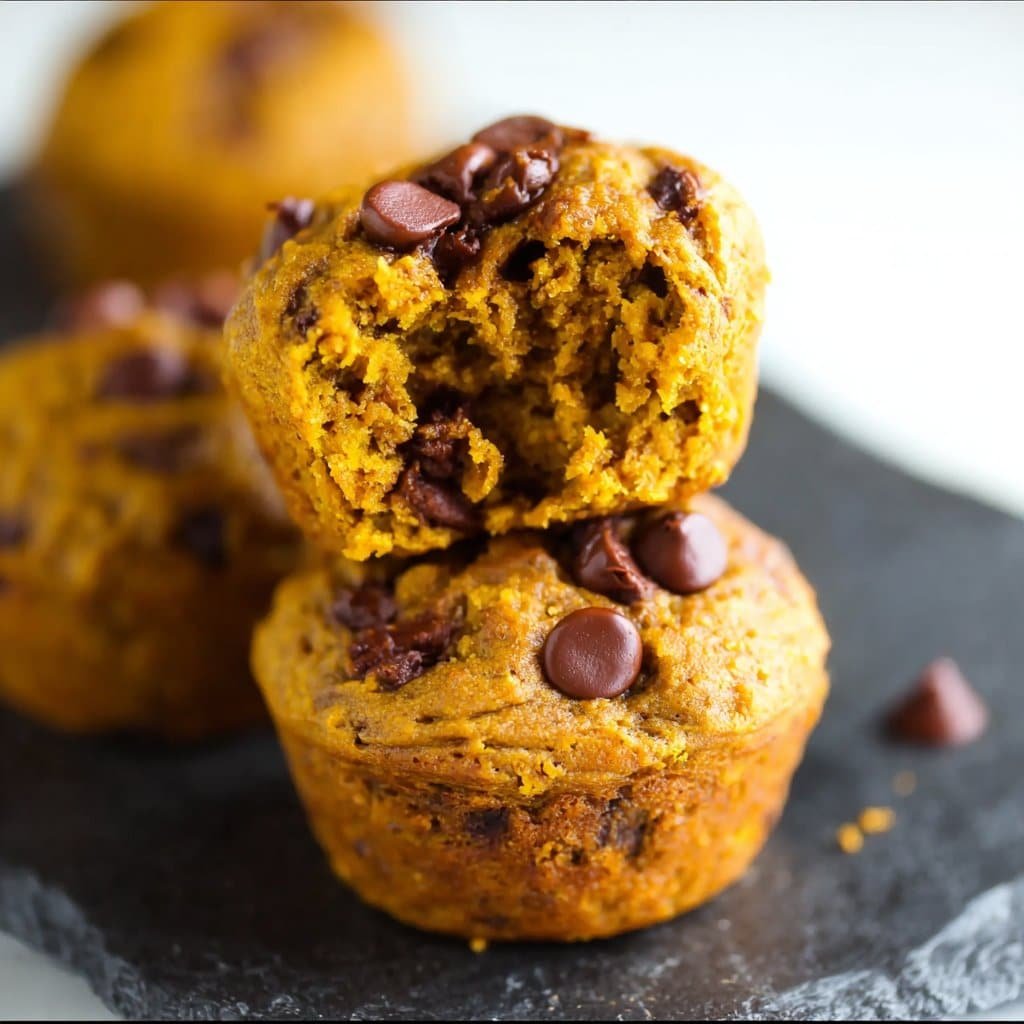
Okay, so before you roll your sleeves up, confession time: The first time I made these gluten free pumpkin protein muffins, I botched it by setting the oven way too high (don’t ask, it’s a long story involving a cat and a timer). But weirdly enough, my neighbor still said they tasted “comforting”—which, in hindsight, probably meant, “could use less crunch on the edges.” Anyway, after a few tweaks (and two more slightly overbaked batches), I think I’ve got it down to a science—or, at least, a happy accident. Honestly, this recipe is now my autumn kitchen tradition. Grab your favorite jumper and come bake with me.
Why You’ll Love This One (Or At Least, My Family Does)
I pretty much pull out this recipe whenever I’ve got leftover pumpkin lurking in the fridge (from the pumpkin bread phase). My family goes bonkers for these, actually. They’re that rare treat that feels like dessert but is secretly packed with stuff your body will thank you for. Plus—I mean, any excuse to not stand at the stove flipping pancakes on a chilly morning, right? Oh, and don’t get me started on those store-bought gluten free muffins… Dry as a desert sometimes. No shade, but homemade always wins — unless you count the time I tried swapping the protein powder for instant coffee… in which case, I’d say, stick with what’s written.
Here’s What You’ll Need (And What I Sometimes Use Instead)
- 1 cup pumpkin purée (Libby’s or, honestly, whatever’s on sale – I’ve even roasted my own once but couldn’t tell, oops)
- 2 eggs (or 1/2 cup unsweetened applesauce if you’re out)
- 1/3 cup maple syrup (honey in a pinch, but it gets a tad sweeter)
- 1/2 cup Greek yogurt (sometimes I do coconut yogurt when my aunt visits)
- 1 tsp vanilla extract (the real stuff if you’ve got it, but imitation is fine, promise)
- 1 1/2 cups gluten free oat flour (but I swear any decent GF blend will work here—Bob’s Red Mill is good if you can find it)
- 1/2 cup vanilla protein powder (I use LivWell, but do your thing)
- 1 1/2 tsp baking powder
- 1/2 tsp baking soda
- 1 tsp cinnamon, 1/4 tsp nutmeg, pinch of salt
- 1/3 cup chopped nuts or chocolate chips (my mum prefers walnuts, I reach for dark choc—no contest)
Let’s Bake! Actually, Don’t Stress the Details
- Preheat your oven to 350° F (175° C). Grab a nonstick muffin tin, or line with those little paper muffin cups if, like me, you dread scrubbing.
- Mix wet stuff: Pumpkin, eggs or applesauce, maple syrup, yogurt, and vanilla—toss them in a big bowl and whisk away. Don’t worry if it looks like baby food; promise it’ll come together.
- Add the dries: Oat flour, protein powder, baking powder, baking soda, cinnamon, nutmeg, and salt. Up to you if you sift. (I usually don’t. Lazy? Maybe.)
- Combine: Pour the dries over the wets. Stir until just mixed. Never overdo it! This is where I sneak a tiny bite (raw egg police, look away).
- Extras: Fold in chopped nuts or chocolate, or both if you’re feeling wild.
- Fill tins: Spoon the mix into the muffin pan—aim for about three-quarters full. Sometimes I overdo and get muffin top spillage… not the worst, honestly.
- Bake: About 18-22 minutes, until they’re firm and a toothpick (or, who are we kidding, a kebab stick) comes out clean. Tops should be a little golden.
- Let them cool as long as you have the patience for. But they’re pretty sturdy, meaning I don’t always wait. Living dangerously.
Messy Notes I’ve Learned Along the Way
- Too much protein powder can make things gummy—add an extra spoonful of yogurt if that happens (discovered by accident, tastes better after a day in the fridge).
- More spice? I chuck in a dash of cloves or ginger sometimes; it’s never hurt anyone.
- Try paper muffin cases. Less cleanup than washing stuck-on gunk ’til your hands are pruney.
- If the mix seems dry, a splash of almond milk (or whatever’s handy) does the trick. Don’t panic.
Wild Experiments and One Mishap…
- Tried shredded coconut once—tasted dreamy. But I wouldn’t bother with raisins (turned out weirdly dry and sad).
- Sometimes I split the batter, add nuts to half and choc chips to the other—pleases the crowd.
- I once added a mashed banana, and it turned, well, extra moist. Might be your thing?
What If I Don’t Have a Muffin Tin?
Here’s the thing: a muffin tin is ideal, but I’ve resorted to filling ramekins or lobbing dollops onto a baking sheet (they taste fine, maybe look a little rustic). Or try mini loaf pans. Creativity’s part of the process, right?
No Joke: Storing These Is (Almost) Pointless in My House
I keep these gluten free pumpkin protein muffins in an airtight tub at room temp for about 2 days—or the fridge for up to 4. But if I’m honest, they never last that long, unless I hide a few on the top shelf (out of sight, out of mind, as my dad says). Oh, and freezer tip: they thaw in about 45 seconds if you’re desperate enough to microwave breakfast.
How Do I Serve These? We Get a Bit Extra
Some mornings, it’s just a slather of almond butter, but when we’re feeling fancy, I sprinkle a little cinnamon sugar on top (bad for the clean-up, outstanding for taste). My cousin dunks his in coffee… which honestly, I should try more often. At Christmas, I stick a cranberry on each for festive vibes. Whatever floats your boat, really.
Pro Tips? You Mean “Oops-I-Learned” Lessons
- I once tried to skip the muffin cases, forgot to grease the tin, and spent half an hour chiseling muffins out. Never again.
- Don’t over-bake! I left them in too long—came out crunchy. Actually, sometimes I like the crispy top. But mostly, watch your timer.
- I always let the cool just a bit before yanking them out, or they squish—patience, grasshopper.
FAQs—Stuff Folks Have Actually Asked Me
- Can I skip the protein powder?
- Sure, just sub in extra oat flour, about 1/4 cup more. Won’t be quite so filling but still delish.
- What’s the best gluten free flour?
- I’d say oat flour or a blend—almond flour makes it too dense, for my tastes. But use what’s easy for you. Don’t sweat the brand.
- Can I add veggies?
- Grated carrot works a treat! Just maybe squeeze out the water first so it doesn’t get soggy.
- Do these taste…healthy?
- Honestly? Kinda, in a good way. Sweet, pumpkiny, but not like a sugar bomb. My kids love ‘em, for what that’s worth.
- Are these freezer-friendly?
- Yep. Flash freeze ‘em on a tray—then pop into a bag or tub. Or, just eat them fresh because you prob’ly will anyway.
- Oh, and where do you get your oat flour?
- I make it in my blender, or grab some here from Bob’s Red Mill in a pinch. Try it once—dead easy.
On a totally random note, one of these days I’ll try making these in a waffle maker just to see what happens. Will report back if the experiment is worth repeating. Until then, happy baking!
Ingredients
- 1 cup pumpkin puree
- 2 large eggs
- 1/3 cup maple syrup
- 1/2 cup unsweetened almond milk
- 1/4 cup coconut oil, melted
- 1 cup gluten-free oat flour
- 1/2 cup vanilla protein powder
- 1 tsp baking powder
- 1/2 tsp baking soda
- 1/2 tsp ground cinnamon
- 1/4 tsp nutmeg
- 1/4 tsp salt
Instructions
-
1Preheat your oven to 350°F (175°C) and line a muffin tin with paper liners or lightly grease it.
-
2In a large bowl, whisk together pumpkin puree, eggs, maple syrup, almond milk, and melted coconut oil until smooth.
-
3Add the oat flour, protein powder, baking powder, baking soda, cinnamon, nutmeg, and salt. Stir until just combined.
-
4Divide the batter evenly among the prepared muffin cups, filling each about three-quarters full.
-
5Bake for 18-20 minutes, or until a toothpick inserted in the center comes out clean.
-
6Let the muffins cool in the tin for 5 minutes before transferring to a wire rack to cool completely.
Approximate Information for One Serving
Nutrition Disclaimers
Number of total servings shown is approximate. Actual number of servings will depend on your preferred portion sizes.
Nutritional values shown are general guidelines and reflect information for 1 serving using the ingredients listed, not including any optional ingredients. Actual macros may vary slightly depending on specific brands and types of ingredients used.
To determine the weight of one serving, prepare the recipe as instructed. Weigh the finished recipe, then divide the weight of the finished recipe (not including the weight of the container the food is in) by the desired number of servings. Result will be the weight of one serving.
Did you make this recipe?
Please consider Pinning it!!

