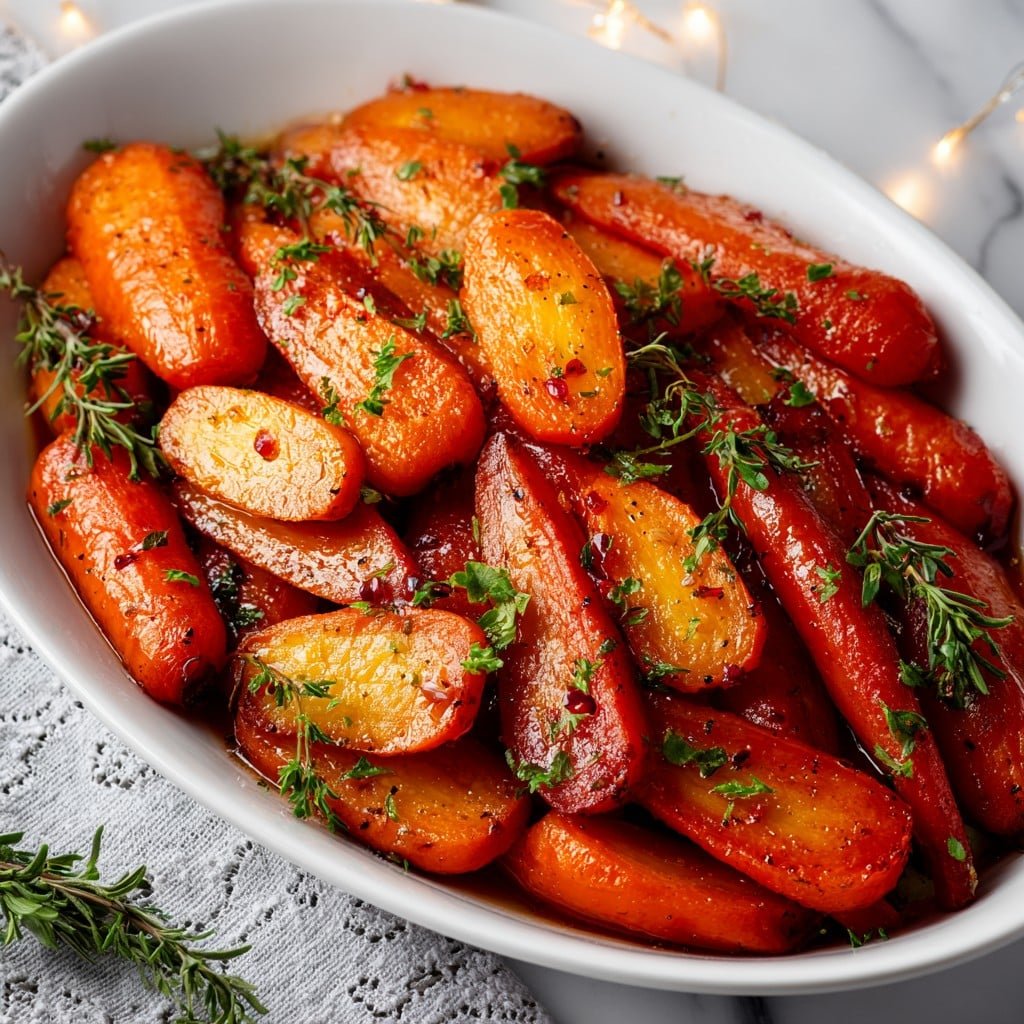
Right, So Here’s How These Glazed Carrots Became My Holiday Go-To
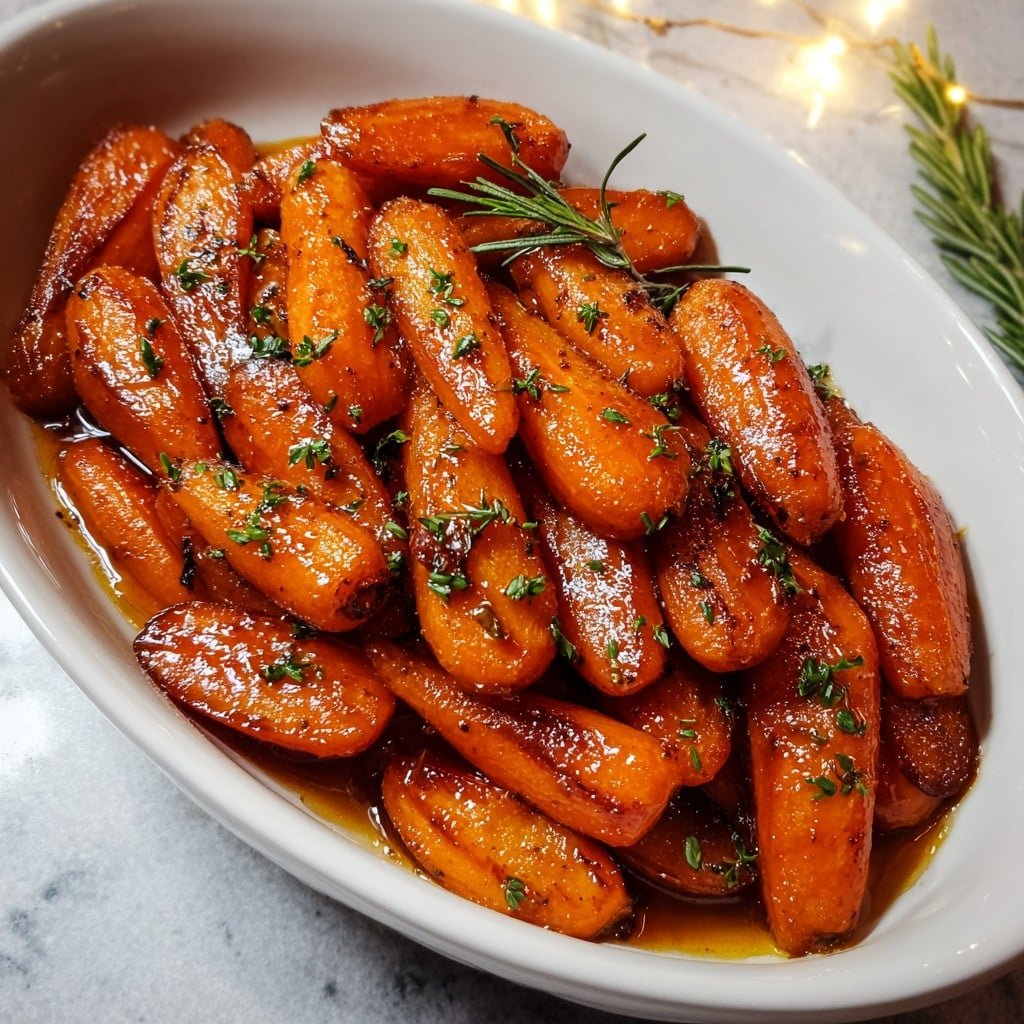
You know how some recipes just sneak their way into basically every family holiday dinner? That’s these carrots for us — they started as a last minute side (honestly, it was my mom who tossed them together with whatever was left in our fridge one Christmas Eve, after an apron mishap and a missing parsnip). Now? If I don’t show up with glazed carrots at Thanksgiving, I get the side-eye from Aunt Deb and Uncle Rick pulls out his passive-aggressive “oh, just plain carrots this year?” routine. So yeah, these guys are now a non-negotiable part of the chaos. And for what it’s worth, even my little niece, who claims she doesn’t “do” vegetables, goes hunting for the leftovers.
Why I Keep Coming Back to This One
I make this when I want (need?) something easy, impressive, and seriously delicious. My family goes a bit bananas for the sticky glaze — I’ve caught people scraping the pan after we’ve run out (…I’m usually one of them). On the odd occasion, I’ve actually run out of butter, and tried olive oil in a panic. You know what? Came out okay. Not perfect, probably wouldn’t fool Grandma, but nobody’s stormed out in protest either.
Plus, this is a “one eye on the stove, one eye on the dog sneaking ham” kinda recipe. Forgiving, flexible, and halfway through you get to stand by a steamy pan inhaling sugary, carrot-y goodness, which is just nice on a cold day, you know?
Here’s What You’ll Need (and Some Options)
- 2 pounds carrots, peeled and cut into chunky coins or sticks (baby carrots in a real hurry, though the texture is a bit different)
- 2-3 tablespoons unsalted butter (I’ve used salted and skipped adding more salt, in a pinch)
- 3 tablespoons brown sugar (maple syrup works but you’ll want to use a little less)
- 1 tablespoon honey (optional, but I use it when I want that extra sticky vibe)
- 1/2 teaspoon sea salt
- 1/4 teaspoon freshly ground black pepper
- Pinch of cinnamon (I swear by it, but my cousin says ‘not today, thanks’, so it’s totally up to you)
- Chopped parsley or chives for serving – honestly, I forget this half the time
How I Actually Cook ‘Em (with Lots of Pausing and Tasting)
- Toss your carrots in a big ol’ pan (nonstick is easiest, but if it’s a little crusty it actually makes for more caramel bits, which I love).
- Add just enough water to barely cover the bottom, then chuck in your butter, brown sugar, salt, pepper, and cinnamon if you’re using it.
- Crank the heat to medium-high — nothing wild, just enough to get a good sizzle. Stir it all together, then pop a loose lid on (or a bit of foil, if you’ve misplaced the actual lid, like I do at least once a month).
- After about 7–10 minutes, most of the water should be gone and the carrots are getting tender. Give ’em a poke — if they’re fork friendly, move on. If not, let ‘em steam another couple minutes, then try again.
- Remove the lid! This is where I usually sneak a taste. Turn the heat down to medium and let the liquid bubble away, stirring occasionally. Use a spoon to baste the carrots in the syrupy mix that forms — don’t worry if it looks a bit shiny (on second thought, that’s the point!).
- When the glaze is thick and carrots are glossy — not swimming in sauce, but not dry either (somewhere in the magical Goldilocks zone) — you’re done. Scatter over the parsley or just go straight to the table, totally your call.
Notes (AKA Things I Learned the Hard Way)
- Smaller carrots = sweeter and quicker to cook. But use whatever is in the fridge, honestly.
- Be stingy with the water; too much and you’ll be boiling your glaze away. I’ve done that more than once, and the carrots end up a little sad and watery.
- Glaze thickens as it cools — so if it still looks a teeny bit runny, don’t panic. It’ll sort itself out on the plate.
Variations I’ve Messed With
- I tried a dash of orange zest once — delicious, especially for Christmas. Makes it smell like the holidays!
- Maple syrup instead of brown sugar & honey. Sweeter, but a bit more Canadian, if you fancy that.
- Cumin and chili for a smokier, slightly spicy twist — not kid friendly in my house, but fun for Friendsgiving.
- Tried rosemary instead of parsley, and it was… weird. Maybe that’s just me!
Equipment, or ‘How I Improvise’
- Big frying pan or skillet with a lid (actually, a baking dish and some foil does work if you put it in the oven, but it takes way longer and you miss out on the caramel-y bits from the direct heat)
- Spoon for basting (although I have, embarrassingly, used a spatula — it’s fine, just messier)
Storing Leftovers (If You Even Get That Far)
Just pop any extras in a container in the fridge; they’ll keep a couple days. If you’re lucky enough to have leftovers, great cold snack straight from the bowl (don’t judge). But honestly, in my house it never lasts more than a day!
How We Serve ‘Em (and a Not-So-Secret Tradition)
Always hot if I can manage it, but they reheat well in the microwave (just add a splash of water). We’ve started bringing a bowl to the sofa for lazy days after Christmas dinner. Good with turkey and, weirdly, surprisingly nice tucked into a sandwich with leftover ham.
Lessons Learned (Or, Don’t Be Like Me)
- Don’t rush the glaze. I cranked the heat once and scorched the sugar — had to start over and live with the burnt-sugar smell for a day. Slow and steady!
- Actually, I find it works better if you let the carrots sit for a couple minutes at the end — coat them well, then just walk away. Magic happens while you’re not looking.
Answering Your (Actual) Questions
- Can I do this ahead of time? Yup — just reheat gently and add a splash of water if it’s too sticky. I think this tastes better the next day sometimes (as long as nobody’s raided the fridge at midnight… looking at you, Dad!)
- Can I make it vegan? Sure, swap in your favorite plant-based butter; I read about this vegan butter that people rave about.
- Do I need to peel the carrots? Honestly, not really, if you scrub them and like the rustic feel. Some folks in my family insist on peeling for ‘looks,’ but that’s a whole dinner table argument I’m not getting into here.
- Is there a way to do this in the oven? Yep, roast ’em at 400°F tossed in everything, then finish under the broiler for a glaze (but you miss some of the pan magic, I think).
- What if my glaze is too runny? Just keep simmering, or add a teensy bit more sugar. Oh, and here’s a handy guide if you have a sauce-thickening emergency (been there!).
If you’re after more cozy sides, I’ve learned a ton from Serious Eats’ sides section — highly recommend a browse while things bubble away. And if your carrots flop (they won’t, but just in case), honestly, everything tastes better with a bit of gravy anyway!
Ingredients
- 2 pounds carrots, peeled and sliced into 1/2-inch thick rounds
- 3 tablespoons unsalted butter
- 1/4 cup brown sugar, packed
- 1/2 teaspoon ground cinnamon
- 1/2 teaspoon salt
- 1/4 teaspoon black pepper
- 1 tablespoon honey
- 1 tablespoon fresh parsley, chopped (for garnish)
Instructions
-
1Bring a large pot of salted water to a boil. Add sliced carrots and cook for 7-8 minutes until just tender. Drain and set aside.
-
2In a large skillet over medium heat, melt the butter. Stir in brown sugar, honey, cinnamon, salt, and black pepper until combined and the mixture starts to bubble.
-
3Add the cooked carrots to the skillet and toss to coat in the glaze. Cook for 5-7 minutes, stirring occasionally, until the carrots are well glazed and heated through.
-
4Remove from heat and garnish with chopped fresh parsley before serving.
Approximate Information for One Serving
Nutrition Disclaimers
Number of total servings shown is approximate. Actual number of servings will depend on your preferred portion sizes.
Nutritional values shown are general guidelines and reflect information for 1 serving using the ingredients listed, not including any optional ingredients. Actual macros may vary slightly depending on specific brands and types of ingredients used.
To determine the weight of one serving, prepare the recipe as instructed. Weigh the finished recipe, then divide the weight of the finished recipe (not including the weight of the container the food is in) by the desired number of servings. Result will be the weight of one serving.
Did you make this recipe?
Please consider Pinning it!!

