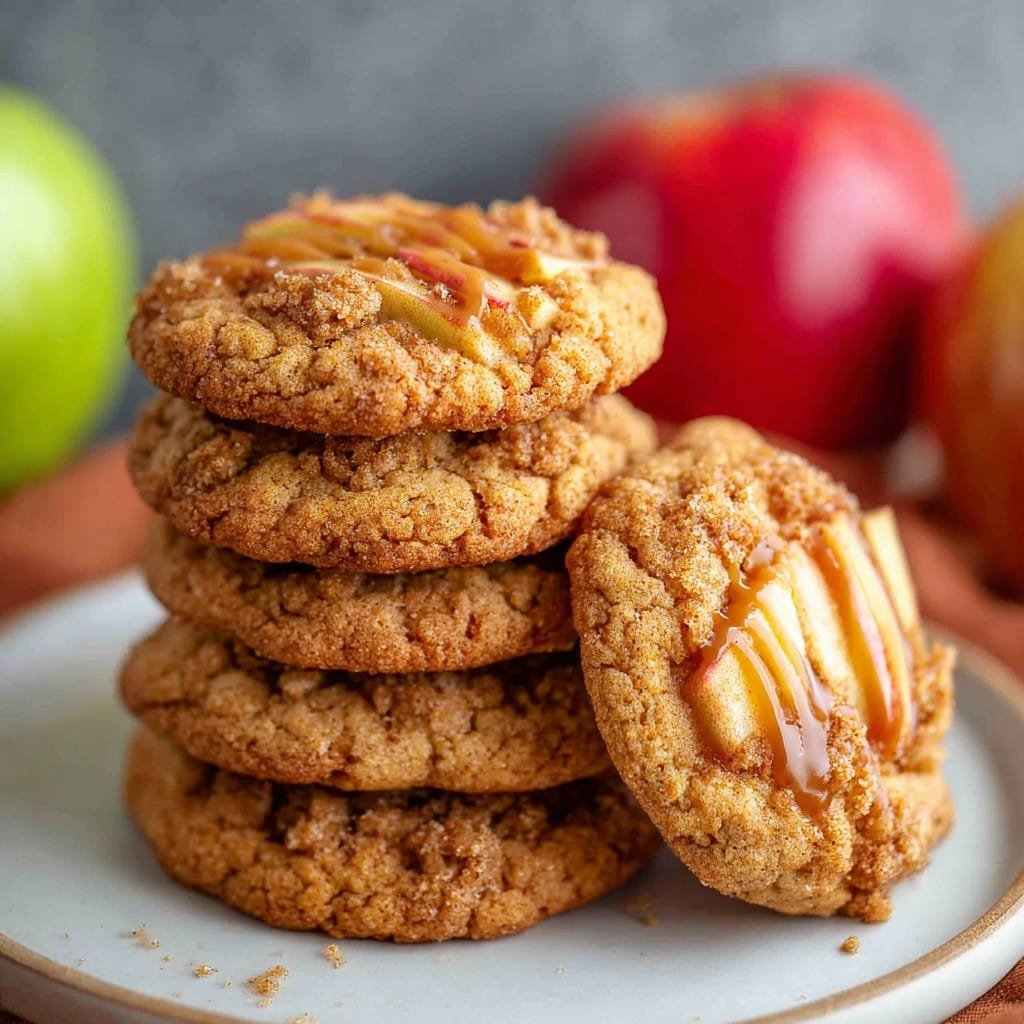
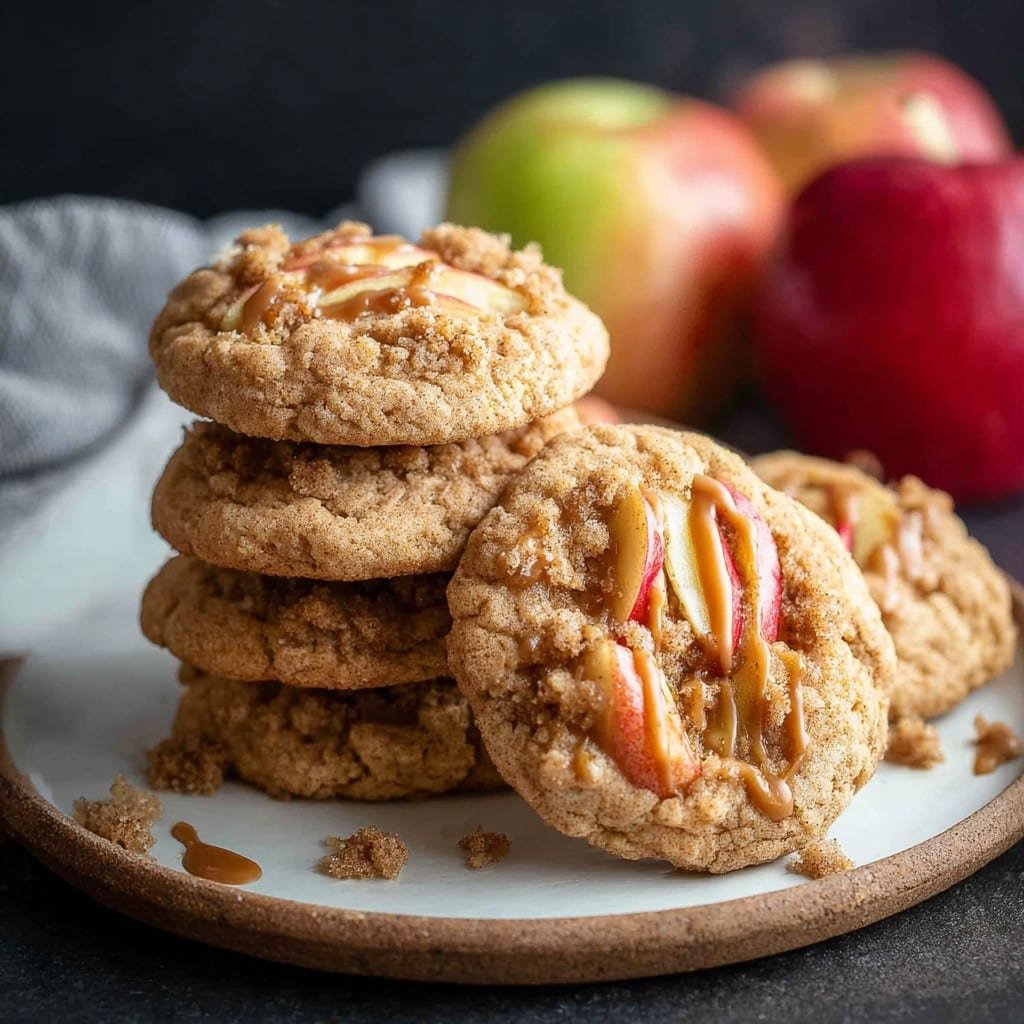
Hey friend, so I just made another batch of my Fall Apple Crumb Cookies, and let me tell you—it smells better in here than a country fair surrounded by caramel apples and crunchy leaves underfoot. I started making these after a total flop with my first apple pie; the crust was… let’s call it “rustic.” So while licking my wounds (and probably some jam), I came up with these instead! They’re easy, full of apple bits, and have this crumbly topping that tastes like someone tucked a mini-portable crisp into every cookie. My kids fight over the last one—full-on table negotiations—so you know it’s good! Anyway, if you end up with flour on your elbow, welcome to the club.
Why You’ll Love This (Besides the Smell!)
I honestly make these whenever it’s chilly and my apples start looking a bit wrinkly (my fruit bowl isn’t a spa). My family goes wild for these—I think it’s the crumbly top; my son calls it “cookie magic dust.” Honestly, I used to dread peeling apples, but since you only need a couple here, it’s not a dealbreaker. Plus, one time I forgot the cinnamon, and oof—not the same, so don’t skip it unless you love regret. Oh, and, these are even better dunked in coffee—if you ask me.
What You’ll Need (and a Few Cheats, If You Like)
- 1 large apple (I love Honeycrisp, but I’ve literally used old Granny Smiths and no one died.)
- 1 1/4 cups all-purpose flour (If you’re out, I’ve managed a patch job with a mix of whole wheat—just add a splash more milk if it’s dry.)
- 1/2 tsp baking powder
- 1/2 tsp cinnamon (Pumpkin pie spice works when I can’t find cinnamon… I know, I know.)
- Pinch of salt
- 1/2 cup unsalted butter (Salted is fine, just skip the added salt, or not—I’m not your boss.)
- 1/3 cup brown sugar, packed
- 1/3 cup granulated sugar
- 1 large egg
- 1 tsp vanilla extract (I once used maple syrup for half the vanilla, and it was great.)
- For crumbs: 1/3 cup flour, 1/4 cup brown sugar, 2 tbsp butter, and a teeny pinch of cinnamon (don’t stress the amounts too much; it’s crumbly, not science.)
How to Make ‘Em Without Losing Your Mind
- Preheat that oven to 350°F (or about 175C, for metric peeps). Line a tray with baking paper. Trust me, you don’t want to spend the evening scraping cookie shrapnel off your pan.
- Peel and dice your apple into bits—think fingernail-sized. I don’t bother with perfect cubes. Toss ‘em in a bowl with a smidge of cinnamon if you want extra oomph.
- In a big-ish bowl, cream together softened butter, brown sugar, and white sugar. I use an electric hand mixer, but a sturdy spoon and a little elbow grease works (don’t skip arm day!). It’s ready when it’s light and almost fluffy. Sort of like, I dunno, an old sweater?
- Beat in the egg and vanilla. If it looks a bit curdled—no worry, it always looks weird now.
- Stir in the dry ingredients: flour, baking powder, the main cinnamon, salt. I just dump ‘em in; fancy folks sift, but I’m too impatient.
- Fold in your chopped apples. This is the part where I usually steal a little dough. No apologies.
- Scoop large-ish tablespoons of dough onto your tray. They spread just a bit—give ‘em space.
- Mix up the crumb topping (flour, sugar, cold-ish butter, cinnamon). Pinch mixture till you get oat-sized crumblies. Sprinkle heaps on every blob of dough—don’t be shy.
- Bake for 12 to 14 minutes till edges are golden and middles look set-ish; they firm up as they cool. And if you eat one fresh and molten-hot, welcome to Team Burned Tongue.
Extra Bits I’ve Learned (The Hard Way)
- If your apples are super juicy, pat ‘em dry or you’ll get dough soup. I learned this after my first “cookie puddle” tray.
- Chilling the dough helps hold the cookies’ shape, but honestly—who has time? I mostly skip it.
- I tried microwaving the butter once because I forgot to soften it, and… it sort of worked? Just mush it up anyway, it all sorts itself out.
Things I’ve Tried (Not All Brilliant)
- Chopped pecans in the dough—delish, highly recommend, but don’t tell my nut-loathing cousin.
- Grated apple instead of diced: too wet! Wouldn’t repeat unless you want to reenact “The Blob.”
- Swapping half the flour for oat flour is nice for extra chew. Maybe a bit more milk if it gets too crumbly.
What If I Don’t Own That?
No mixer? No worries. I’ve used one of those old wooden spoons and a strong wrist, worked fine. The only thing you really need is baking paper; or you can just butter the tray super well (just be ready to dig a little).
How To Store (Assuming They Last That Long…)
Okay, so officially, airtight jar, two or three days on the counter…but in my house, these never survive more than 18 hours—24 tops. If you want to freeze ’em, wrap in foil, then shove in a bag. They thaw quick, and I actually think the flavor gets better somehow (or I’ve just convinced myself because I forget to defrost things properly).
How We Eat ‘Em (Sometimes With Ice Cream!)
We serve these warm, always, usually with tea (or hot cocoa, if it’s that kind of evening). My son swears by a scoop of vanilla ice cream on top—he says it’s genius; I say it’s an excuse to eat ice cream. Nice with a bit of homemade caramel sauce if you’re feeling extra-spesh. If I’m honest, sometimes we just eat ‘em standing around the kitchen before dinner—life’s short.
Pro Tips; and Stuff I’ve Regretted
- Don’t try to bake more than one tray at a time—did it once, bottom ones burned while the top took forever. Lesson learned.
- If you underbake them (because you really, really want cookies ASAP), they will puff up and collapse into sad pancakes. Chill—just give ‘em an extra minute or two.
- I used to skip parchment to save time, but prying cookies off with a spatula is like picking stickers off a sweater. Use parchment. I don’t care what anyone says.
So, What Do People Ask Me About These?
- “Can I double this recipe?”—Absolutely, and you should! But, try to bake them in batches. My oven’s a bit moody so maybe that’s just me (your mileage may vary).
- “Can you use pears instead?”—Yeah, but the flavor’s milder. Still yummy, though! Maybe add a splash more spice.
- “My crumb never sticks!”—Try pressing it down just a bit. Or, actually, maybe mix with cold butter, not melted. Learned that form the hard way.
- “Are these like scones?”—Not really, they’re moister and less dense. But by all means, slather with clotted cream if you want. I won’t stop ya.
- “Do you peel the apples?”—Usually, yes. But if I’m being lazy, the peel just adds fiber. (Though the kids do pick it out. Go figure.)
Digression—oh! If you’re ever wondering what to do with leftover apple bits, I snack on ‘em while I cook, but apparently you can chuck ‘em into breakfast cookies too. Not that these last long enough for leftovers, but just sayin’.
Last thing: If you want cookies that taste a bit like being wrapped up in your favorite old jumper with the rain outside, here’s your recipe. And you can always swap the apple for whatever fruit’s lolling around come spring. But honestly—it’s never quite as good as when there’s a nip in the air, and the leaves are crunchy underfoot.
Ingredients
- 1 1/2 cups all-purpose flour
- 1/2 teaspoon baking soda
- 1/2 teaspoon ground cinnamon
- 1/4 teaspoon salt
- 1/2 cup unsalted butter, softened
- 3/4 cup brown sugar, packed
- 1 large egg
- 1 teaspoon vanilla extract
- 1 cup peeled and finely diced apple
- 1/2 cup old-fashioned oats
- 1/4 cup granulated sugar
- 3 tablespoons cold unsalted butter (for crumb)
- 1/4 cup all-purpose flour (for crumb)
- 1/4 teaspoon ground cinnamon (for crumb)
Instructions
-
1Preheat oven to 350°F (175°C) and line a baking sheet with parchment paper.
-
2In a bowl, whisk together 1 1/2 cups flour, baking soda, cinnamon, and salt.
-
3In a large bowl, cream 1/2 cup butter and brown sugar until light and fluffy. Beat in the egg and vanilla extract.
-
4Gradually mix dry ingredients into wet until just combined. Fold in diced apple and oats. Scoop dough onto prepared baking sheet.
-
5For crumb topping, combine 1/4 cup flour, granulated sugar, 3 tablespoons cold butter, and 1/4 teaspoon cinnamon. Mix until crumbs form. Sprinkle over cookies.
-
6Bake cookies for 12-15 minutes or until edges are golden. Cool on a wire rack before serving.
Approximate Information for One Serving
Nutrition Disclaimers
Number of total servings shown is approximate. Actual number of servings will depend on your preferred portion sizes.
Nutritional values shown are general guidelines and reflect information for 1 serving using the ingredients listed, not including any optional ingredients. Actual macros may vary slightly depending on specific brands and types of ingredients used.
To determine the weight of one serving, prepare the recipe as instructed. Weigh the finished recipe, then divide the weight of the finished recipe (not including the weight of the container the food is in) by the desired number of servings. Result will be the weight of one serving.
Did you make this recipe?
Please consider Pinning it!!

