Let’s Make Mini Halloween Pizzas! (Or, How I Ended Up Covered in Flour…Again)
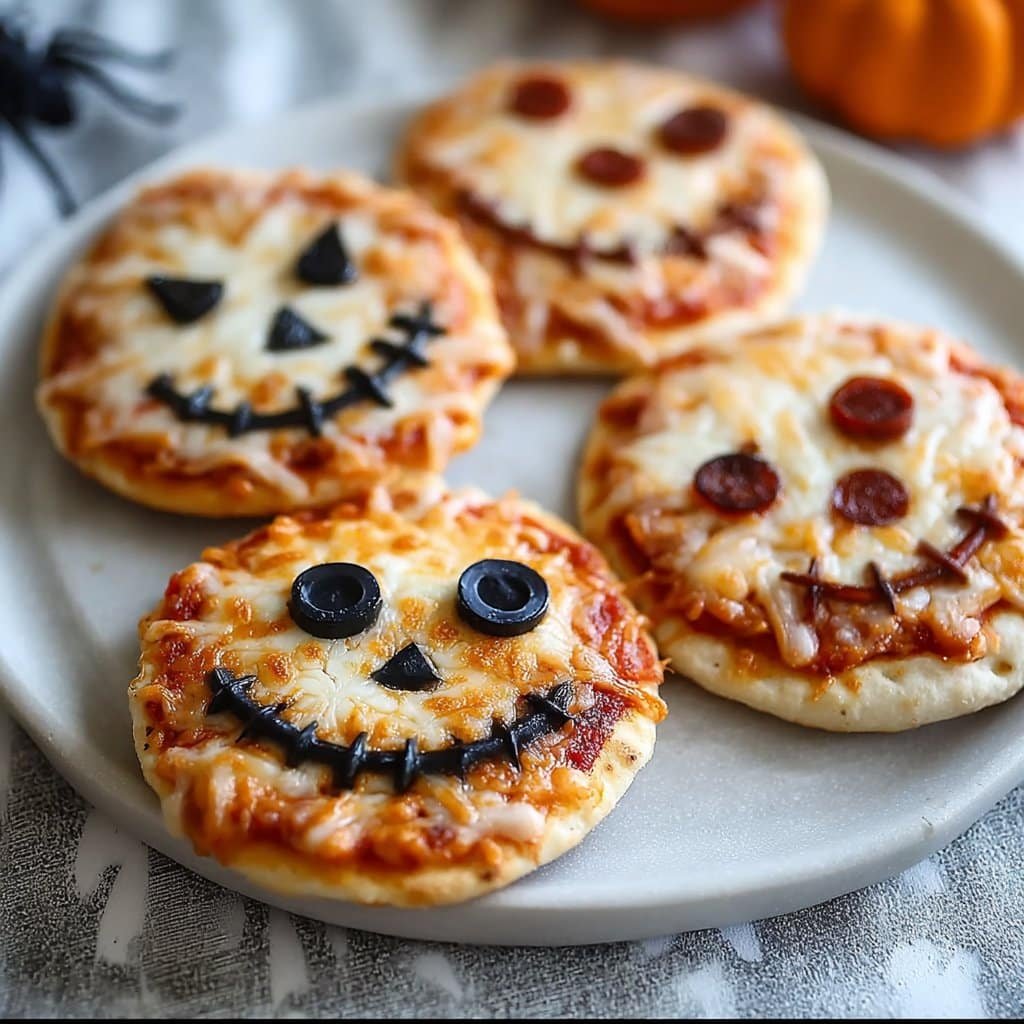
Okay, so picture this: it’s nearly Halloween, the kids are hopped up on pumpkin hype, and you need a snack that doesn’t immediately send them into sugar orbit. That’s how I stumbled into making these DIY mini Halloween pizzas. I was totally out of pre-made crust—story of my life—so I improvised, using leftover English muffins and honestly? Never looked back. It’s now become this weird/fun October tradition, and even my husband (who claims not to like “shaped food”—whatever that means) gets involved. Plus, there’s something kind of delightful about creating cheese ghosts that resemble, well, sad little marshmallows instead of anything remotely spooky. Hey, it’s the effort, right?
Why I Think You’ll Have a Blast With This (And When I Make Them…)
I usually whip these up when I’ve got a herd of kids to feed—playdates, Halloween movie marathons, or whenever someone is whining for pizza but I just can’t, in good conscience, order takeout again. They’re fast, customizable (pickier eaters rejoice!), and you get to make a fun mess with edible “eyes” and olive “spiders”. Sidenote: I once tried sculpting a werewolf; it came out looking more like Chewbacca with a sinus infection but it still tasted awesome. Sometimes I even get a bit competitive about who can make the silliest face. My family goes a bit mad for these because…well, when else can you play with your food and have it be encouraged?
What You’ll Need (But Don’t Stress It!)
- 4-6 English muffins, split (Sourdough sandwich bread slices work too. I’ve even used tortillas in a pinch.)
- About 1 cup pizza sauce (or plain old tomato sauce plus oregano—I’ve done it and lived.)
- 2 handfuls of shredded mozzarella (Provolone works, or that super-orange cheddar if you want Jack-o’-lantern faces.)
- Handful of mini pepperoni or salami slices (sometimes I use torn-up ham because, well, that’s what we have)
- Black olives, sliced (for little “spiders” or eyes; I steal them straight from the kids’ plates)
- Red pepper strips or green bell pepper, thinly sliced (optional, if you actually want something healthy in there)
- Canned corn or pineapple tidbits (Don’t judge—it adds a bit of sweet tang!)
- Olive oil, just a splash, totally optional
Honestly, my gran swore by only using San Marzano tomatoes for the sauce, but, I mean, supermarket jarred works just fine. (Don’t tell her I said that.)
How To Make ‘Em (With a Few Fumbles)
- Preheat your oven to 200°C/400°F—or just crank it up a notch if you’re not the precise sort. If you have a baking tray, great. No tray? It’s cool; I once used an upside-down casserole dish. Lined with baking paper, ideally, unless you like chipping charred cheese later.
- Split your muffins and lay them out. If you want them extra crispy, toast ’em first…but I forget half the time and it’s still decent.
- Spoon over your pizza sauce. Be generous, but not so much it ends up as soup. (This is the part where I usually sneak a taste.)
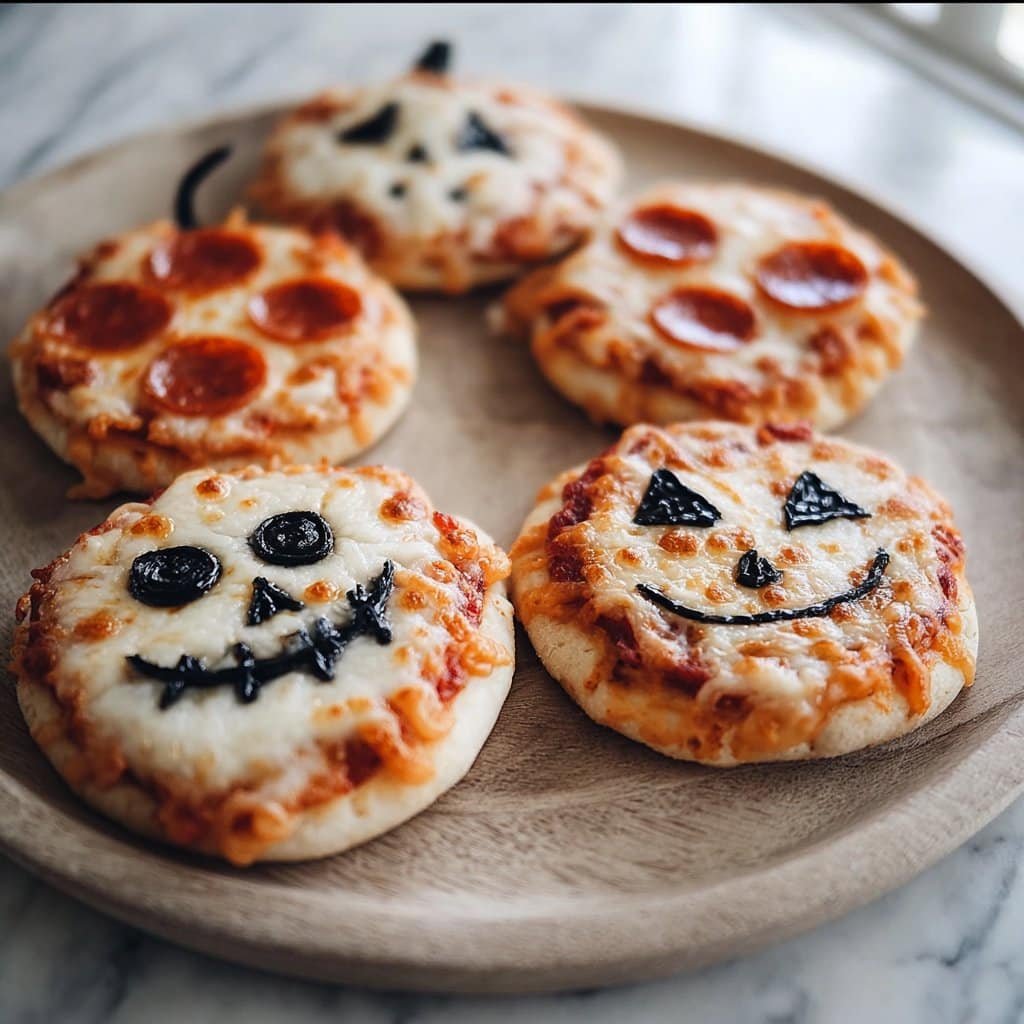
- Scatter with cheese. Any which way. If you want ghosts, cut some cheese slices into blobby shapes; for mummies, lay on strips. Let the kids (big or small) help.
- Add toppings. Olive spiders, corn monster eyes, pepperoni jack-o’-lantern grins…or just whatever falls out of the fridge.
- Bake for about 12 minutes, or until the cheese is all bubbly and the edges just catch a bit of brown. Don’t worry if they look a little odd—mine always do and nobody minds.
Take a quick peek around minute 10; sometimes the cheese does a runner and rearranges itself like a modern art project. But honestly, that’s half the fun.
Notes from My (Sometimes Messy) Kitchen
- I once tried adding anchovies…let’s just say Bon Appetit seemed to have better luck than me.
- If the muffins feel a tad soggy, try double-toasting before adding toppings. But even then, a bit of “squidginess” is quite cozy, especially on a cold night.
- Sometimes I use scissors for cheese “sculpting,” but a dull butter knife works just as well (and far less threatening if small hands are helping).
The Time I Got Creative (And it Occasionally Backfired)
- Crescent dough base: Works, but expect things to get puffier than you’d imagine. Like, really puffy. Sort of like a haunted pillow.
- Pretzel twists for spooky arms: Looks cool before baking, but they usually crisp into little black twigs. Still edible.
- Sliced mushrooms as “bats”. Don’t recommend. The bats kinda look like sad umbrellas.
What You’ll Need—Or Muddle Through Without
- Baking tray (as I said, flip a casserole pan if you have to)
- Baking parchment or foil
- Small knife or scissors for cheese shapes, but I’ve even used a kid’s plastic knife. Just don’t try with a spoon. Trust me.
On Storing (But They Rarely Last)
In theory, you can pop leftovers (ha!) in a container in the fridge for up to 2 days. But, and I’m being real, they usually vanish within a day—either eaten cold standing at the fridge or microwaved for late-night snacking (I’ll admit: I think they taste better the next morning, a little chewy but still good). If you need to reheat, a quick zap or even a minute under the grill is fine.
How We Serve These (Highly Scientific Method…Not)
Honestly, we pile them onto a big platter, let people argue over who got the best monster face, and then usually end up playing a game of “who can make the weirdest pizza next?” Oh, and a side salad, if I remember. Sometimes I sprinkle them with a bit of oregano, or serve with a quick garlic yogurt dip (here’s a good basic one if you need ideas). No fancy plating. It’s chaos, in the best kind of way.
Stuff I’ve Learned (The Hard Way…)
- Once, I tried baking them all together on the same tray—don’t overlap them unless you want a melted cheese tectonic plate situation.
- I rushed the toasting step once, because I was hangry, but it made for soggy-bottomed pizzas. Next time, I just let them toast a bit slower. Actually, I find it works better if you just hang tight for those extra minutes.
- Watch those olives, they roll right off if you heap too much cheese on top—trust me, I’ve spent ages hunting rogue olives off the floor.
People Have Asked…
- “Can I freeze these?”
Probably, but honestly, I never have leftovers long enough to try! Maybe wrap ’em well and reheat in the oven so they aren’t all soggy. - “Is there a gluten-free option that’s not cardboard?”
Yep, use gluten-free bread or even potato slices instead—my mate from Cork does the latter (I thought it was bonkers, but it’s tasty). - “Do I have to use tomato sauce?”
Nah—white sauce, pesto, even just a bit of olive oil and garlic can be delish. (Though the ‘ween vibe might be a bit less, well, orangey.) - “How do you make cheese ‘ghosts’ look less sad?”
Okay, no guarantees, but using provolone slices tends to keep better shape than shredded cheese blobs. - “Can I make these ahead?”
Sure. Just hold the cheese and bake right before serving. Or embrace the fact that reheated pizza is basically a food group.
And if you get stuck, or want to get lost in pizza inspiration for a while, try King Arthur’s pizza guides—loads of ideas there. Oh, and if you end up putting Halloween candy ON the pizza, I mean…maybe don’t tell me.
Ingredients
- 6 mini pizza crusts (store-bought or homemade)
- 1 cup pizza sauce
- 1 1/2 cups shredded mozzarella cheese
- 18 slices pepperoni
- 1/2 cup black olives, sliced
- 1/2 red bell pepper, thinly sliced
- 6 small mushrooms, sliced
- 1 tablespoon olive oil
Instructions
-
1Preheat your oven to 400°F (200°C) and line a baking sheet with parchment paper.
-
2Place the mini pizza crusts on the prepared baking sheet. Brush each with a little olive oil.
-
3Spread a layer of pizza sauce over each crust, leaving a small border around the edges.
-
4Sprinkle shredded mozzarella evenly on top. Use pepperoni slices, black olives, bell pepper, and mushrooms to make fun Halloween designs like spiderwebs, mummies, or jack-o’-lantern faces.
-
5Bake for 13-15 minutes, or until the cheese is bubbly and the crusts are golden brown.
-
6Remove from the oven, let cool slightly, and serve your festive mini Halloween pizzas warm.
Approximate Information for One Serving
Nutrition Disclaimers
Number of total servings shown is approximate. Actual number of servings will depend on your preferred portion sizes.
Nutritional values shown are general guidelines and reflect information for 1 serving using the ingredients listed, not including any optional ingredients. Actual macros may vary slightly depending on specific brands and types of ingredients used.
To determine the weight of one serving, prepare the recipe as instructed. Weigh the finished recipe, then divide the weight of the finished recipe (not including the weight of the container the food is in) by the desired number of servings. Result will be the weight of one serving.
Did you make this recipe?
Please consider Pinning it!!

