So I Had a Snack Attack: Why This Crispy Fried Mac & Cheese Exists
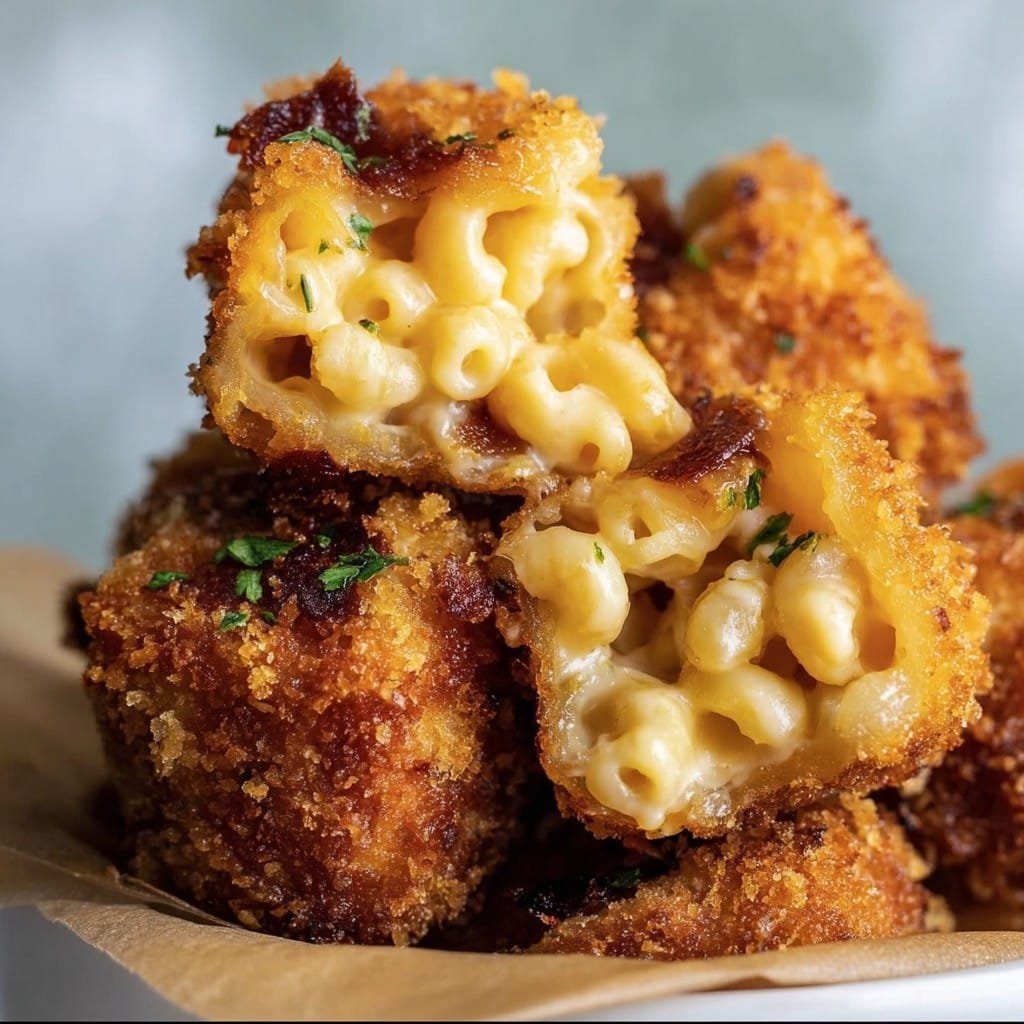
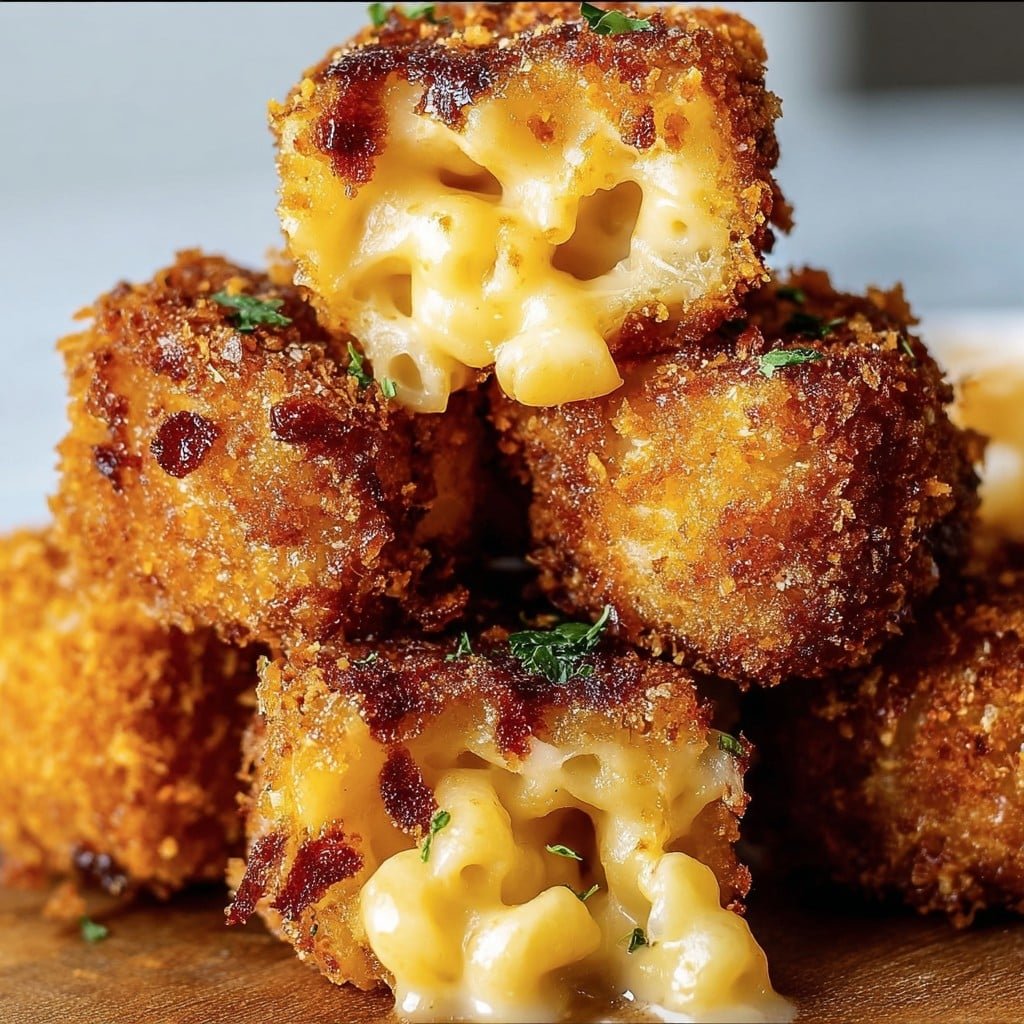
Look, I know what you’re thinking: who has time for homemade mac and cheese, let alone Crispy Fried Mac & Cheese? But it was one soggy Tuesday night, I’d made way too much mac and cheese (again) and — after shamelessly eating it cold from the fridge the next morning — decided there must be a better way. Enter: crispy, gooey, golden-brown perfection. My kids said it was like if a grilled cheese and mac & cheese had a baby, which — well, they aren’t wrong!
Truthfully, this recipe was born out of late-night cravings and the sort of boredom that has you frying things just to see what happens. I once tried deep-frying a slice of leftover pie, but that’s a story for another day (spoiler: not a triumph).
Why You’ll Totally Love This (Or, Why I Make It More Than I Should)
I make this when I want to look like the cool parent. My family goes crazy for these crispy bites because they’re cheesy inside and crunchy outside—kind of like if mozzarella sticks and mac & cheese teamed up. Oh, and I do it because eating cold mac never feels quite right, especially after you know these exist! (Once, I tried baking instead of frying to feel healthier, but let’s just say it wasn’t my proudest snack.)
Honestly, there’s something mischievous about deep-frying comfort food, and I can’t decide if it’s the childhood nostalgia or the sheer surprise-factor. Plus, they’re basically made for dipping. I still haven’t found a dipping sauce that doesn’t work here, except maybe grape jelly…don’t ask.
What You’ll Need (Substitutions, Optional Chaos Included)
- 3 cups leftover mac & cheese (homemade is ideal, but box stuff works in a pinch — Kraft diehards, I see you)
- 1 cup shredded cheese (cheddar is classic; I’ve tossed in colby-jack once and nobody complained)
- 2 large eggs (or if you’re out, mix 1 tbsp mayo with a splash of milk — grandma’s workaround, don’t knock it)
- 1/2 cup all-purpose flour
- 1 1/2 cups panko breadcrumbs (regular ones get the job done, but the crunch isn’t as wild)
- Oil for frying (vegetable or canola — honestly, any neutral oil is fine. I used sunflower oil once. Worked!)
- Salt & pepper to taste
- Optional: Hot sauce, chopped chives, or a pinch of paprika (for a bit of razzle-dazzle)
How To Make Crispy Fried Mac & Cheese (Don’t Stress The Mess)
- Get your mac & cheese cold — this bit’s key. If it’s leftover and cold, you’re set. If it’s freshly made, stick it in the fridge for 2 hours or so (or freezer if you’re in a rush, just don’t forget it in there. Ask me how I know…)
- Shape it up: Scoop generous spoonfuls (2 tablespoons or a solid golf ball if you prefer sports analogies) and roll into balls or flatten into nuggets. I always end up with a rogue odd-shaped one I call the “chef’s sample.”
- Chill again: Not strictly necessary, but I swear by popping the shaped bites back in the fridge for 30 mins. Helps ’em keep their shape. (Or skip if you’re starving. No judgment, buddy.)
- Prep the breading lineup. Set up three bowls: one with flour, next with beaten eggs (add a dash of hot sauce if you’re feeling daring), and the last with breadcrumbs.
- Roll mac balls in flour; tap off excess.
- Dunk in egg. (This is where I usually taste a bit of leftover mac. Call it QC.)
- Coat in panko — press gently so they really cling on.
- Heat the oil in a deep pot or skillet to 350°F (I don’t always use a thermometer — a breadcrumb sizzles = it’s ready).
- Fry in batches for 2-3 minutes each, turning so every side gets golden. Don’t crowd the pan! Fish out with a slotted spoon, put ’em on a paper towel. Try not to eat them all right away.
- Season & serve hot. I toss on a pinch more salt, maybe a little extra cheese if I’m feeling over the top.
Lil’ Notes from Totally Normal Attempts
- If your mac mixture is too soft, add a bit more cheese or even a spoonful of breadcrumbs. Don’t fret if it’s sticky — mine always is at first.
- Once tried air-frying. Not bad, but really not as indulgent — fried is king here. Oven-baked? Eh. It’s fine if you’re desperate.
- Honestly, the smaller you make ’em the crispier — but the bigger ones are cheesier. I guess size does matter, but only for snacking.
What I’ve Experimented With & Some Oops Moments
- If you have leftover bacon or jalapeños, toss ’em in before shaping the mac & cheese. Makes it fancy (and surprisingly grown-up).
- Tried adding a scoop of Greek yogurt once, but honestly, it just made it weirdly tangy. Wouldn’t repeat.
- Truffle oil on top? Tastes great, but then my kids wouldn’t eat it. Choose your audience!
What If You Don’t Have All The Stuff?
Honestly, you can get by with just a regular frying pan, though a heavy-bottomed pot helps control oil splatter. Lacking a thermometer? Just flick in a breadcrumb to see if it sizzles. I once used salad tongs for frying — did I get splashed? Absolutely, but you live and learn.
How To Store (If You Somehow Have Leftovers)
Pop these nuggets in an airtight container in the fridge for up to 3 days, but — full confession — we’ve never had any last more than 24 hours. To reheat, either oven or air fryer works. Microwave? Eh, does the job, but they lose their crisp. Sometimes I just eat ’em cold, but that’s on me.
How I Love To Serve ‘Em (And Dips: The Secret Weapon)
We always have these with a side of spicy ketchup or that chipotle mayo from Serious Eats (fancy, but easy). Ideal for movie nights, game days, or those times you want to dazzle brunch guests with something other than avocado toast. Bonus: pair ’em with cold pickles or crunchy coleslaw — woah buddy, that’s a meal.
Pro Tips, Or: Stuff I’ve Messed Up
- I once tried to fry too many at once and got a batch stuck together — don’t do what I did. Crowding = cold, greasy bites!
- Actually, I find it works better if you keep the oil hot between batches. If it cools off, the breading goes pale and…womp womp.
- Don’t rush the chilling step. If you want the mac cheese to stay inside, give it time to firm up. Impatience is the enemy of crisp here.
Real-Life Questions & Answers (Or, Maybe Just Excuses to Make More)
Can I make this gluten-free?
Actually, yes! Use gluten-free pasta, breadcrumbs, and flour. Just check that the cheese sauce is GF too, because some brands sneak in flour (annoying, right?).
What cheese works best?
I usually reach for block cheddar, but it’s honestly pretty forgiving. Gouda or Swiss? Game on! Anything that’s melty. I wouldn’t do blue cheese, unless you’re into that sort of thing.
How do you keep ’em from falling apart in the oil?
Chill those babies. Also, don’t jostle them too soon; let a crust form first. And don’t freak out if you lose a couple bits to the oil — happens to the best of us.
Any quick dipping sauce ideas?
Oh yes! Ranch, BBQ, spicy honey — or just classic ketchup. (I sneak a dollop of sriracha into mine.)
Can you freeze these?
For sure. Assemble and freeze before frying. Then fry from frozen, just add a minute or two to the time. Frozen ones *do* splatter more though, so watch your arms.
Totally Unnecessary But Fun Digression
Do you ever get the urge to snack on something while standing at the fridge, only to forget what you were looking for halfway through? I do this all the time, and that, friends, is actually how this recipe was born. Sometimes a little absent-mindedness leads to the best discoveries.
Oh, and if you want to get really wild, there’s a brilliant video from Binging with Babish where he jazzes up fried mac & cheese like a pro. Worth a watch if you have 10 minutes and a snack handy.
Ingredients
- 2 cups cooked macaroni pasta
- 1 1/2 cups shredded sharp cheddar cheese
- 1/2 cup grated Parmesan cheese
- 1/2 cup whole milk
- 2 tablespoons unsalted butter
- 1 cup all-purpose flour
- 2 large eggs, beaten
- 1 1/2 cups breadcrumbs (panko preferred)
- 1/2 teaspoon black pepper
- 1/2 teaspoon salt
- Vegetable oil for frying
Instructions
-
1In a saucepan over medium heat, melt butter, then add milk, cheddar cheese, and Parmesan cheese. Stir until the cheese is melted and the sauce is smooth.
-
2Add cooked macaroni pasta to the cheese sauce and mix well. Season with salt and black pepper.
-
3Transfer the mac and cheese mixture to a baking dish and refrigerate for at least 2 hours or until firm enough to shape.
-
4Scoop out portions of the chilled mac and cheese and shape into balls or squares. Dredge each piece in flour, dip in beaten eggs, and coat with breadcrumbs.
-
5Heat vegetable oil in a deep skillet or fryer to 350°F (175°C). Fry the coated mac and cheese bites in batches until golden brown and crispy, about 2-3 minutes per batch.
-
6Drain on paper towels and serve hot.
Approximate Information for One Serving
Nutrition Disclaimers
Number of total servings shown is approximate. Actual number of servings will depend on your preferred portion sizes.
Nutritional values shown are general guidelines and reflect information for 1 serving using the ingredients listed, not including any optional ingredients. Actual macros may vary slightly depending on specific brands and types of ingredients used.
To determine the weight of one serving, prepare the recipe as instructed. Weigh the finished recipe, then divide the weight of the finished recipe (not including the weight of the container the food is in) by the desired number of servings. Result will be the weight of one serving.
Did you make this recipe?
Please consider Pinning it!!

