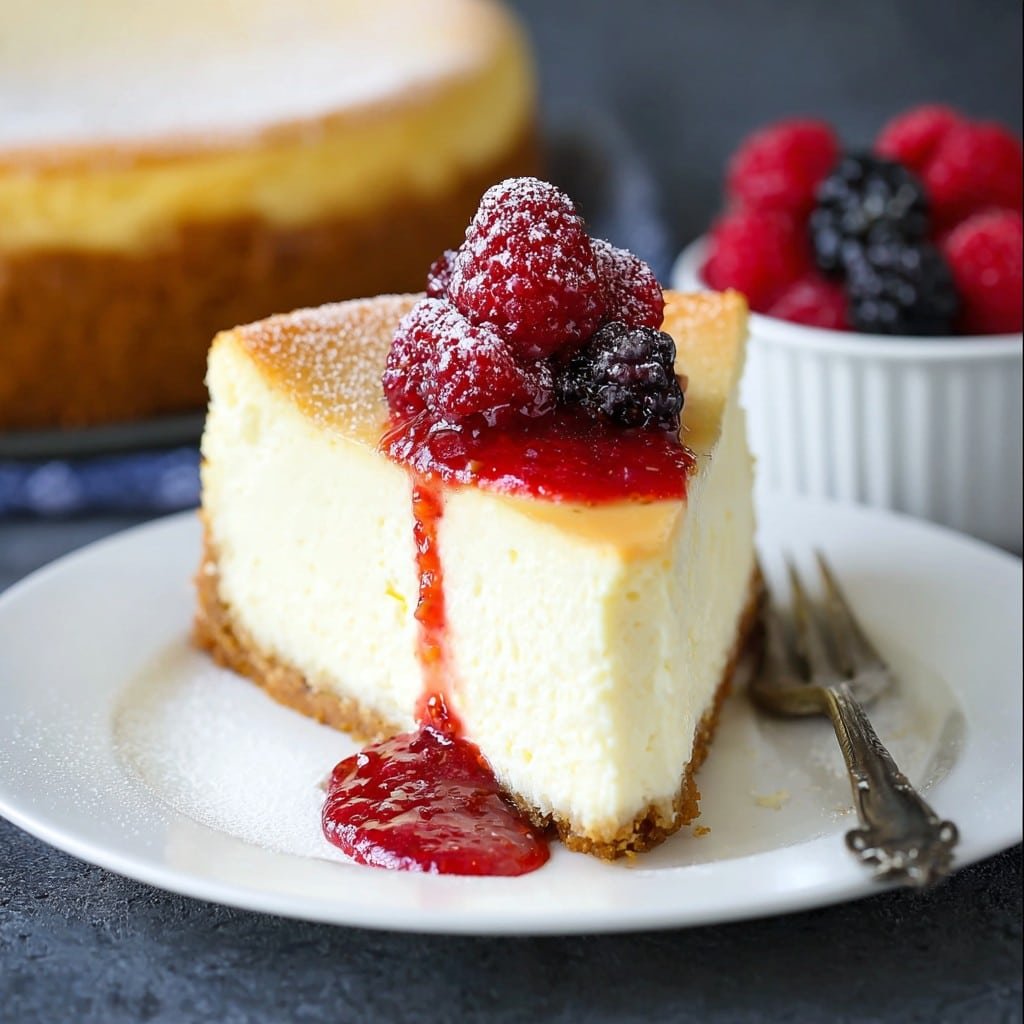
So, Cheesecake… Let Me Tell You Why I Love Making It
All right, imagine this: It’s Sunday afternoon, the kitchen’s a bit of a mess (let’s face it, mine always is during baking experiments), and I’m trying to impress my dad with something that tastes like those fancy slices we used to overpay for in diners. I mean, it’s cheesecake! Only, the first time I tried to make one? Major crack right in the middle. But hey, that didn’t stop us from devouring it with big grins. Honestly, now cheesecake is my go-to for family birthdays, and I’ve probably eaten more of it for breakfast than I should admit. But life’s short, right?
Why You’ll Probably End Up Loving This, Too
I make this when anything big is going on—holidays, my aunt dropping by (she calls ahead to “make sure there will be cheesecake”, classic), or when it’s just been that sort of week. My family goes a bit bonkers for this because it’s rich, creamy, and just slightly tangy. (Oh, and it tastes kinda better the next day, if you can wait that long!) One frustration: I used to panic over the water bath step, like it was some kind of mysterious alchemy, but turns out, it’s not THAT scary. If you’ve ever wrestled a jammed springform pan, I feel your pain. Actually, save yourself the headache—line the bottom, you’ll thank me later.
Here’s What You’ll Need (Substitutions Totally Welcome)
- 1 and 1/2 cups (about 180g) graham cracker crumbs (sometimes I use digestive biscuits because I forget to buy grahams—works fine, just a different texture)
- 2 tbsp sugar (or brown sugar if that’s all you’ve got)
- 1/2 cup (115g) melted unsalted butter (honestly, sometimes I eyeball it; it won’t break the recipe)
- Four 8-oz (225g) blocks full-fat cream cheese—let it soften, room temp is best (my gran swore by the Philly brand, but store brand is totally okay)
- 1 cup (200g) granulated sugar
- 1 cup (240ml) sour cream (greek yogurt works in a pinch, but it’s tangier)
- 1 tsp pure vanilla extract (if you like a bit more, go wild—it’s your cheesecake)
- 3 large eggs (I’ve used medium, just add an extra yolk if you’re feeling precise)
- Pinch of salt
The Directions—With a Few Detours
- Prep Your Pan: Grab a 9-inch springform pan. Line the bottom with parchment (trust me, the first time I didn’t and spent an hour scraping cheesecake off), then wrap the outside with foil up the sides to help with that water bath situation.
- Crust First: Mix the cracker crumbs, sugar, and melted butter until it looks like wet sand. Press it into the bottom of your pan (I use the bottom of a glass, but bare hands work—there’s no baking police). Bake at 350F (175C) for about 10 minutes, just until it barely browns.
- Cheese Filling—This Part’s Kinda Fun: Beat the cream cheese until it goes super creamy and fluffy—no lumps if you can help it. (This is where I usually sneak a nibble.) Add sugar and salt, blend well. Next, stir in the sour cream and vanilla. Add the eggs one at a time. If it looks a bit runny, don’t stress, it always thickens when baked.
- Ready for the Water Bath Drama: Pour your filling over the crust, smooth it with a spatula (or, okay, a spoon). Set the pan into a bigger roasting pan, then pour hot water in till it comes about halfway up the sides—don’t spill it, but if you do, just laugh and mop up.
- Bake it Low and Slow: Slide into the oven—bake at 325F (163C) for about 60 to 75 minutes. If the middle jiggles a bit but the sides are set, that’s your cue. Shut off the oven, crack the door (just wedge a wooden spoon), and let it hang out for another hour—makes for less cracking, in my experience.
- Chill, Please: After it cools, jam it in the fridge for at least 4 hours. Overnight is best, but who are we kidding—I only manage that when I make it ahead. That weird plastic smell? It airs out. Don’t worry.
Notes From My Personal Cheesecake Saga
- Try not to overbeat after adding the eggs, or you end up with air pockets. I learned that after my cheesecake looked like an old honeycomb—still tasty though!
- If you get some surface cracks, dollop sweetened sour cream on top as a coverup. It’s like edible spackle.
- The first slice never comes out clean, and I’ve made peace with it. The second slice is where you shine.
- Oh, and if you ever drop a graham cracker on the floor, give it a quick rinse and keep going. Or don’t. I won’t judge either, ha.
If You Want to Mix It Up
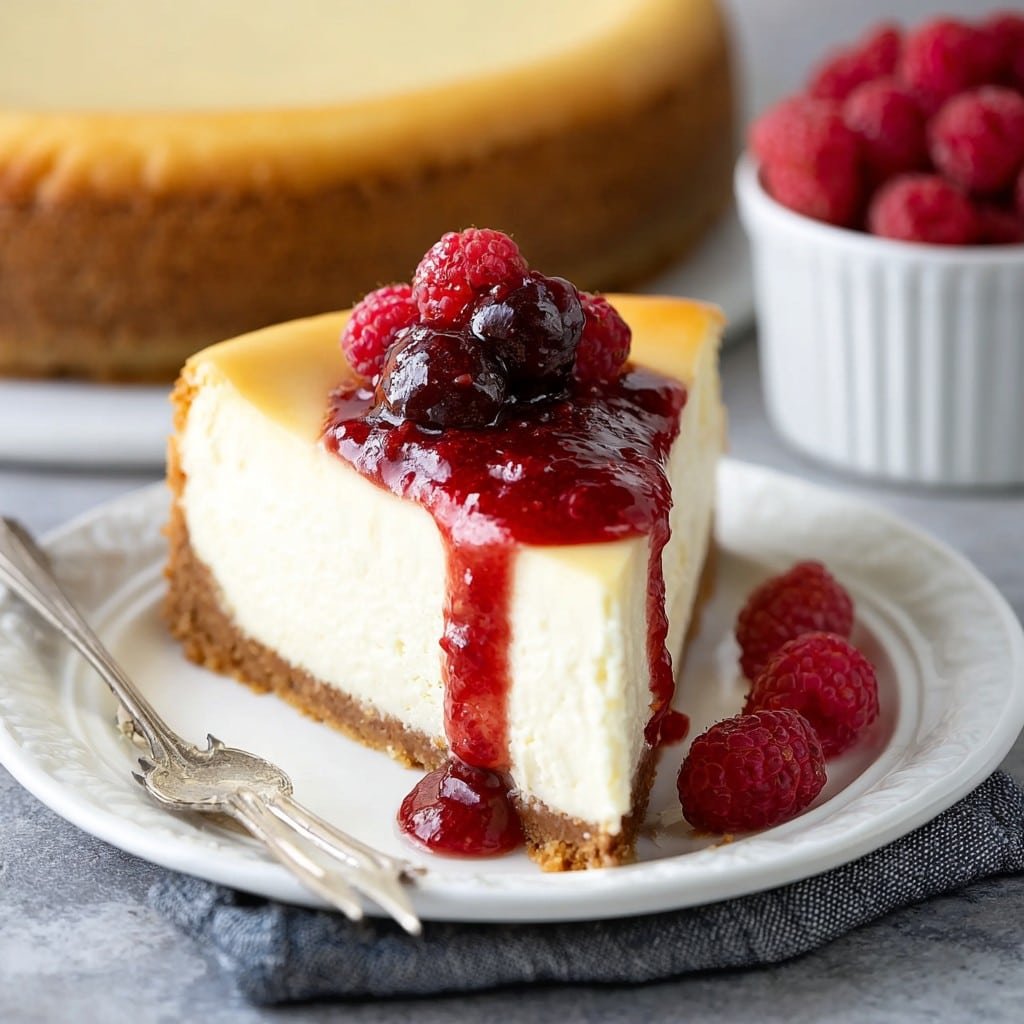
- Once I swirled in some raspberry puree—looked spectacular, tasted even better.
- I tried chocolate chips in the mix once, but honestly, they all dropped to the bottom (I never figured out how to make that work… tips, anyone?)
- Biscoff cookies make a wild crust if you’re feeling a bit fancy.
- Little bit of lemon zest in the batter? Makes it taste like pure sunshine, but not everyone in my house is a fan. To each their own.
About the Gear: What If You Don’t Have A Springform?
Okay, so every cheesecake recipe makes it sound like the springform pan is as vital as, say, oxygen. But—on second thought—you can use a deep pie dish or even a regular cake pan with a parchment sling. Just let it cool before trying to get it out, otherwise, it’s carnage.
How To Store It (Not That You’ll Need This Info…)
Wrap leftovers (if there’s any) in plastic or stash in an airtight box. It keeps in the fridge for up to a week, but honestly, in my house it never survives that long! Freezer works, but the texture goes a bit crumbly—not a dealbreaker.
Ideas for Serving—I’m a Purist, Sort Of
I serve it straight up, maybe with some fresh strawberries or a big whack of whipped cream. My nephew dunks his slice in chocolate syrup, which I used to call sacrilege, but actually? Not bad at all. Sometimes we sit on the porch with coffee and just eat it plain—you don’t need all the bells and whistles.
Pro Tips (That I Learned the Hard Way)
- Never, ever try to un-mold while it’s warm. I rushed once, and the whole thing slumped like a sad hat.
- Actually, I find letting it chill overnight gives you cleaner slices. There’s a reason diner cheesecakes are always cold.
- Don’t skip the lining if you’re worried about sticking. Trust me, chiseling bits off the bottom is no fun, especially when guests are watching.
- Towel off any water on top after the bath. Those weird water spots are almost impossible to smooth over, ask me how I know…
Questions I Actually Get Asked
- Can I make it without a water bath? Yeah, you could, but it’ll probably crack—though a cracked cheesecake still tastes good in my book. Sometimes I skip it when feeling rebellious.
- Is low-fat cream cheese okay? It’s…fine, but it goes a bit grainy. If full-fat makes you nervous, try half and half. Still delish.
- How do you know when it’s done? Give it a gentle shake. Jiggly middle, firmer sides. Or poke it gently—should barely stick. If in doubt, turn off the oven and let it rest longer.
- Do I have to use graham crackers? Nope! Any digestive-style biscuit works. I heard someone once used gingersnaps; pretty wild.
- Is this recipe freezer-friendly? Sorta—wrap slices tight and thaw overnight in the fridge. Texture gets a tad less creamy, but no biggie.
Feel like diving deeper? For more step-by-step visuals (seriously, their photo guides are a lifesaver), check out Sally’s Baking Addiction or if you want crust ideas that are a bit outside-the-box, King Arthur Baking has loads of tips.
Oh! Almost forgot—I once tried to bake this with the radio so loud I miscounted the eggs. It still somehow worked out (tasted more like a souffle), but it goes to show: cheesecake is actually pretty forgiving!
Ingredients
- 1 1/2 cups graham cracker crumbs
- 1/4 cup granulated sugar
- 1/2 cup unsalted butter, melted
- 32 oz cream cheese, softened
- 1 cup granulated sugar
- 1 cup sour cream
- 4 large eggs
- 2 teaspoons pure vanilla extract
- 1/4 cup all-purpose flour
Instructions
-
1Preheat oven to 325°F (163°C). Grease a 9-inch springform pan.
-
2In a medium bowl, combine graham cracker crumbs, 1/4 cup sugar, and melted butter. Press mixture firmly into the bottom of the prepared pan to form the crust. Bake for 10 minutes, then set aside.
-
3In a large mixing bowl, beat the cream cheese until smooth. Add 1 cup sugar and beat until light and fluffy. Mix in the sour cream, vanilla extract, and flour.
-
4Add eggs, one at a time, mixing on low speed until just incorporated. Do not overmix.
-
5Pour the filling over the cooled crust. Place the pan on a baking sheet and bake for 60 minutes, or until the center is almost set.
-
6Turn off the oven and let the cheesecake cool in the oven for 1 hour with the door slightly open. Remove, cool to room temperature, then refrigerate for at least 4 hours before serving.
Approximate Information for One Serving
Nutrition Disclaimers
Number of total servings shown is approximate. Actual number of servings will depend on your preferred portion sizes.
Nutritional values shown are general guidelines and reflect information for 1 serving using the ingredients listed, not including any optional ingredients. Actual macros may vary slightly depending on specific brands and types of ingredients used.
To determine the weight of one serving, prepare the recipe as instructed. Weigh the finished recipe, then divide the weight of the finished recipe (not including the weight of the container the food is in) by the desired number of servings. Result will be the weight of one serving.
Did you make this recipe?
Please consider Pinning it!!

