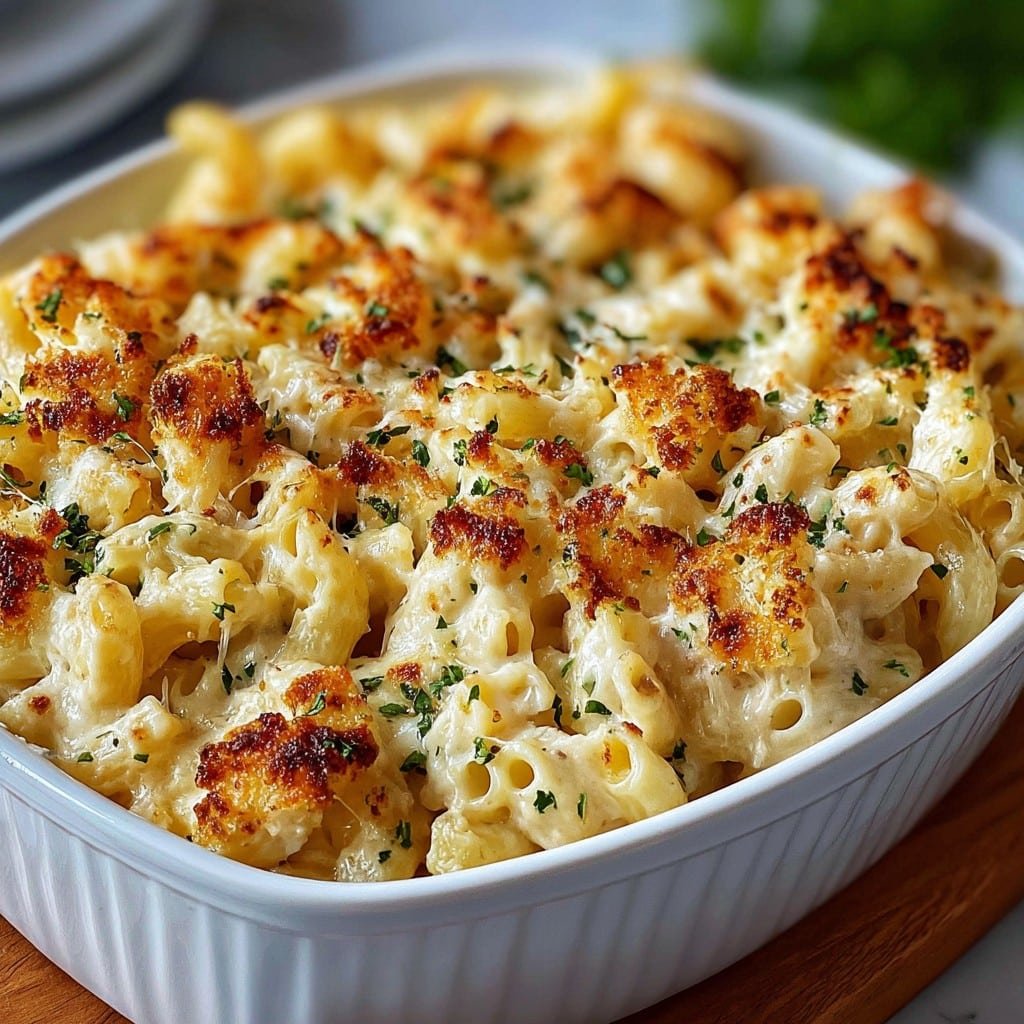
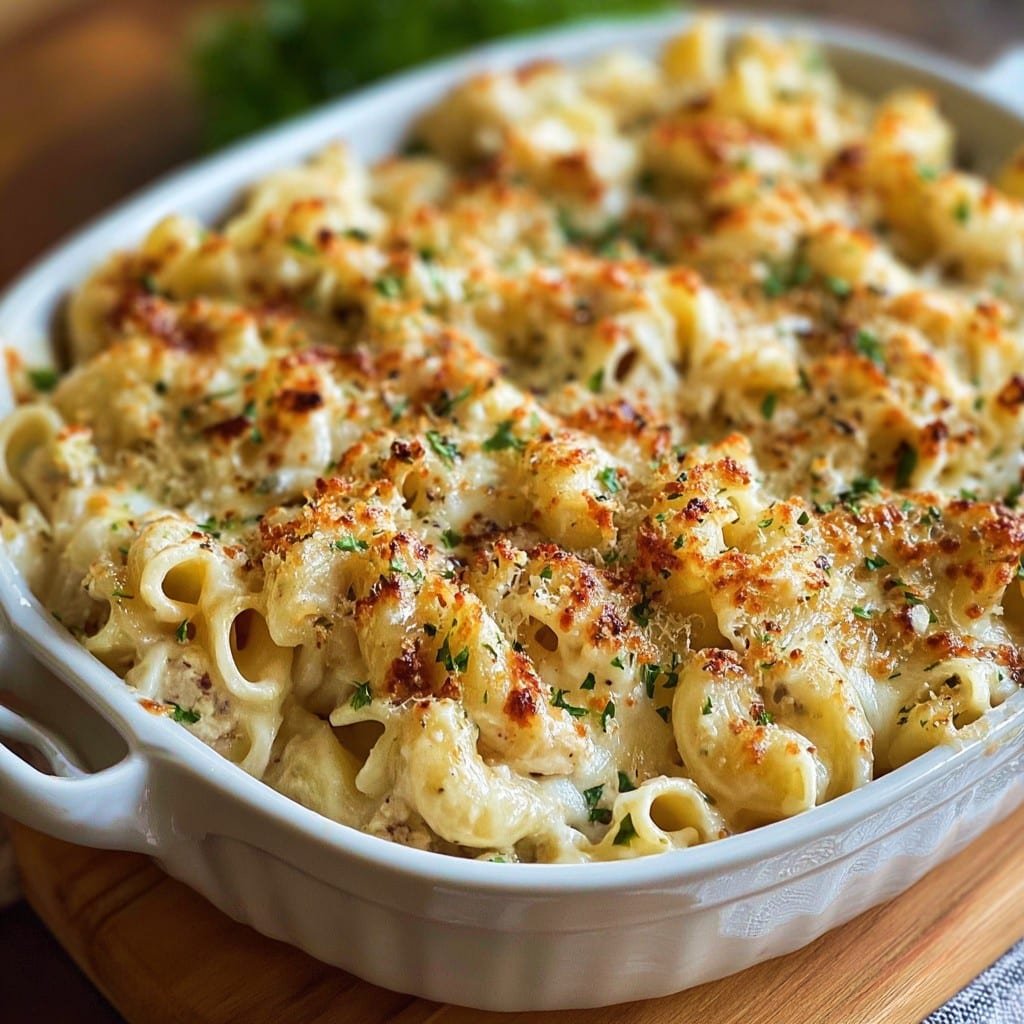
Alright, let me tell you—if there’s one dish I can pull together on a rainy Tuesday (you know the type), it’s this creamy garlic parmesan pasta bake. First time I made it, I got distracted by a cat video, nearly burnt the roux, but somehow dinner turned out so well my nephew actually thanked me—which literally never happens. Ever since, this pasta bake pops up on our dinner table whenever I want something cheesy, easy, and honestly, a little dramatic when it bubbles away in the oven.
Why You’ll Love Making (and Eating) This
I whip this out when the day’s felt a bit, well, soggy. My family goes bananas for it because, let’s be real, there are few things as forgiving (and gooey) as baked pasta blanketed in creamy parmesan sauce. Sometimes I’ll grumble about the dishes, but watching everyone basically battle for the crispy cheesy corner bits—worth it. Plus, it’s my secret weapon if I’ve forgotten to go shopping; nobody ever asks if the chicken’s missing, because they’re too busy scarfing noodles.
Stuff You’ll Need (Substitutions Totally Allowed)
- 400g pasta (I usually grab penne or rigatoni, but spiral ones make it more fun—honestly, anything not too tiny works)
- 3–4 cloves garlic, minced (but I’ve cheated with jarred pre-chopped garlic; don’t @ me)
- 1/4 cup unsalted butter (salted is fine, just go easy on extra salt later)
- 1/4 cup flour (plain old all-purpose; whole wheat is okay, but grandma always said it made things grainy)
- 2.5 cups milk (I swap half for cream if I’m feeling fancy, or use oat milk for my vegan-ish cousin)
- 1/2 cup cream cheese, softened (sometimes I skip this and add a splash more milk—no one notices)
- 1.5 cups grated parmesan (got a wedge? Use it. Pre-grated is fine too, despite what purists say.)
- 1–2 cups mozzarella, shredded (or that “pizza cheese” in the supermarket bag—life’s short)
- Big pinch of cracked black pepper
- 1 tsp dried Italian herbs (sometimes I’m wild and toss in fresh parsley or basil instead; totally optional)
- Salt (to taste; sometimes not needed at all)
Alright, Here’s How You’ll Actually Make It
- Boil that pasta. Get a big pot, lots of salt in the water, and cook the pasta till it’s just a smidge under al dente (it finishes in the oven). Drain, but save a mug of the water. Trust me.
- Make the creamy magic. In a big saucepan, melt butter over medium heat. Add garlic; sizzle it for a bit, but don’t let it brown (I always get distracted and let it go a little too far—still tasty). Whisk in flour. If it’s clumpy, don’t panic; keep whisking—looks weird now, totally fine later.
- Slowly add milk, then cream cheese. (I go slowly to avoid lumps, but honestly, if you get a few, they melt out in the oven.) Stir like your dinner depends on it.
- Take it off heat; dump in parmesan. Stir until it goes all gooey. Add black pepper and Italian herbs.
- Mix it all up. Toss in pasta. If it looks too thick, splash in that saved pasta water. (This is usually where I sneak a taste. For, you know, science.)
- Pour into a big baking dish—mine’s ancient and slightly chipped. Sprinkle mozzarella on top. Go heavy if you’re a cheese goblin like me.
- Bake! 200°C (about 400°F) for 20–25 minutes, till it’s all bubbly and golden on top. If you like it extra crispy, broil/grill for a minute. But don’t wander off; I’ve learnt the hard way how fast it can go from gold to charcoal.
- Let it cool just a bit (or risk burning the roof of your mouth—don’t ask).
Real-Life Notes (from Actual Kitchen Chaos)
- If you dump cold milk into the roux, you’ll wind up with lumps—the annoying kind. Actually, I find it works better if the milk’s a bit warm, but who has time? Microwave for 20 secs, done.
- Some days I run out of parmesan and swap in pecorino or even cheddar; it changes the flavor, but doesn’t ruin it.
- The crusty bits are always the best part, so don’t skip the cheese on top—seriously.
Experiments I’ve Tried (And One Epic Fail)
- Did it with gluten-free pasta once—worked way better than expected. So go for it if you need!
- Added cooked chicken for extra protein. Good, but honestly, it sometimes dries out, so shred it small or toss in at the very end.
- Once tried to make it with almond milk and vegan cheese for a friend; not my best work. He swore it was “fine” but I know the look of polite disappointment.
You Don’t Need Fancy Gear (But This Helps)
- Baking dish—biggish, anything oven-proof, even a deep roasting tin
- Saucepan for the cream stuff
- Colander, unless you like chasing noodles round the sink
- A regular whisk is good, but a fork will do if you’re desperate (I’ve done it… it’s slightly messier, but whatever works)
How to Store (If Leftovers Even Happen)
Pop it in a tight-lidded dish in the fridge; it’ll hang around 2–3 days, reheat nicely in the microwave or oven. In my house? It rarely makes it past breakfast. Cold pasta for breakfast is underrated, just saying.
If You’re Wondering How to Serve (Or You Just Want to Show Off)
I usually scoop big spoonfuls into bowls and top with a handful of fresh rocket or chopped parsley—looks posh with about 2 more minutes effort. If it’s a big deal (like, the in-laws are here), I serve with garlic bread and pretend I planned it all week. Sometimes I pair it with a simple salad like this one that I found online—works a treat.
Pro Tips (Things I’ve Messed Up Before)
- Don’t rush the sauce. One time I cranked the heat and wound up with curdled, sad cheese. Just… low and slow is your friend.
- If you forget to undercook the pasta, it gets mushy after baking (happens about half the time for me, not gonna lie, still eats fine though).
- Take a breather before digging in so you don’t end up with a burnt mouth. Voice of experience, here.
FAQ—People Actually Ask Me This
- Can I freeze it? Yeah, but honest? Thaws a bit grainy sometimes. Still tasty, just don’t expect perfection.
- Can I add veggies? Absolutely. Broccoli or peas are my go-tos. Mushrooms also work (unless you’re anti-fungi like my brother-in-law).
- What’s the best cheese? I lean hard into parmesan, but grana padano or even a mature cheddar does the trick. Don’t overthink it.
- Does it reheat well? Yup. Add a splash of milk before microwaving, it’ll stay creamy. Or eat it cold, midnight-snack style, I won’t judge.
- Can I make it in advance? For sure. Actually, I think it tastes better the next day—flavors settle down and mingle. See this link for more make-ahead pasta ideas.
- Is fresh parmesan worth it? Mmm, probably, but I usually just grab what I’ve got. If you’re feeling flush, go for it—no wrong answers.
On a totally unrelated note, have you ever tried making your own garlic bread? I did, once, and it set off the smoke alarm. I stick to store-bought now—sometimes survival is the real win. Anyway, good luck, and let me know if you tweak this recipe; always fun to see what others come up with (and maybe borrow the idea myself next time).
Ingredients
- 12 oz penne pasta
- 2 tablespoons unsalted butter
- 4 garlic cloves, minced
- 2 cups heavy cream
- 1 cup grated Parmesan cheese
- 1 cup shredded mozzarella cheese
- 1/2 teaspoon salt
- 1/4 teaspoon ground black pepper
- 2 tablespoons chopped parsley, for garnish
Instructions
-
1Preheat oven to 375°F (190°C). Cook the penne pasta according to package instructions; drain and set aside.
-
2In a large skillet over medium heat, melt the butter and sauté the minced garlic until fragrant, about 1 minute.
-
3Stir in the heavy cream and bring to a gentle simmer. Add Parmesan cheese, salt, and pepper, whisking until the sauce thickens.
-
4Add the cooked pasta to the skillet, tossing to coat in the creamy sauce. Stir in half of the mozzarella cheese.
-
5Transfer the pasta mixture to a baking dish. Sprinkle the remaining mozzarella cheese on top and bake for 20-25 minutes, until golden and bubbly.
-
6Remove from oven, garnish with chopped parsley, and serve hot.
Approximate Information for One Serving
Nutrition Disclaimers
Number of total servings shown is approximate. Actual number of servings will depend on your preferred portion sizes.
Nutritional values shown are general guidelines and reflect information for 1 serving using the ingredients listed, not including any optional ingredients. Actual macros may vary slightly depending on specific brands and types of ingredients used.
To determine the weight of one serving, prepare the recipe as instructed. Weigh the finished recipe, then divide the weight of the finished recipe (not including the weight of the container the food is in) by the desired number of servings. Result will be the weight of one serving.
Did you make this recipe?
Please consider Pinning it!!

