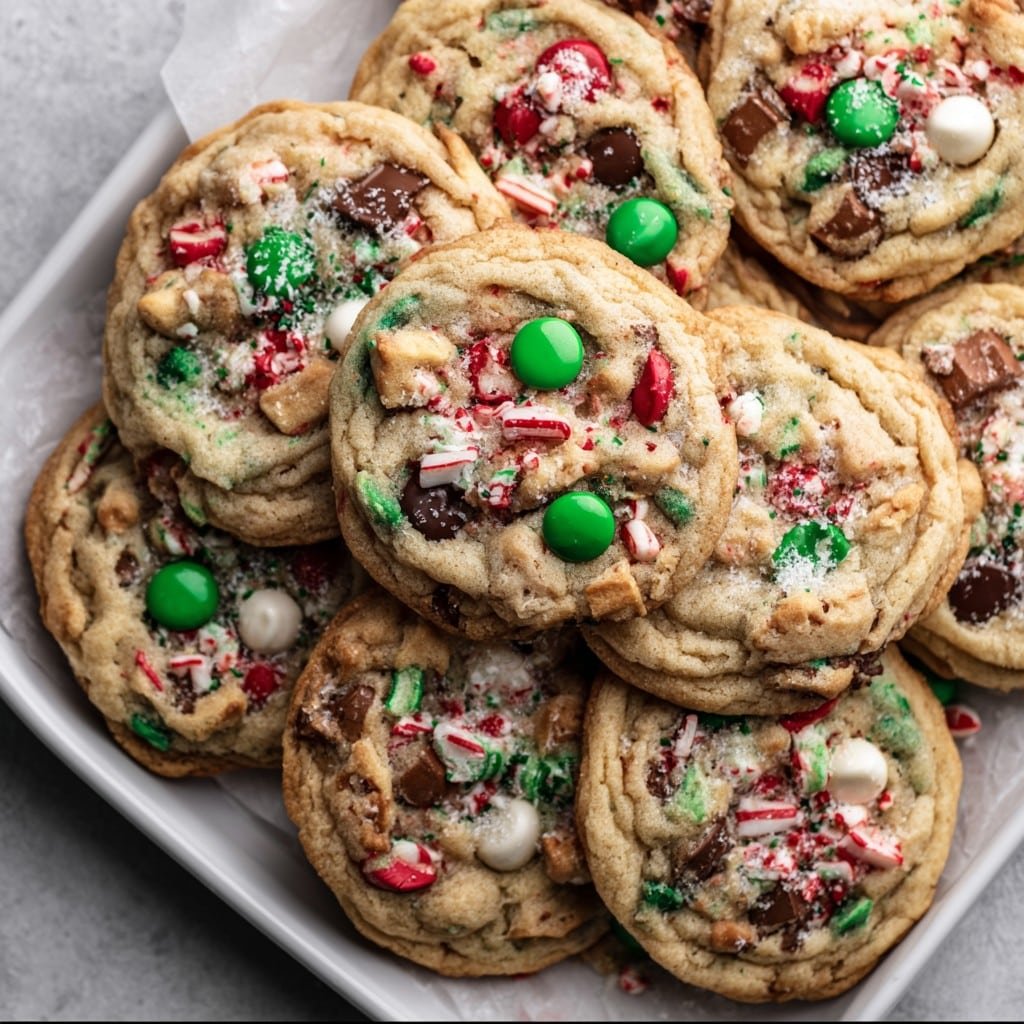
Alright, Let Me Tell You About These Cookies…
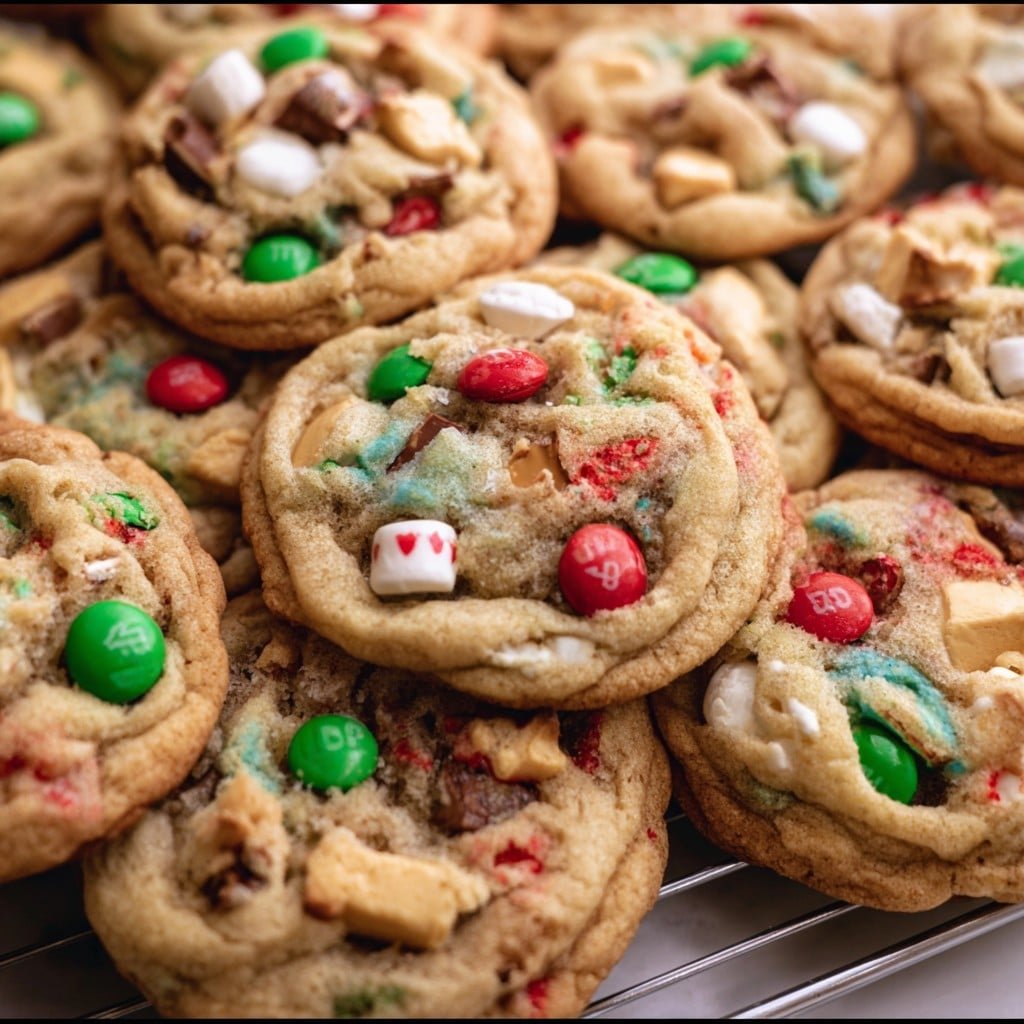
If you’re after a super serious, stiff-collared recipe, you might want to look elsewhere. These Christmas Kitchen Sink Cookies are the baking equivalent of a festive family gathering: a little wild, never quite the same twice, but, honestly, unforgettable every single time. I first made these when my friend’s kids were visiting and honestly, chaos reigned supreme in my kitchen (sprinkles everywhere, I think I found one in my shoe weeks later). But the cookies sort of brought us together in that messy, sugar-dusted way only homemade treats can. And, maybe slightly embarrassingly, I’ve been making them pretty much every Christmas since. They remind me not just of mince pies and mulled wine, but of laughing so hard you nearly drop your mixing bowl. You know that feeling?
Why You’ll Probably Love These (I Sure Do)
I drag out this recipe when I’ve got a pantry full of odds and ends and absolutely no shame about shoving peanut butter cups next to dried cranberries. My family goes wild for these (especially my nephew, who claims eating two at once counts as a meal). And hey, if your sugar gets a bit clumpy or you accidentally drop in too many pretzels, join the club—it all sorts itself out in the oven, I’ve found. Once, I thought I’d ruined the whole batch but turns out, everyone just likes more chocolate anyway.
What You Need (and a Few Things You Can Wing)
- 2 1/4 cups (about 280g) all-purpose flour (strong bread flour in a pinch makes crispier cookies, but whatever you’ve got)
- 1 tsp baking soda
- 1/2 tsp salt (or just sorta crumble a big pinch—I’m not the salt police)
- 1 cup (225g) unsalted butter, melted & cooled (Grandad swore by Kerrygold, but let’s be real, store brand works fine)
- 1 1/4 cups packed brown sugar (golden, dark, whatever sits in the jar)
- 1/2 cup white sugar (sometimes I just toss in what looks about right—don’t be shy)
- 2 large eggs (no, medium eggs won’t ruin it, promise)
- 2 tsp vanilla extract (once used maple syrup when I was out—pretty good, actually)
- 2 cups semi-sweet chocolate chips (or random chocolate bars, chopped up—my emergency move)
- 1 cup mini pretzels, roughly broken (big twisty ones or sticks both work, don’t stress)
- 1/2 cup red & green M&Ms—or smarties, or heck, raisins if you’re feeling healthy(ish)
- 3/4 cup roasted peanuts or pecans (walnuts get bitter, I think, but you do you)
- 1/2 cup toasted coconut flakes (optional, grandma would be clutching her pearls, but I love it)
- 1/2 cup toffee bits or crushed up candy canes (yep, whatever’s rattling around the cupboard)
How I Bash Them Together (Sometimes with Chaos)
- Preheat your oven to 350°F (180°C). I always forget this and end up waiting, tapping my foot. Line a couple cookie sheets with parchment (or just grease ’em, no biggie).
- Mix the dry stuff. Whisk the flour, baking soda, and salt in a big bowl. If lumps show up, smash them with a spoon—works fine.
- Wet ingredients party. In another bowl, beat the butter and both sugars till they’re like wet sand. Stir in eggs and vanilla. Sometimes my arm gets tired, so I just swap hands and carry on. Sweaty work, this baking business.
- Join the bowls. Dump the dry in with the wet. Stir just till combined (a few flour streaks left is okay—overmixing = dry cookies and tears).
- Pile in the mix-ins. Chocolate, pretzels, M&Ms, peanuts, coconut, toffee—dump it all in. This is where I sneak a chunk or two, ’cause quality control’s important. If it looks like too much stuff and not enough dough, that’s right. It’ll work out.
- Drop dollops. Scooping golf-ball sized blobs onto your sheet is perfect. I use a cookie scoop, but a couple of spoons work just fine (or your hands, if you don’t mind a bit of mess—wash ’em first though, obviously).
- Bake. Shove trays in for 10-12 minutes, until just brown at the edges and kind of puffy in the middle. They flatten as they cool. And if you start poking at them when they’re hot, they fall apart everywhere (ask me how I know). Let them cool on the sheet for 5 minutes, then finish on a rack. Or straight into your mouth. No one’s judging.
The Messy Notes I’ve Learned Over Time
- The dough’s pretty forgiving—if it’s too wet, sprinkle in a bit more flour. And if it’s dry, splash in a bit of milk (just a tablespoon or so).
- Sometimes I chill the dough for an hour if I remember; helps with thickness, but honestly, impatience usually wins.
- Once tried baking at a lower temp to get chewier cookies, but ended up with something more like cake. Stick with 350°F.
- If you want to really lean into the Christmas spirit, press a few extra candies on top before baking. Nice touch for photos, if you’re that way inclined.
Some Wild (and Some Regrettable) Variations
- Swapped the peanuts for chopped pistachios one year—looked rather snazzy, tasted minty (not sure why, must’ve been the leftover toothpaste flavor in my mouth? Kidding. Sort of.).
- Used butterscotch chips instead of chocolate. Much too sweet for me, though Aunt Jude called it ‘a revelation.’ You win some, you lose some.
- Tried adding mini marshmallows. Melty mess—maybe if you freeze them first?
- One time I ran out of eggs, threw in a banana (mashed). Cookies tasted mega banana-y, but my neighbour loved them. Go figure.
What I Use (and Make Do Without)
- Large mixing bowls (if one is in the dishwasher, I use my soup pot, shhh…)
- Hand mixer or a good wooden spoon and elbow grease
- Cookie scoop (or two big spoons, OR hands—you’ve got options here)
- Parchment paper or a nonstick tray (if nothing else, just mudge a stick of butter all over the pan)
- Wire rack is nice for cooling, but if you don’t have one, a chopping board works in a pinch
About Storing (Haha, As If These Last)
Supposedly, you can store these in an airtight tin for 5 days, or freeze the dough for a month. But honestly? In my house they barely makes it 24 hours before they’re nothing but crumbs and sticky fingers. If you do manage to have leftovers, I actually think they taste better the next day—chewier somehow. Oh, and if you’re freezing, King Arthur Baking’s guide is super handy.
This Is How I Serve ‘Em
We pile these cookies on a big tin tray right in the centre of the table, usually around the time someone puts on Fairytale of New York much too loud. Sometimes I stick a scoop of vanilla ice cream on top (not technically Christmas, but who’s checking?). Or, dunked in hot chocolate, which is so good it should probably be illegal.
Pro Tips (a.k.a. Mistakes I’ve Made So You Don’t Have To)
- Don’t try to bake two trays at once unless your oven is magic—bottom will overbrown while the top just sort of glares at you. Learned that the hard way.
- If you’re tempted to skip cooling them, don’t. I did once—they crumbled into sad little heaps. Still tasty, but good lord, what a mess.
- For gift giving, wrap these up in a cellophane bag with one of those twisty ties; looks cute and people think you’re all sorts of clever.
FAQ—Because There’s Always Questions
- Can I make these gluten-free?
Yep, just use your fave GF blend. Actually, I find it works better if you add a spoonful of ground almonds as well (accidentally did this once—happy accident). - Do I have to use all the mix-ins?
No way! Sometimes I clear out the cupboard and end up with 3 types of nuts and 2 types of dried fruit. No rules, really. - My cookies spread too much; what gives?
Might be the butter was too warm or the dough needed chilling. Or maybe your baking tray runs hot—on second thought, try chilling for 30 min next time, see if that helps. - Is it okay to halve the recipe?
For sure. But, you might regret it. Just saying. - Why do you call them “kitchen sink” cookies?
Because I chuck in everything but the kitchen sink! Har har, I know. If you come up with a better name, let me know—I’ve had the same one on my Christmas cards for a decade now. - Got a good resource for what to do with leftover candy canes?
Yep, Sally’s Baking Addiction has some wild ideas.
So, that’s about it. If you do make these, snap a photo and send it my way—unless of course your kids (or, let’s be honest, you yourself) demolish the lot before the camera’s out. Happy baking and enjoy every crumb, mate.
Ingredients
- 1 cup (226g) unsalted butter, softened
- 1 cup (200g) packed brown sugar
- 1/2 cup (100g) granulated sugar
- 2 large eggs
- 2 teaspoons vanilla extract
- 2 1/2 cups (315g) all-purpose flour
- 1 teaspoon baking soda
- 1/2 teaspoon salt
- 1 cup (170g) semi-sweet chocolate chips
- 1 cup (125g) red and green milk chocolate candies (M&Ms)
- 3/4 cup (45g) mini pretzel twists, roughly chopped
- 1/2 cup (50g) chopped pecans or walnuts
Instructions
-
1Preheat the oven to 350°F (175°C) and line two baking sheets with parchment paper.
-
2In a large bowl, cream together the butter, brown sugar, and granulated sugar until light and fluffy.
-
3Beat in the eggs one at a time, then add the vanilla extract.
-
4In a separate bowl, whisk together the flour, baking soda, and salt. Gradually add to the wet ingredients and mix until just combined.
-
5Fold in the chocolate chips, holiday candies, chopped pretzels, and nuts.
-
6Scoop rounded tablespoons of dough onto prepared baking sheets. Bake for 10-12 minutes, until golden around the edges. Cool on a wire rack.
Approximate Information for One Serving
Nutrition Disclaimers
Number of total servings shown is approximate. Actual number of servings will depend on your preferred portion sizes.
Nutritional values shown are general guidelines and reflect information for 1 serving using the ingredients listed, not including any optional ingredients. Actual macros may vary slightly depending on specific brands and types of ingredients used.
To determine the weight of one serving, prepare the recipe as instructed. Weigh the finished recipe, then divide the weight of the finished recipe (not including the weight of the container the food is in) by the desired number of servings. Result will be the weight of one serving.
Did you make this recipe?
Please consider Pinning it!!

