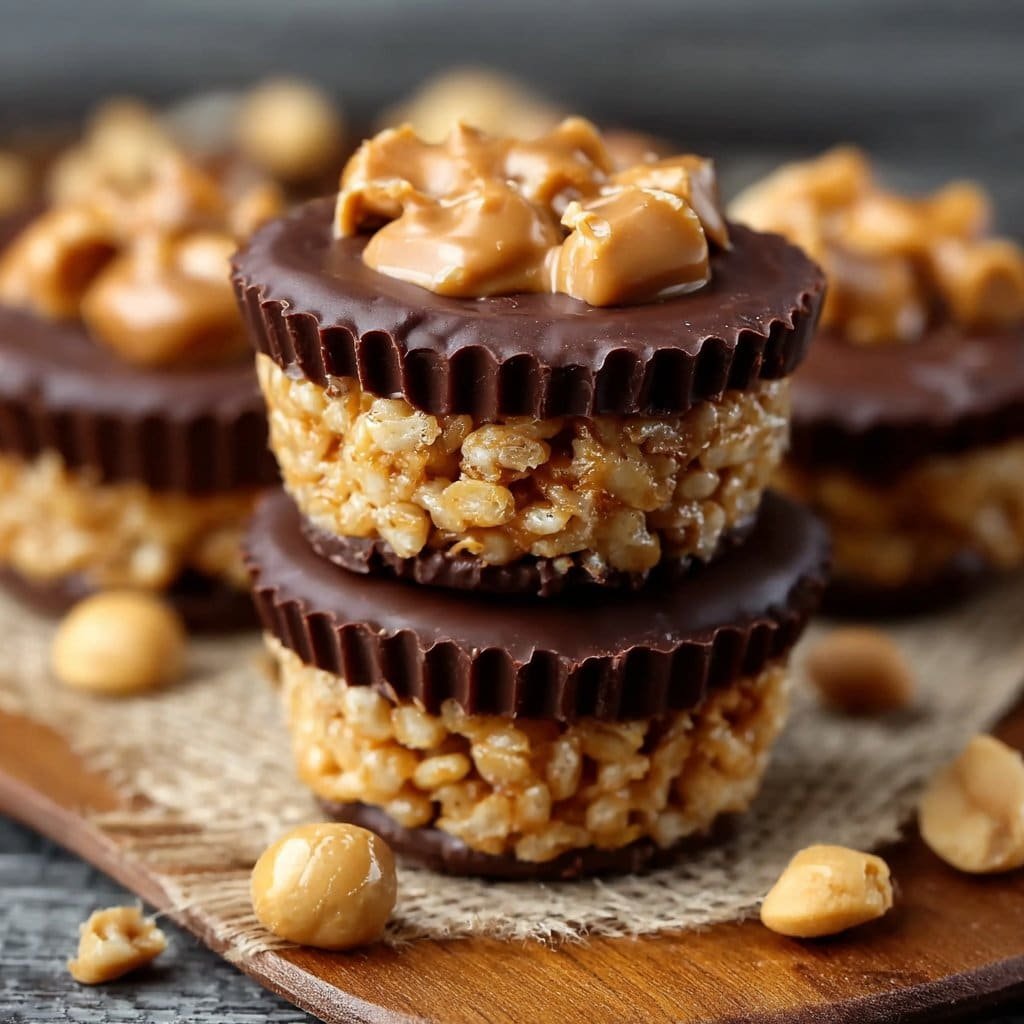
Let Me Tell You About These Addicting Cups
So, the first time I made these Chocolate Peanut Butter Rice Krispie Cups, I thought, “Can they possibly live up to the hype?” The answer—dear friend—is yes, and then some. Imagine it’s 11pm, you’re craving something sweet-but-not-over-the-top, and the only thing on TV is a gardening show narrated by that guy with the badly trimmed beard (you know the one). That’s the kind of mood that leads to this recipe. I keep a stash of the ingredients just in case; they’re my secret weapon for last-minute cravings or, let’s be honest, for impressing friends who ‘just stopped by.’ (By the way, my cousin Andy once ate four in a row… and I challenged him to beat his record. He did not.)
Why You’ll Love Making (and Eating!) These
Honestly, I make these whenever I need a dessert nobody will argue with—or when I want something that won’t heat up the kitchen. My family goes wild for them, to the point where I actually had to hide a batch at the back of the fridge once (they found them anyway). I also like that they need zero baking—always a plus in the hotter months. Oh, and if you’ve ever been betrayed by desserts that stick to the pan? Me too. But this one’s pretty forgiving. Sometimes I mess up the ratios but they’re still good, like a happy little accident.
What You’ll Need (But Feel Free to Swap Things Around)
- 3 cups Rice Krispies cereal (my grandma swore by the name brand, but I’ve used store brand and nobody noticed!)
- 1 cup peanut butter (crunchy is fun, smooth is classic, and almond butter in a pinch… works but is a bit fancy?)
- 1/2 cup honey or golden syrup (maple syrup gets used here when I’m feeling extra Canadian or lazy)
- 1 cup semi-sweet or milk chocolate chips (once I even chopped up an old Easter bunny—use what you have!)
- Pinch of salt (optional, but highly recommended, especially if you use unsalted PB)
- 1 tsp vanilla extract (no worries if you forget, but it does add something nice)
How to Make These Little Beauties
- Grease or line a standard muffin tin (12 cups) with paper liners. Sometimes I forget liners—if you do too, just grease it well and hope for the best! Works most times.
- In a large mixing bowl, dump in your Rice Krispies. Set aside. If a few spill on the floor, that’s for the kitchen mice…
- In a saucepan, heat your peanut butter and honey over medium-low. Stir gently till it’s all melty and smooth. This is where I usually sneak a taste—watch out, it’s hot!
- Turn off the heat. Stir in vanilla and that pinch of salt. Pour the mixture over your Rice Krispies quickly (it does start to set up).
- Mix like mad with a spatula. Don’t panic if it looks too sticky or messy. Scoop about 2 tablespoons into each muffin cup. Press down gently—I use my fingertips, but the back of a spoon does the trick if you’re not into that sticky life.
- Time to melt chocolate: either in the microwave (short 15–20 second bursts, stirring between, so you don’t scorch it) or using a double boiler if you fancy a bit of drama.
- Spoon melted chocolate over each cup—enough to cover but not flood. Don’t be too precious here; a swirl is fine. Sprinkle with flaky salt if you’re like me and want “that cheffy look.”
- Pop the tray in the fridge for 30 minutes or so, till the chocolate sets. Or just as long as you can wait.
Notes from Someone Who’s Definitely Messed These Up Before
- If your PB is super oily, you might want to cut back just a touch or add a tiny bit more cereal—otherwise they get droopy.
- I tried using natural PB once… and it worked, but the flavor was somehow less exciting? Maybe just me.
- If you forget salt, no biggie. But if you skip the liners, sometimes they stick a bit, and you’ll have to wiggle them loose. That’s half the fun, right?
Variations I’ve Actually Made (Some Were Hits, Others Not so Much…)
- Nutella in place of half the PB: oh wow. Richer and possibly a bit decadent for school lunches, but delicious.
- Swapped Rice Krispies for Cheerios once. Didn’t love it, but kids ate them anyway (confession: I still preferred the original).
- Mini M&Ms sprinkled on top? Colorful and a crowd-pleaser, though I once tried coconut flakes and promptly heard, “What’s this fuzzy stuff?” Not a winner.
The Equipment Bit (But Don’t Stress If You Don’t Have Fancy Gear)
- Muffin tin (standard 12-cup; if you’ve only got a mini one, just make smaller cups.)
- Good saucepan (mine’s old and slightly warped—still works)
- Microwave or double boiler for chocolate (no microwave? A glass bowl over a pot of water does just fine—it’s what I use at my aunt’s place)
- Mixing bowl and spatula
If you have nothing but a loaf pan, you can also press it all in there and slice into bars. Not quite cups, but it’ll do.
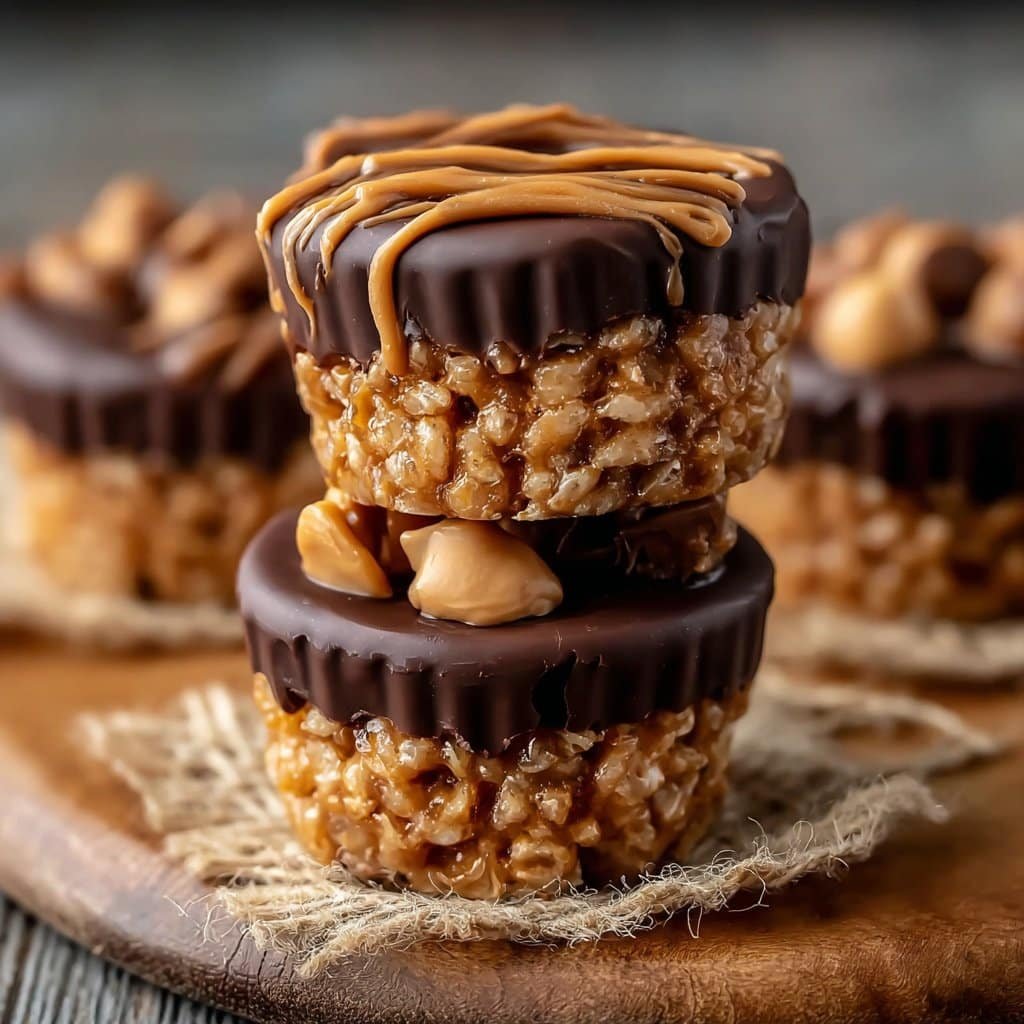
How to Store (If You Actually Have Leftovers…)
They go into an airtight container in the fridge, mostly to keep the chocolate set. Technically they’ll last up to a week, but—truth—my family’s record is 30 hours. If they do last, I think they taste even better cold and a little chewy the next day. Oh, and check out this guide on candy storage if you want to get nerdy about it (I did, but only once).
How We Serve Them (I’m a Tea Person, But…)
These are a post-lunch treat at my place, right when the afternoon slump sets in. Sometimes I cut them up into quarters for a party platter (grabby little squares) or even pop one in the microwave for 7 seconds for a warm, gooey bite. My mom always grabs one with her coffee. (I’m more a Yorkshire Tea sort, myself.)
Pro Tips, AKA My “Don’t Make My Mistake” List
- I once tried squishing the cups without letting them set even a tiny bit—result: sticky hands and splattered chocolate. Just chill for even ten minutes before adding chocolate—it’s worth the pause.
- Don’t use tiny marshmallows instead of honey, unless you like wrestling with goo. (Not fun. Don’t ask.)
- Also, microwave chocolate for less time than you think you need; it burns fast and smells like burnt hair. Ew.
Some Actual Questions People Ask Me (And My Wobbly Answers)
- Can I swap the peanut butter? Sure! I’ve used almond, sunflower seed butter, even cashew (kind of sweet, not my fav). Just watch the texture—some are runnier.
- Do I have to use muffin liners? I’ll be honest—I prefer them because clean-up is a breeze, but, I’ve managed with just a greased tin and lots of patience. The edges look “rustic.”
- Are these gluten-free? If you use certified GF cereal and PB, yes. Don’t trust the regular stuff if sensitive.
- Can I freeze them? Absolutely. I wrap ’em up and toss in a zip bag, but—here’s the catch—they taste best within a month. Thaw in the fridge for a smoother bite.
- What chocolate is best? Honestly, whatever is around. If you’ve only got dark, go for it. I once used white chocolate, and it looked… odd but tasted fine! I usually stick with semi-sweet or milk though.
If you love this kind of low-fuss, high-yumminess dessert, you might also like Sally’s No-Bake PB Cookies or the classic Rice Krispie Treats (I sometimes make both for parties—no shame).
And if you do give these a go, let me know how it went. Or just tell me your microwave mishaps—misery loves company. Happy snacking!
Ingredients
- 2 cups rice krispie cereal
- 3/4 cup creamy peanut butter
- 1/2 cup semi-sweet chocolate chips
- 1/3 cup honey
- 2 tablespoons unsalted butter
- 1/4 teaspoon vanilla extract
- Pinch of salt
- 1/4 cup mini chocolate chips (optional topping)
Instructions
-
1Line a 12-cup muffin tin with paper liners.
-
2In a medium saucepan over low heat, melt the peanut butter, honey, and butter together, stirring until smooth.
-
3Remove from heat and stir in vanilla extract and salt.
-
4Add the rice krispie cereal to the peanut butter mixture and mix until well combined.
-
5Divide the mixture evenly among the muffin cups and press down gently.
-
6Melt the chocolate chips in the microwave in 20-second intervals, stirring until smooth. Spoon melted chocolate over each cup and spread evenly. Sprinkle with mini chocolate chips, if desired. Chill in the refrigerator for at least 30 minutes before serving.
Approximate Information for One Serving
Nutrition Disclaimers
Number of total servings shown is approximate. Actual number of servings will depend on your preferred portion sizes.
Nutritional values shown are general guidelines and reflect information for 1 serving using the ingredients listed, not including any optional ingredients. Actual macros may vary slightly depending on specific brands and types of ingredients used.
To determine the weight of one serving, prepare the recipe as instructed. Weigh the finished recipe, then divide the weight of the finished recipe (not including the weight of the container the food is in) by the desired number of servings. Result will be the weight of one serving.
Did you make this recipe?
Please consider Pinning it!!

