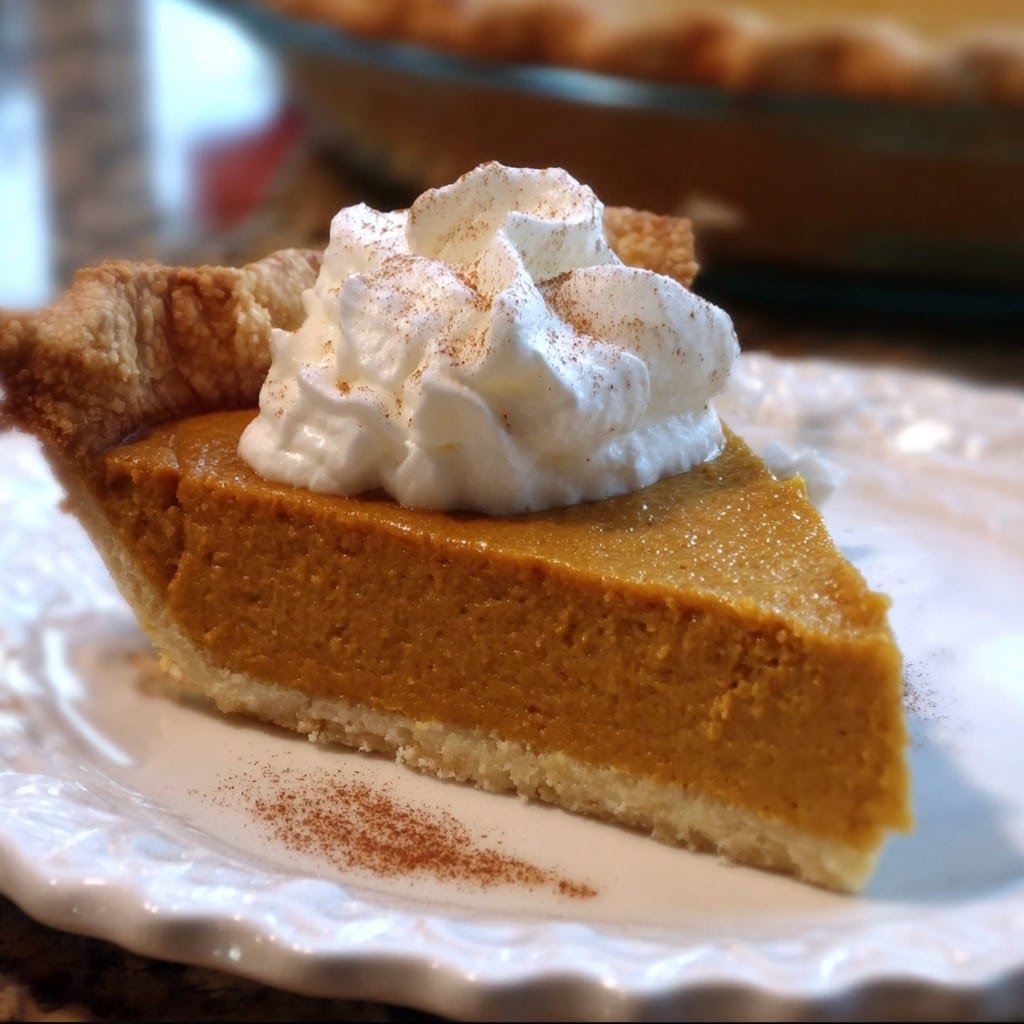
Chef John’s Pumpkin Pie
Let Me Tell You About My Chef John’s Pumpkin Pie Adventure
So, here’s the story: a few autumns ago, I decided—mostly out of stubbornness—to finally do battle with Chef John’s infamous pumpkin pie recipe. And you know how some things just set off a chain reaction? I baked it for a potluck, then my cousin nabbed the last piece, then suddenly everyone wanted “the recipe.” I’m still not sure if it was because of the pie or because I accidentally left out salt that first time. Either way, now I’m basically the pumpkin pie person in my family (and yes, it’s exactly as much pressure as you’d imagine.)
Honestly, if my pie could talk, it would probably thank me for sparing it from the pre-made crust life, but also grumble about how I never let it cool long enough before cutting—some habits die hard! Plus, do you know how hard it is not to swipe a taste of the custard filling before it even hits the oven? My willpower is not legendary.
Why I Keep Coming Back to This Pie
I make this whenever the leaves start looking like a Bob Ross painting outside. My friends go a little wild for this mostly (let’s be real) because it has actual spice, not those sad little shakers you get at the grocery. And my cousin Tom—he claims it’s the only pumpkin pie he’ll eat, but I think he says that just so he gets a bigger slice. Baking it can be a tad nerve-wracking if you’re not used to custardy stuff (those cracks on top!? Aggravating at first), but actually, when you chill it overnight, they soften up anyway. Slap a little whipped cream on top if you’re worried.
Here’s What You’ll Need (and a Few Workarounds)
- One 9-inch pie crust: I’m partial to homemade, but in a pinch, the supermarket stuff gets the job done (my grandma swore by the kind in the red box, honestly—use whatever you’ve got)
- 425g (1 3/4 cups) canned pumpkin puree: Libby’s is canonical, but the no-name brands are just fine (I sometimes roast my own pumpkin, but let’s be real—opening a can is easy-peasy)
- 200g (1 cup) packed brown sugar: Dark or light—I switch it up depending on what’s rolling around in my pantry, and no one’s noticed
- 2 large eggs
- 1 can (354ml) evaporated milk: If you don’t have this, mixing milk and cream (half and half) works. Not *quite* the same, but I won’t tell
- 1 heaping teaspoon ground cinnamon
- 1/2 teaspoon ground ginger
- 1/4 teaspoon ground cloves: Or allspice—I’ve done both, it’s good either way. Honestly, sometimes I just eyeball it.
- 1/2 teaspoon salt: But, um, pay attention unlike me that first time
How I Actually Make It (Don’t Stress the Small Stuff)
- Preheat your oven to 425°F (220°C). Yeah, I forget half the time and then have to wait—do it before you start the filling!
- Roll out your pie crust and drape it into a 9-inch pie plate (don’t fuss too much if the edges look wonky—rustic is in, right?). Stick it in the fridge while you prep the filling. Well, to be honest, sometimes I forget this step and it’s still fine.
- In a bowl, dump in the pumpkin puree, brown sugar, eggs, evaporated milk, cinnamon, ginger, cloves (or allspice), and salt. Give it a good whisk. This is when I always sneak a spoonful, just to check the seasoning (I mean, what’s the worst that can happen?).
- Pour the filling into the chilled crust. Now, pop it in the oven at 425°F for 15 minutes—don’t wander off! Then, drop the oven temp to 350°F (175°C), and bake 35–40 minutes more, until the center is just a tiny bit wobbly. If the edges start to brown faster than you want, I crumple up some foil and call it a pie shield.
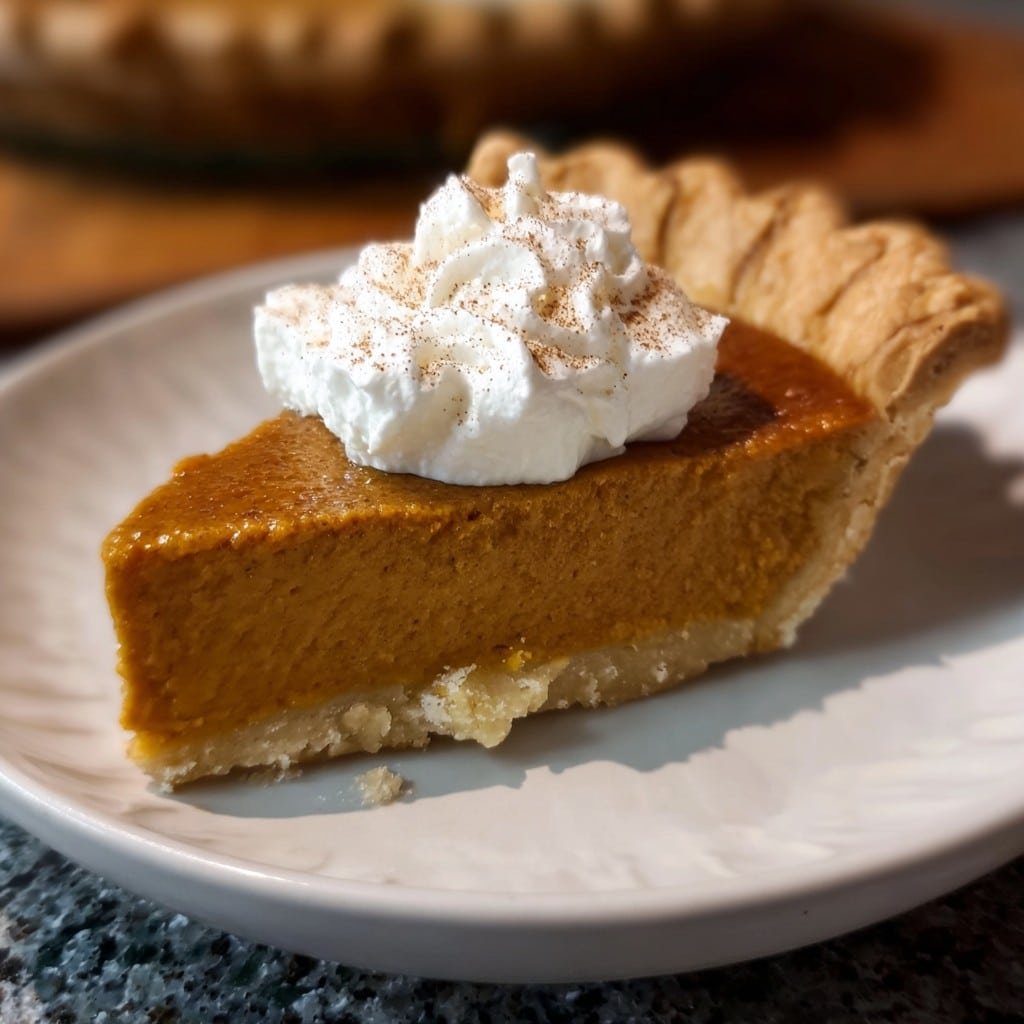
- This is crucial: let it cool. I know, I KNOW. But if you slice it hot, you’ll get pumpkin soup. I usually stick it by a chilly window and keep poking it with my finger (don’t recommend this, but… well, habits.)
What I’ve Figured Out After Too Many Pies
- Pie crust sticking to the pan? A light dusting of flour before rolling totally saves your day.
- Cracks on top: Sometimes you just can’t avoid ’em, and it doesn’t matter. Actually, a dollop of whipped cream covers a multitude of sins.
- I used to overbake it, thinking the jiggle meant it wasn’t done—it sets up as it cools, so stop baking before you think it’s ready.
Weird Variations I’ve Tried (So You Don’t Have To)
- Maple Pumpkin Pie? I tried swapping some of the sugar for maple syrup—turned out too runny. Maybe if you cut back on the milk it’d work, but I’ll just stick to syrup for pancakes.
- Extra-Gingery: More ginger = zingy pie, but too much and it tastes kind of medicinal (unless you like that sort of thing!)
- Crustless Pie: If you forget the crust or just can’t be bothered, pour the filling into a greased pie plate and bake it as a sort of pumpkin custard. Obvious, but works.
- I also once made it with a graham cracker crust… kinda works, but honestly, the classic flaky crust is where it’s at; sorry, cheesecake fans.
Seriously, Do You Need Fancy Equipment?
If you’ve got a whisk and a reliable oven, you’re sorted. Pie weights if you’re blind-baking the crust, but in a pinch, I’ve used dried beans (and, once, rice—messy, but it works!) Don’t stress about a fancy pie dish—one time I used a cake tin and just served slightly shallower slices.
Will This Pie Actually Last In Your Fridge?
Technically, it’s happiest in the fridge for up to 3 days, tightly covered. But honestly, in my house? It’s history within 36 hours, tops. If you somehow have leftovers, it makes a sly little breakfast with coffee—don’t judge me.
How Do You Serve It? (And Do You Have To Follow the Rules?)
Tradition dictates whipped cream, but ice cream—especially this cinnamon one I found on Serious Eats—is killer too. My sister likes it cold, my partner likes it just barely warm. We once had a pie buffet at Thanksgiving and nobody agreed on anything, so… serve it how you like.
Things I’ve Messed Up So You Don’t Have To
- I once tried to rush cooling by sticking it in the freezer. End result? Wet crust—never again. Let it breathe, buddy.
- Didn’t check oven temp once, ended up with burnt edges and soupy center. From now on, I keep an oven thermometer in there (they’re cheap—see this oven thermometer test if you’re curious).
- Don’t overthink the spice blend. Some days I use a dash of nutmeg, others I forget the ginger, and it’s never gotten a single complaint.
Real-Life FAQ—Because Y’all Actually Ask These!
- Do I have to prebake the crust? I usually don’t. If you really like a super crisp bottom, go ahead, but it’s never been a dealbreaker for me.
- Can I use fresh pumpkin? Yep, but honestly it’s a hassle. Go for it if you’ve got time. Sometimes it’s stringy, though, so make sure to blend it well.
- What about coconut milk? I tried it once—turned out fine, a bit different but not bad if you like a subtle coconut vibe.
- How do I know it’s done? If a knife near the center comes out mostly clean (a little custardy is ok), you’re set. Or jiggle it—if the outer 2 inches are set but the center wobbles a tad, take it out. It’ll keep cooking as it cools, promise.
- I don’t have a pie dish—help! Use a cake tin or, honestly, even a cast iron skillet. I did both and they worked fine. Just adjust the bake time if it’s deeper.
Oh, and quick digression: Once, I got distracted binging Chef John’s Food Wishes videos and left the pie in an extra 10 minutes. So if you need permission to fudge the timing a little—consider it granted (just set a timer if you’re easily sidetracked like me).
Ingredients
- 1 (15 ounce) can pumpkin puree
- 1 (14 ounce) can sweetened condensed milk
- 2 large eggs
- 1/2 cup brown sugar
- 1 teaspoon ground cinnamon
- 1/2 teaspoon ground ginger
- 1/4 teaspoon ground nutmeg
- 1/2 teaspoon salt
- 1 unbaked 9-inch pie crust
Instructions
-
1Preheat oven to 425°F (220°C).
-
2In a large bowl, whisk together pumpkin puree, sweetened condensed milk, eggs, brown sugar, cinnamon, ginger, nutmeg, and salt until smooth.
-
3Pour the pumpkin mixture into the unbaked pie crust.
-
4Bake in preheated oven for 15 minutes. Reduce temperature to 350°F (175°C) and continue baking for 35-40 minutes, or until the center is set.
-
5Remove pie from oven and cool completely on a wire rack before slicing and serving.
Approximate Information for One Serving
Nutrition Disclaimers
Number of total servings shown is approximate. Actual number of servings will depend on your preferred portion sizes.
Nutritional values shown are general guidelines and reflect information for 1 serving using the ingredients listed, not including any optional ingredients. Actual macros may vary slightly depending on specific brands and types of ingredients used.
To determine the weight of one serving, prepare the recipe as instructed. Weigh the finished recipe, then divide the weight of the finished recipe (not including the weight of the container the food is in) by the desired number of servings. Result will be the weight of one serving.
Did you make this recipe?
Please consider Pinning it!!

