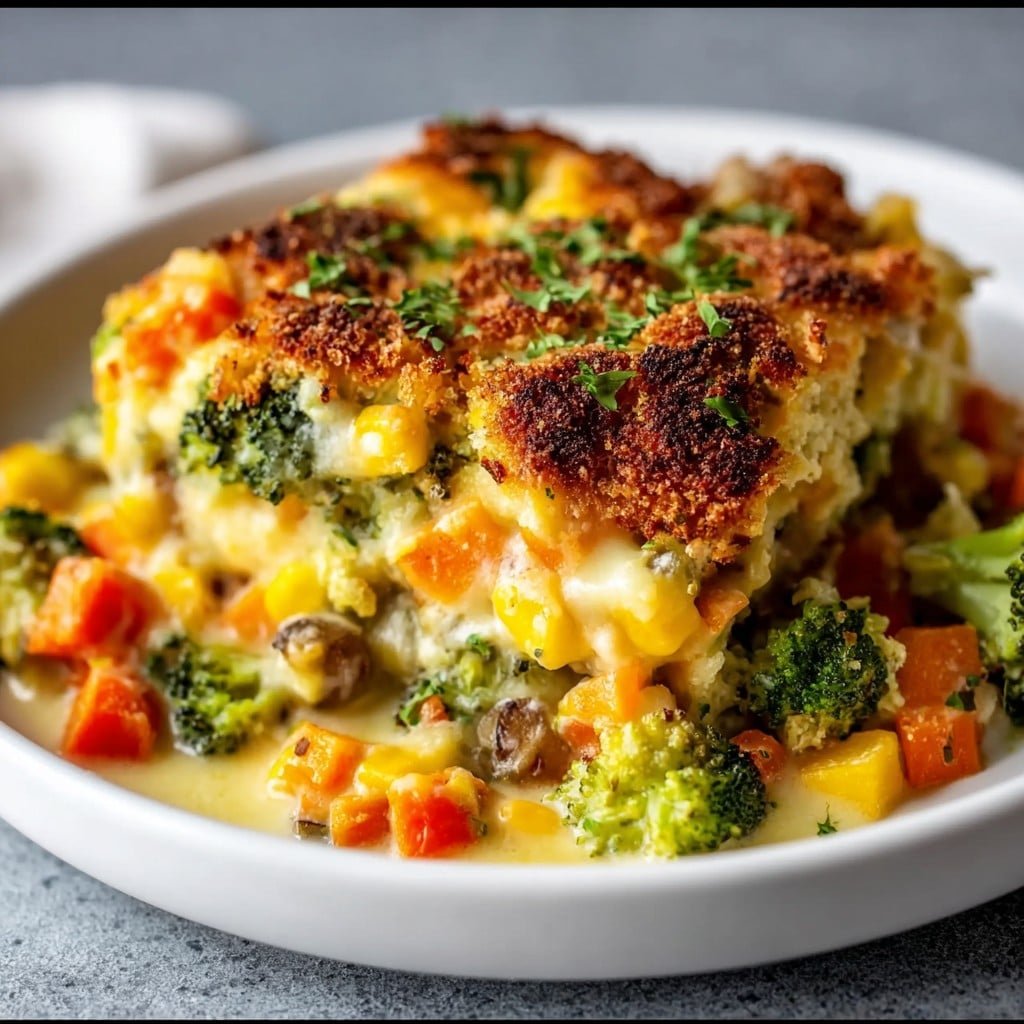
Let’s Start with Why I Love This Cheesy Vegetable Casserole
Okay—so right off the bat, this casserole isn’t some five-star restaurant secret; it’s one of those tried-and-true, a-bit-of-this-and-that comfort dishes that somehow makes even boring old broccoli exciting. Every time I pull this out of the oven, my kitchen fills up with people (usually family, occasionally a curious neighbor with very good timing), and honestly, I don’t even get a chance to let it cool half the time. Once, I made it for a Sunday lunch, and my brother-in-law inhaled three-quarters before anyone could blink. Bless him, but he did regret it later… Anyway, making this always feels like a warm hug wrapped in golden cheese. No judgement if you eat it straight from the casserole dish; I’ve been there.
Why You’ll Probably Get as Hooked as I Did
I make this when I’ve officially run out of mental energy for fancy meals, or when I find a suspiciously wrinkly zucchini lurking at the back of the fridge (basically, salvage operation meets comfort food). My family goes crazy for this because, well, it’s cheesy, bubbly, and somehow makes veggies disappear—under a blanket of cheddar, of course. I did once try to sneak in extra mushrooms, but my youngest somehow detected them and mounted a full-scale protest (so maybe don’t push your luck with the mushrooms). Plus, if you don’t want to spend a century chopping, just grab a pre-cut veg mix—nobody ever accused this of being snobby.
Here’s What You’ll Need (Substitute at Will, Seriously)
- 2 cups broccoli florets (fresh or frozen—I use whatever’s in the crisper, but my nan would only use fresh. You do you.)
- 1 large carrot, sliced (honestly, a handful of baby carrots works just as fine)
- 1 zucchini, roughly chopped (sometimes I use yellow squash because it’s prettier, maybe?)
- 1 red bell pepper, diced (or green if you’re feeling wild or have leftovers to be rid of)
- 1 cup frozen peas (I skip them if I’m out—no biggie)
- 1 small onion, chopped (optional, but worth it for some extra oomph)
- 2 cloves garlic, minced (I use the jar stuff when I’m too tired to chop, which is most nights)
- 1.5 cups shredded cheddar cheese (or mozzarella, or both, or something else in the fridge calling your name)
- 1/2 cup sour cream (plain Greek yogurt does the trick in a pinch)
- 1/2 cup milk (whole, 2%, or, y’know, that almond milk you bought by accident)
- 2 eggs, lightly beaten (duck eggs work too, if that’s your jam—someone online swears by it)
- 1/2 teaspoon salt, more if you’re feeling salty
- 1/4 teaspoon black pepper
- 1 cup breadcrumbs (panko gives a nice crunch, but my gran just used stale bread blitzed in a blender)
- 2 tbsp melted butter (skip if you want less richness, but why would you?)
How I Actually Throw This Together—Step by Step (Sort Of)
- Preheat your oven to 180°C (that’s 350°F for all my U.S. friends who still use Fahrenheit—no judgment). Grease up a reasonably sized casserole dish (9×13 inches or thereabouts). Some folks line it with parchment because they can’t stand scrubbing; I just soak mine overnight and accept my fate.
- Steam or microwave your broccoli, carrot, zucchini, and bell pepper for about 5–7 minutes, just ‘til they’re starting to soften. You don’t want sad, overcooked mush—just a bit of bite left. This is where I usually sneak a bite for, uhm, quality control.
- In a big bowl (the biggest one you’ve got—don’t kid yourself), toss in all the veggies and peas. Add the chopped onion and garlic, and give it a little toss—if you drop some, that’s just chef’s treat.
- Separately, whisk together your eggs, milk, and sour cream. Season with salt and pepper. Pour this gently over your veggies. (Gently is a formality. It’s all ending up together.)
- Fold in about 1 cup of your shredded cheese. For extra cheesy pull-apart strings, save some cheese for the topping. This is the bit where I sometimes add a little pinch of paprika or dried herbs if I’m feeling all chef-like.
- Scrape everything into your prepared casserole dish. It always looks a bit messy here, but trust the process. Top with breadcrumbs tossed in melted butter. Sprinkle the last bit of cheese over everything. Seriously, extra cheese is hardly ever a bad idea.
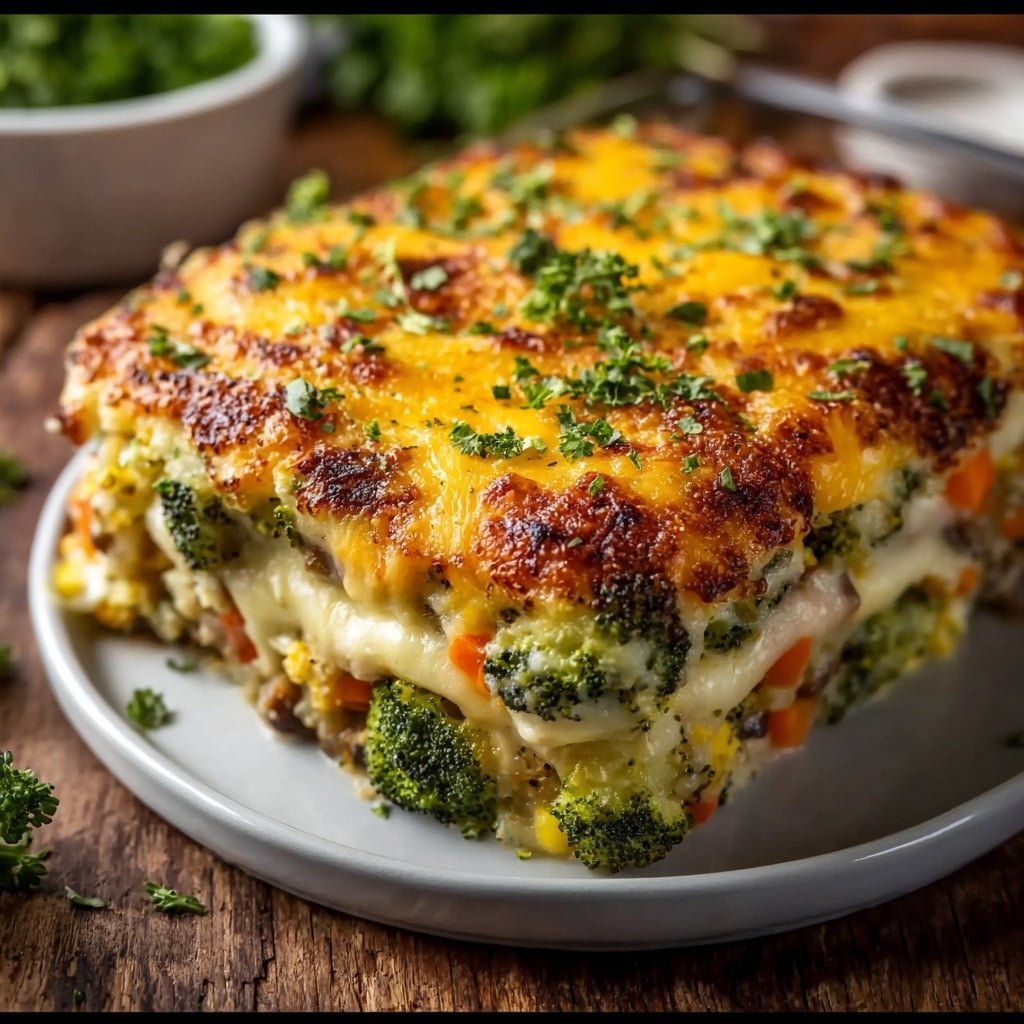
- Bake for 30-35 minutes, or until it’s bubbling around the edges and golden on top. If you check and see it’s a bit pale, stick it under the broiler for a couple of minutes—just don’t wander off, or you’ll join Club Extra Crispy like I have more times than I care to admit.
- Let it stand 5–10 minutes before you dig in (if you can wait). It sets up better, but… I get it if you just can’t hold back.
Things I Learned (the Hard Way)
- If you use too much milk, it’s just a soggy mess—stick close(ish) to the measurements above. But, on second thought, I kinda liked it once when it was super creamy. Depends how soupy you want your dinner.
- Any cheese works except for, like, blue cheese… which, oddly, my uncle likes. Personally, I don’t recommend it unless you’re going for a whole new experience.
- Don’t rush letting it cool; it’ll just fall apart (I mean, it still tastes good, but you’ll have more of a vegetable… pile).
Stuff I’ve Tried Switching Up (and an Oopsie)
- Swapped out half the veggies for sweet potato cubes once—kids loved it.
- Added cooked shredded chicken for a meal-in-one. Actually, I find it works better if you lay the chicken on top so it stays tender.
- Tried adding cauliflower rice and my family revolted. Not recommended unless you’re Anna from that blog who puts cauliflower in everything—and if you’re reading this, Anna, sorry.
What About Equipment?
I use a basic 9×13 glass dish, but my neighbour used a cast iron skillet and, actually, it looked great. If you don’t have a whisk, just use a fork. I did once use disposable foil trays for a picnic—they’re a bit wobbly, but hey, no washing up!
How Long Does This Last in the Fridge? (It Won’t!)
Technically, should last 3-4 days in a sealed container in the fridge. Although honestly, in my house it never lasts more than a day! If you do have leftovers, it reheats surprisingly well (you may want a splash of milk to perk it up).
Serving: How Do I Dish This Up?
My favourite way: plop a big spoonful next to roast chicken or just eat it solo with a slab of crusty bread (especially if you’re fancy and made your own—I did once, but my bread looked like a deflated football). My sister likes hers with a dash of sriracha on top. Weird, but it works. For holidays, I stick a sprig of parsley on for color, just like this recipe from Sally’s Baking Addiction recommends.
Some Real Pro Tips (a.k.a. My Slightly Embarrassing Mistakes)
- Don’t skip pre-cooking the vegetables! I tried it once—and wow, crunchy carrot surprise is not a fun one.
- Rushing the cheese topping (or forgetting it completely) results in a pretty sad casserole experience. Been there, done that, never again.
- Breadcrumbs: Italian seasoned ones add nice flavor, but if you only have plain, mix in some dried herbs yourself.
Questions I’ve Actually Been Asked
- Can I freeze this Cheesy Vegetable Casserole?
- Yup, you can! Let it cool, wrap it tight. Reheat covered, then uncover to crisp the top. The texture goes a bit softer, but it’s still pretty tasty—especially at midnight, for reasons I won’t explain.
- Could I make this totally dairy-free?
- Sort of. I’ve done it with vegan cheese and coconut milk—I wouldn’t call it Cheesy Vegetble Casserole per se but it’s passable. I wouldn’t recommend skipping all the cheese, though. Or, check resources like Minimalist Baker for a proper vegan casserole that doesn’t taste sad.
- What veggies work best if I hate broccoli?
- No worries! Cauliflower, green beans, or even corn kernels work grand. Frankly, use what ya like—casserole is forgiving, like a soft pillow that welcomes any wayward vegetables.
- Wait, do I have to beat the eggs a certain way?
- Just a quick fork job is fine. No need for fancy peaks or whatever. In fact, I usually just splash ’em in and stir wildly.
And just one more thing—I read this bit about properly cooling casseroles at Serious Eats the other day, and actually it makes sense, so if you want to nerd out, have a peek.
Whew. That was probably more than you wanted to know, but hey, at least now you’re ready to whip up a Cheesy Vegetable Casserole even on your worst brain-fog days. Now, should you happen to leave out the breadcrumbs by accident (it happens), just serve it up anyway and call it a crustless bake—no one needs to know. Happy cooking, mate!
Ingredients
- 2 cups broccoli florets
- 1 cup cauliflower florets
- 1 cup sliced carrots
- 1 cup frozen green peas
- 1 cup shredded cheddar cheese
- 1/2 cup grated mozzarella cheese
- 1 can (10.5 oz) cream of mushroom soup
- 1/2 cup milk
- 1/2 cup crushed buttery crackers
- 1 tablespoon unsalted butter
- 1 teaspoon garlic powder
- 1/2 teaspoon salt
- 1/4 teaspoon ground black pepper
Instructions
-
1Preheat the oven to 375°F (190°C). Lightly grease a 9×13-inch casserole dish.
-
2In a large bowl, combine broccoli florets, cauliflower florets, sliced carrots, and green peas.
-
3In a separate bowl, mix together cream of mushroom soup, milk, garlic powder, salt, and black pepper until well combined.
-
4Pour the soup mixture over the vegetables and stir until evenly coated. Transfer the mixture into the prepared casserole dish.
-
5Sprinkle shredded cheddar and mozzarella cheese evenly over the top. Mix the crushed crackers with melted butter and sprinkle over the cheese layer.
-
6Bake for 35 minutes or until the casserole is hot and bubbly, and the topping is golden brown. Let stand 5 minutes before serving.
Approximate Information for One Serving
Nutrition Disclaimers
Number of total servings shown is approximate. Actual number of servings will depend on your preferred portion sizes.
Nutritional values shown are general guidelines and reflect information for 1 serving using the ingredients listed, not including any optional ingredients. Actual macros may vary slightly depending on specific brands and types of ingredients used.
To determine the weight of one serving, prepare the recipe as instructed. Weigh the finished recipe, then divide the weight of the finished recipe (not including the weight of the container the food is in) by the desired number of servings. Result will be the weight of one serving.
Did you make this recipe?
Please consider Pinning it!!

