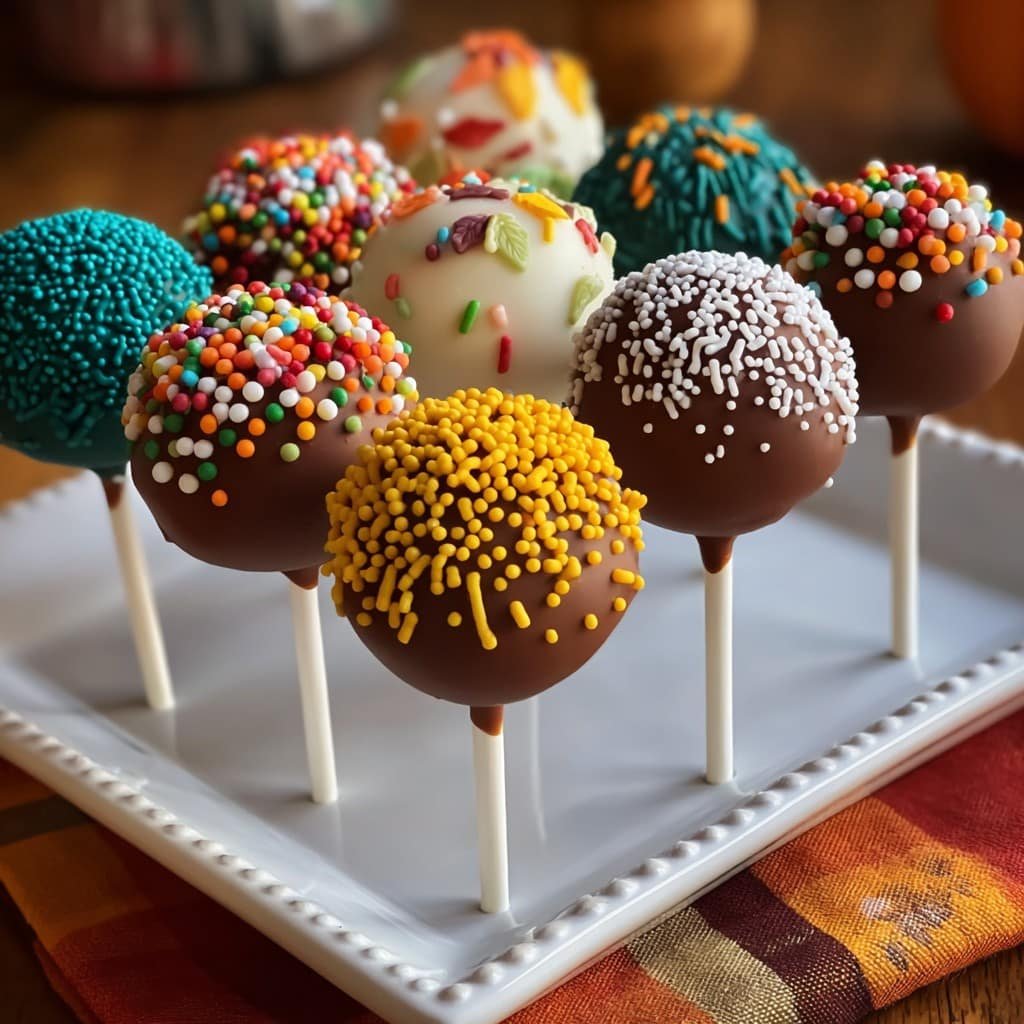
Thanksgiving Cake Pops That Bring Back All the Good Memories
So, funny story—my first attempt at cake pops was actually a Halloween disaster (picture melted Frankenstein faces, but, uh, not in a cool way). But come Thanksgiving, I braved it again—bless my stubborn streak—and these little turkey guys somehow turned out adorable. Now, my cousins literally start asking about ‘the weird cake ball things’ as soon as November hits. I just wish I’d learned the knack for keeping them on the sticks sooner, but we got there (eventually). And honestly, if you end up with a lopsided one, eat it. Chef’s treat.
Why These Cake Pops Are My Thanksgiving Go-To
Okay, I make these when I want to bribe the kids into helping clean up—kidding (sort of). My family goes crazy for these because, well, they’re as fun to make as they are to eat. Plus, you don’t need fancy skills. It’s kind of like edible arts and crafts, but you get to “accidentally” eat your mistakes along the way (the best part, really). I used to get frustrated with the melted chocolate, thinking, why does it never get smooth? Turns out, a splash of oil makes all the difference. Go figure.
You’ll Need These Ingredients (But Feel Free To Swap!)
- 1 box yellow cake mix (I’ve grabbed chocolate in a rush, totally works)
- 3/4 cup canned frosting (vanilla, chocolate, or your favorite—my grandma insisted on homemade, but I honestly just use store stuff now)
- 1 bag candy melts (about 340g—if you can’t find candy melts, regular chocolate chips + a dab of shortening does the trick)
- Lollipop sticks (You can use sturdy straws, though they get wobbly. Pro tip: don’t use toothpicks, learned that the hard way!)
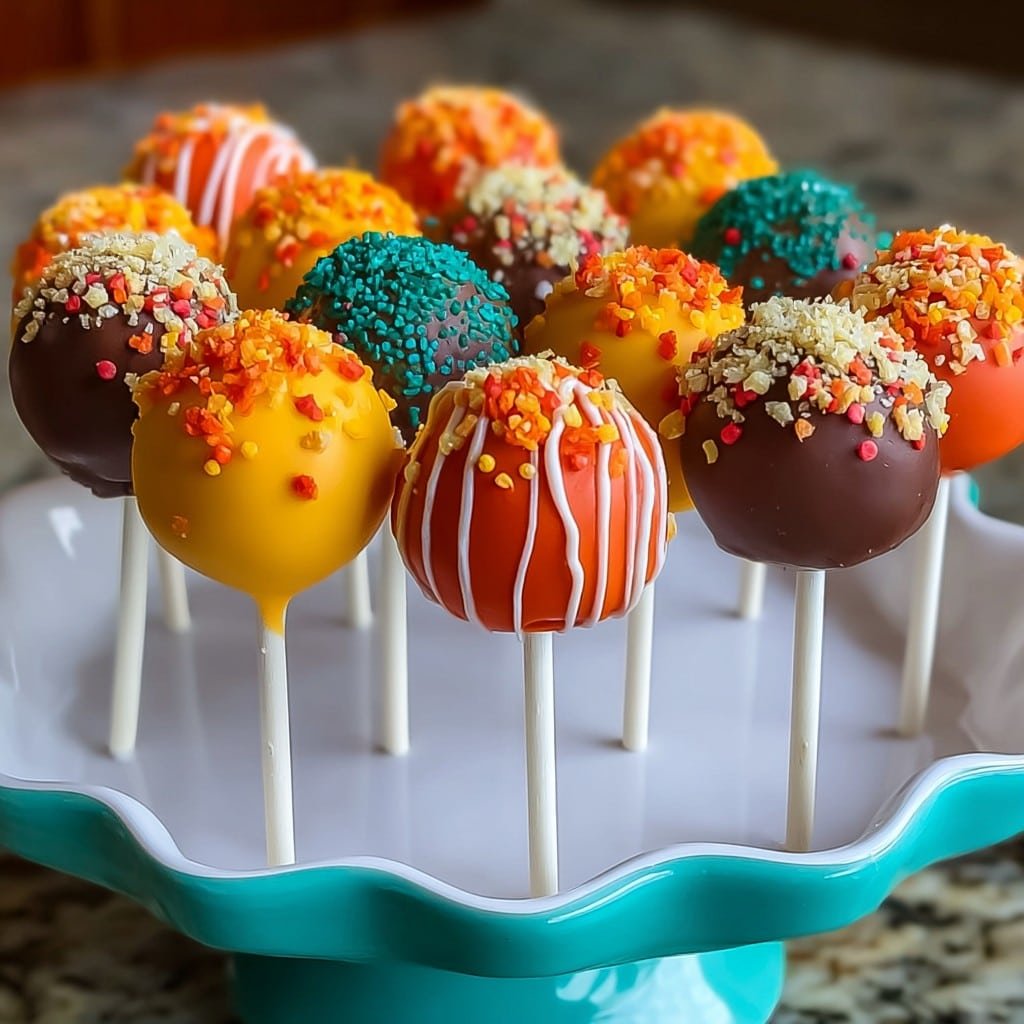
- Sprinkles, mini pretzels, or candy corn for decoration (I like googly candy eyes too—totally optional, but kids love them)
- Vegetable oil or coconut oil (just a smidge if your chocolate acts up)
How to Make These (Trust Me, It’s Not as Fiddly as It Looks)
- Bake the cake per the box directions. Or if you’re feeling ambitious, bake one from scratch. I mostly use boxed during Thanksgiving chaos—no shame in that.
- Let it cool (this is where patience pays off, since warm cake = mess), then crumble it into a big bowl using your hands. Yes, it feels weird, but also satisfying? Anyway, make it fine as you can.
- Mix in about 3/4 cup frosting. Start with less, add more if it looks dry. You want dough that sticks together, but not mushy. Sometimes I get carried away and over-frost—if this happens, just chill the mix longer. Or eat some and act like that was your plan.
- Roll into balls, about golf ball size. If they look wonky, just pretend you meant to make rustic cake pops. Chill in the fridge for 30 minutes, or the freezer for maybe 15. (You need them cold, not frozen.)
- Melt your candy coating in a mug or deep bowl. This step always takes longer than expected. Zap in the microwave in short bursts, stirring well each time. Thin with oil if it’s too thick.
- Dip each lollipop stick in the melted coating, then shove it halfway into a cake ball. The coating glue helps keep everything from cartwheeling off later. Chill again for 10 min. (I stuck ‘em outside once ‘cause it was freezing, shortcut worked.)
- Now the fun/messy bit: dip each cake pop into the candy coating, twirl and tap gently until smooth-ish. This is where I sneak a taste.
- Before the coating sets, stick on eyes, sprinkles, or candy decorations. I usually just let my niece go wild—her turkeys sometimes end up with antlers, but hey, who’s judging?
- Stand cake pops up in a block of styrofoam, or a colander with big holes. Or, an empty egg carton (seriously!), just poke holes first.
- Let them set completely, which… takes about 20-30 minutes. But I’ve rushed it before and regretted it (they get smudgy). So, grab a coffee and chill.
Notes From (Sometimes Messy) Experience
- If your chocolate cracks, they’re probably too cold—I learned this by panic-Googling halfway through a batch. Let the balls sit out a minute before dipping.
- Too much frosting = soggy pops. I used to think more = better, but nope.
- If you end up with leftovers (ha), cake pops taste better the next day once the coating fully hardens. Actually, I think so anyway.
- Dog tried to snag one off the counter once. Keep ‘em up high and out of reach!
If You Want to Mix It Up…
- I’ve swapped pumpkin bread for cake—pretty good, just crumbly, so use a bit less frosting.
- Red velvet and cream cheese frosting is a knockout with the grown-ups (kids prefer chocolate, go figure).
- One time, I tried to make them gluten-free with almond flour cake, but, eh, they kinda fell apart—maybe you’ll have better luck?
What If You Don’t Have Fancy Tools?
You honestly don’t need those purpose-built cake pop stands (though they look cute on Pinterest). I use a shoebox with holes poked in the lid. Or, like I said, egg cartons. Heck, I saw someone use play-doh to steady them. Lollipop sticks are easiest, but I’ve used those reusable plastic drink stirrers, just had to warn everyone not to eat them.
Storing Leftover Cake Pops
Air-tight container, room temp for a few days—fridge if you want them to last longer. That said, in my house, they barely make it to the next morning (especially with late night snackers sneaking through). If you want to freeze ‘em, wrap individually in plastic first. But they never last long enough here to make that worth the hassle.
How We Serve Cake Pops at Thanksgiving
We kinda plop them in a mug on the dessert table, nothing too fancy. But if you want to be all Martha Stewart about it, arrange them in a pumpkin-shaped vase or with some fake leaves for fall vibes. Honestly, my favorite is just handing one out with a mug of hot chocolate. (Nobody complains.)
Some Lessons I Learned the Hard Way (Pro Tips)
- Don’t skip chilling, or you’ll have a sad parade of cake slides. I once tried skipping to save time and… disaster.
- Microwaving the candy coating for too long burns it faster than you’d think. Short bursts, stir often—trust me, I’ve ruined a couple bags.
- Actually, I find it works better if I dip the pop halfway, let excess drip off, and then swirl to finish. Keeps things tidier!
What People Always Ask Me (Cake Pop FAQ)
Q: Can I make cake pops ahead of time for Thanksgiving?
A: Yep! A day or two is fine. If you do it too far ahead, the coating might get weird. Just don’t put them in the sun (learned that last summer—melt city!).
Q: My coating cracked. What did I do wrong?
A: Probably your cake balls were too cold or coating was too hot. Let them get to room temp a bit; and don’t overheat the chocolate. Happens to me still some years.
Q: Do I have to use store-bought frosting?
A: No! Homemade is great—though honestly, when you’re juggling ten things on Thanksgiving Eve, the can is fine (trust me, I won’t tell).
Q: Any fun designs for Thanksgiving?
A: Turkeys with pretzel tail feathers are a classic, but I’ve seen tiny pumpkin pops too. Or just roll in fall sprinkles—no need to stress! For inspo, you can check Sally’s Baking Addiction, which has super detailed cake pop basics.
So, give these Thanksgiving cake pops a go. Even if you mess up, you get cake out of the deal. And, at least in my kitchen, that’s never a loss. Happy Turkey Day!
Ingredients
- 1 box yellow cake mix
- 3 large eggs
- 1/2 cup vegetable oil
- 1 cup water
- 1/2 cup vanilla frosting
- 12 ounces orange candy melts
- 2 ounces dark chocolate chips (for decorating)
- 1/4 cup assorted sprinkles
Instructions
-
1Bake the cake according to the package instructions using eggs, oil, and water. Let it cool completely.
-
2Crumble the cooled cake into a large bowl. Mix in the vanilla frosting until the mixture holds together.
-
3Roll the mixture into 16 golf-ball-sized balls and place them on a baking sheet lined with parchment paper.
-
4Melt the orange candy melts according to package instructions. Dip the end of each lollipop stick into the melted candy, then insert into each cake ball. Freeze for 15 minutes.
-
5Dip each cake pop into the melted orange candy coating, letting any excess drip off. Place upright in a Styrofoam block or stand.
-
6Decorate with dark chocolate chips, assorted sprinkles, and other decorations to create Thanksgiving designs. Let set before serving.
Approximate Information for One Serving
Nutrition Disclaimers
Number of total servings shown is approximate. Actual number of servings will depend on your preferred portion sizes.
Nutritional values shown are general guidelines and reflect information for 1 serving using the ingredients listed, not including any optional ingredients. Actual macros may vary slightly depending on specific brands and types of ingredients used.
To determine the weight of one serving, prepare the recipe as instructed. Weigh the finished recipe, then divide the weight of the finished recipe (not including the weight of the container the food is in) by the desired number of servings. Result will be the weight of one serving.
Did you make this recipe?
Please consider Pinning it!!

