Let Me Tell You About This Butterfinger Bomb Cake
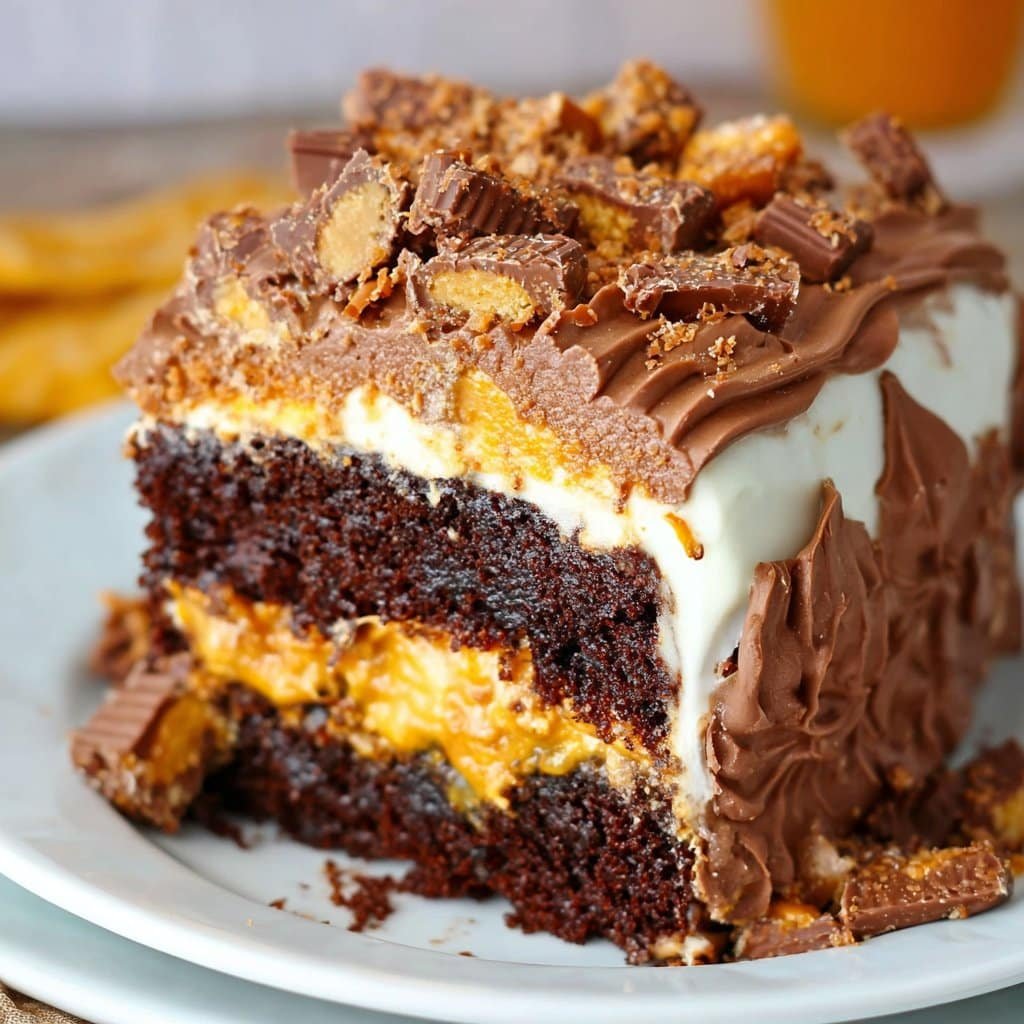
Okay, so here’s the scoop: this Butterfinger Bomb Cake is basically what happens when you can’t decide if you want cake, pudding, or candy for dessert. I made it the first time because I had a leftover stash of Butterfingers (shoutout to post-Halloween chaos) and no desire to bake from scratch at midnight. My cousin Jennifer, who honestly has no restraint for anything chocolate-peanut buttery, asked for it three times since then. Actually, last Christmas someone tried to take home the leftovers and it got a bit heated — not naming names, but you know who you are. Point is, this recipe is more like sweet-tooth therapy than anything fancy! Oh, and fair warning, you’ll find little shards of Butterfinger stuck to your counter for a week. Worth it.
Why You’ll Love This (And Why I Make It…Too Often)
I throw this together when my schedule is bonkers and there’s no time to make a proper layer cake, but everyone’s still expecting “something with that candy bar in it.” My family goes wild for this because it’s gooey, obviously, but also because it looks messy — so no one expects perfect slices (which takes the stress off me, bless). If you’ve ever gotten frustrated with dry cakes (haven’t we all?), you’ll appreciate this one. The pudding layer kind of soaks in and saves everything. Oh, and, confession: I once tried skipping the candy on top and honestly, nobody forgave me. So now I overcompensate.
What You’ll Need (But Honestly, Improvise!)
- 1 box chocolate cake mix (I sometimes go with devil’s food instead, and my gran insists Duncan Hines is superior, but whatever’s on sale honestly)
- Ingredients for cake mix (usually water, oil, eggs — just check the box; wing it if you must, but eggs are kind of non-negotiable)
- 1 (14 oz) can sweetened condensed milk (though once I used caramel sauce instead, and it kinda worked!)
- 1 (16 oz) tub whipped topping (Cool Whip, but homemade is dreamy if I’m feeling motivated, which is rare)
- 4–5 regular Butterfinger candy bars, crushed up (or those Butterfinger Bites — pro tip: less wrapper drama)
- 1 (3.9 oz) box instant chocolate pudding mix (I had to use vanilla once when I ran out; not bad actually, just different)
- 2 cups cold milk (don’t sweat if you only have 1%, it works)
How I Actually Make This (Read: No Judgment!)
- First things first, bake the cake: Mix up your chocolate cake according to the instructions on the box. You know the drill. Pour it into a greased 9×13 baking dish. (Actually, a metal pan works better for me, but glass does in a pinch.)
- Bake at the temp the box says — usually about 350°F (175°C) for 30 minutes? When it smells done and springs back when you poke it (just not with your face), you’re good.
- Here’s where things get interesting. While the cake is still warm (not nuclear, just warm), poke holes all over it with the handle of a wooden spoon — or a chopstick, or even a straw; who am I to judge. The more holes the merrier.
- Pour that magical can of sweetened condensed milk over the whole thing. It’ll look weird and swampy. Don’t panic — it always looks like that before it gets awesome.
- Let it all soak in and cool for a bit. (Honestly, I’ve rushed this and paid the price — the topping gets all melty and questionable.)
- Whisk your pudding mix with cold milk until thick. Spread that over the cooled cake with a spatula, or just the back of a spoon if you can’t find your spatula which happens to me, like, every time.
- Next is the whipped topping layer. Slap it on, swirl it around, don’t fuss. This is usually when I sneak a taste, and sometimes forget to wash the evidence off the spoon. Oops.
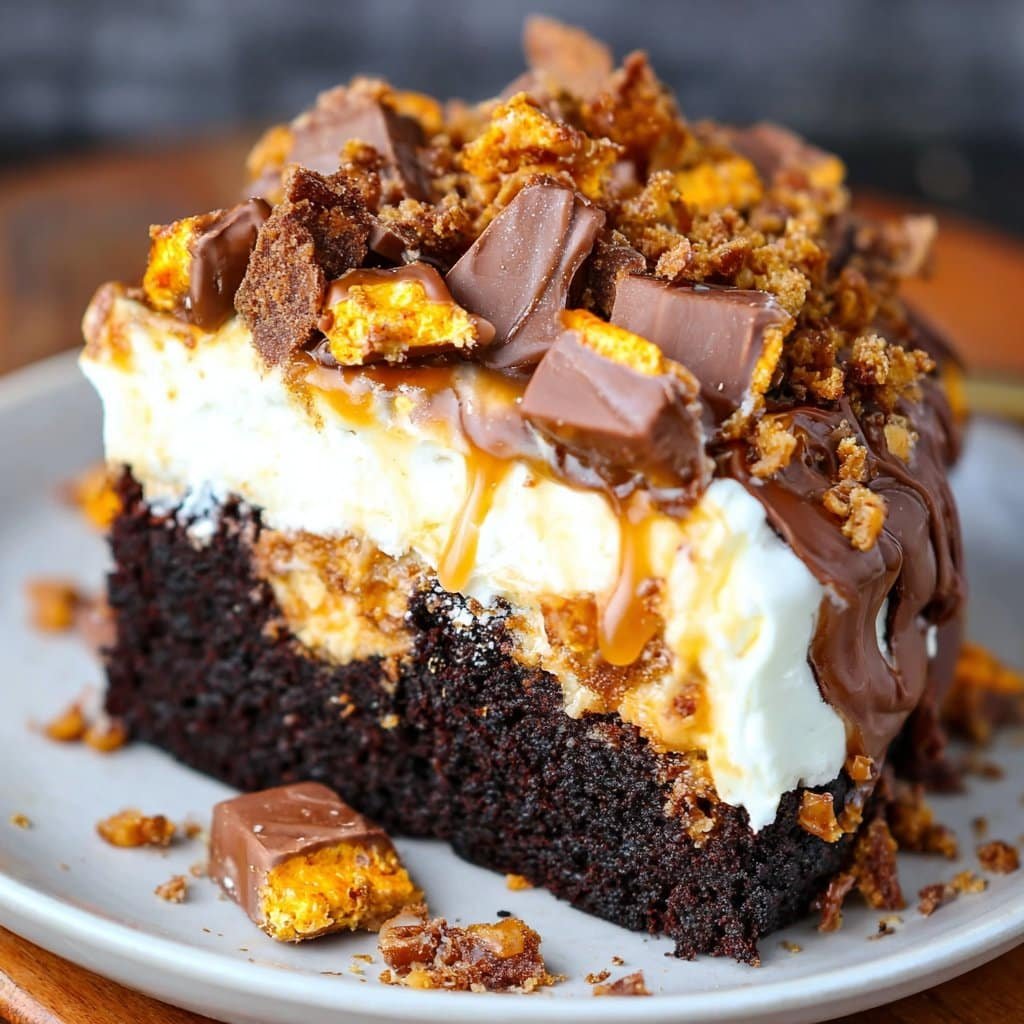
- Crush up your Butterfinger bars — I throw them in a zip-top bag and whack them with a rolling pin. (A coffee mug does the job too, if you’re desperate). Sprinkle all over the top. Go nuts here!
- Now, chill it in the fridge for at least 3 hours, but overnight is even better. (I think the flavors get cozier the next day, though honestly, who has that kind of self control?)
Stuff That Surprised Me (Notes!)
- If you pour the milk over a hot-hot cake, it sometimes pools in the corner. Don’t ask how many times I’ve done this. I just carefully swirl the pan around to even it out.
- The candy can get weirdly sticky if it sits out on a humid day — just pop it back in the fridge if it gets too gloopy.
- The denser the cake, the better it soaks up the sweetened milk. Box mix + pudding always seems to win. I tried a homemade cake base once and it was just too crumbly. Live and learn!
Tinkering With The Recipe (Stuff I’ve Tried)
- Reese’s Cups instead of Butterfingers: works, but honestly, not the same vibe. Butterfinger’s got that crunch!
- Salted caramel drizzled over the whipped topping as a last-minute flourish: A++ in my book.
- Using coffee instead of water in the cake mix: Actually kind of brilliant, adds a little depth. I probably wouldn’t do it for kids, though.
- One time I tried doubling the pudding layer — not recommended, it just got kind of…sloshy? Stick to one box.
What You’ll Need (And What You Don’t)
- 9×13″ baking dish (if your dish is slightly smaller, just be ready for a thicker cake — not a crime!)
- Mixing bowls (or, in a pinch, I used a clean soup pot. Nobody noticed.)
- Hand mixer or a whisk — honestly, a fork works if that’s all you’ve got.
- Rolling pin or something heavy to crush up the candy (I’m not above a wine bottle, folks)
How To Store It (If It Even Lasts Long Enough)
Store leftovers (ha!) covered in the fridge for up to four days. I find the topping can get a little soggy after day two, but it’s still edible in a pinch. Truthfully, in my house it’s gone by the next morning, usually for breakfast — not judging.
Best Ways to Serve It (According to My Crew)
Scoop big messy hunks into bowls, or slice squares if you’re feeling formal. My dad actually demands a tiny scoop of vanilla ice cream on the side (go figure), but I just like it cold straight from the dish. Around here, it’s become a weird family tradition to have it during movie marathons, which means crumbs everywhere and maybe a rogue Butterfinger chunk in the couch cushions.
Things I Wouldn’t Skip (Learned the Hard Way)
- Chilling is non-negotiable (I once tried rushing, didn’t wait and the layers slid everywhere. Lesson learned)
- Don’t crush the candy to dust — you want some chunks for texture.
- If you’re using a homemade whipped cream, add a little sugar or it gets lost in all that chocolate.
Your Questions — Answered The Way I Usually Do
- “Can I make this ahead of time?” Oh for sure. Actually, it’s even better after chilling overnight. Just keep the candy separate till the last minute or it goes weirdly chewy.
- “What if I don’t have Butterfingers where I live?” Hmm, that is tricky. I’ve heard from folks using various alternatives — think toffee bars like Heath or, in a stretch, even crunchy peanut brittle. It’s not an exact swap, but it’ll scratch the itch.
- “Can I freeze it?” I wouldn’t. The texture gets kind of funky and the candy bars get all weird. Good luck fitting the pan in your freezer anyway!
- “Is it very sweet?” Well, yeah — it’s dessert. But actually, if you use less condensed milk or sub in caramel, it’s a bit less sweet (not much, but every little helps).
- Looking for fancier serving ideas? Once, I tried layering the whole thing in a trifle bowl (see Angela’s gorgeous setup on Southern Living). It looked very posh until someone dropped a spoon in it. Still tasted grand!
Anyway, that’s my slightly rambling guide to Butterfinger Bomb Cake. Give it a try and let me know if you find Butterfinger bits stuck to your sock, too. I swear it happens every time.
Ingredients
- 1 box chocolate cake mix (plus ingredients required on the box: eggs, oil, water)
- 1 (14 oz) can sweetened condensed milk
- 1 cup creamy peanut butter
- 2 cups whipped topping (such as Cool Whip), thawed
- 1 (8 oz) package cream cheese, softened
- 1/2 cup powdered sugar
- 2 cups Butterfinger candy bars, crushed (about 6 fun-size bars)
- 1/2 cup chocolate syrup
Instructions
-
1Prepare the chocolate cake mix according to package instructions and bake in a 9×13-inch pan. Let cool for 10 minutes.
-
2While the cake is still warm, poke holes all over the cake using the handle of a wooden spoon.
-
3Pour the sweetened condensed milk evenly over the cake, allowing it to soak into the holes. Let the cake cool completely.
-
4In a medium bowl, beat cream cheese, peanut butter, and powdered sugar until smooth. Fold in 1 cup of whipped topping.
-
5Spread the peanut butter mixture over the cooled cake, then top with the remaining whipped topping.
-
6Sprinkle crushed Butterfinger candy evenly over the top and drizzle with chocolate syrup. Chill for at least 30 minutes before serving.
Approximate Information for One Serving
Nutrition Disclaimers
Number of total servings shown is approximate. Actual number of servings will depend on your preferred portion sizes.
Nutritional values shown are general guidelines and reflect information for 1 serving using the ingredients listed, not including any optional ingredients. Actual macros may vary slightly depending on specific brands and types of ingredients used.
To determine the weight of one serving, prepare the recipe as instructed. Weigh the finished recipe, then divide the weight of the finished recipe (not including the weight of the container the food is in) by the desired number of servings. Result will be the weight of one serving.
Did you make this recipe?
Please consider Pinning it!!

