The Time I Accidentally Turned Sprouts Into a Party Snack
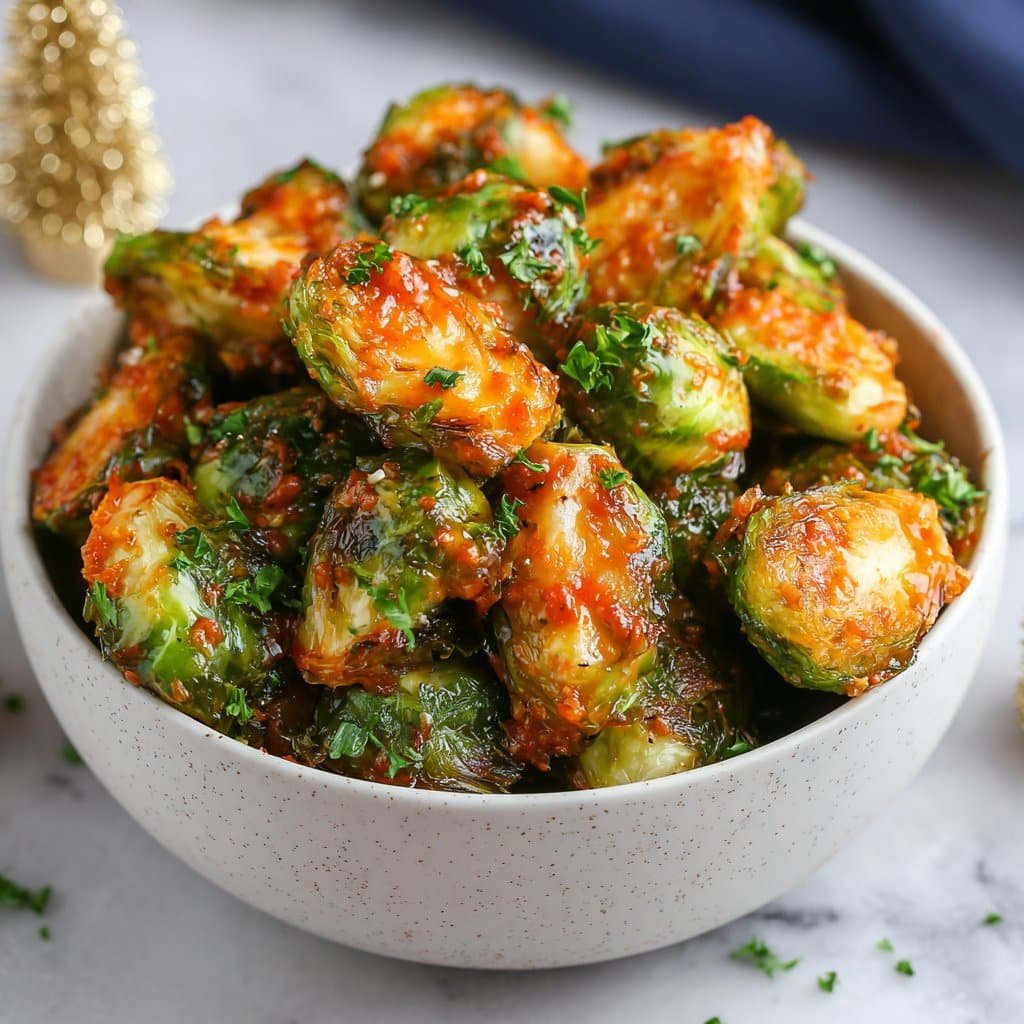
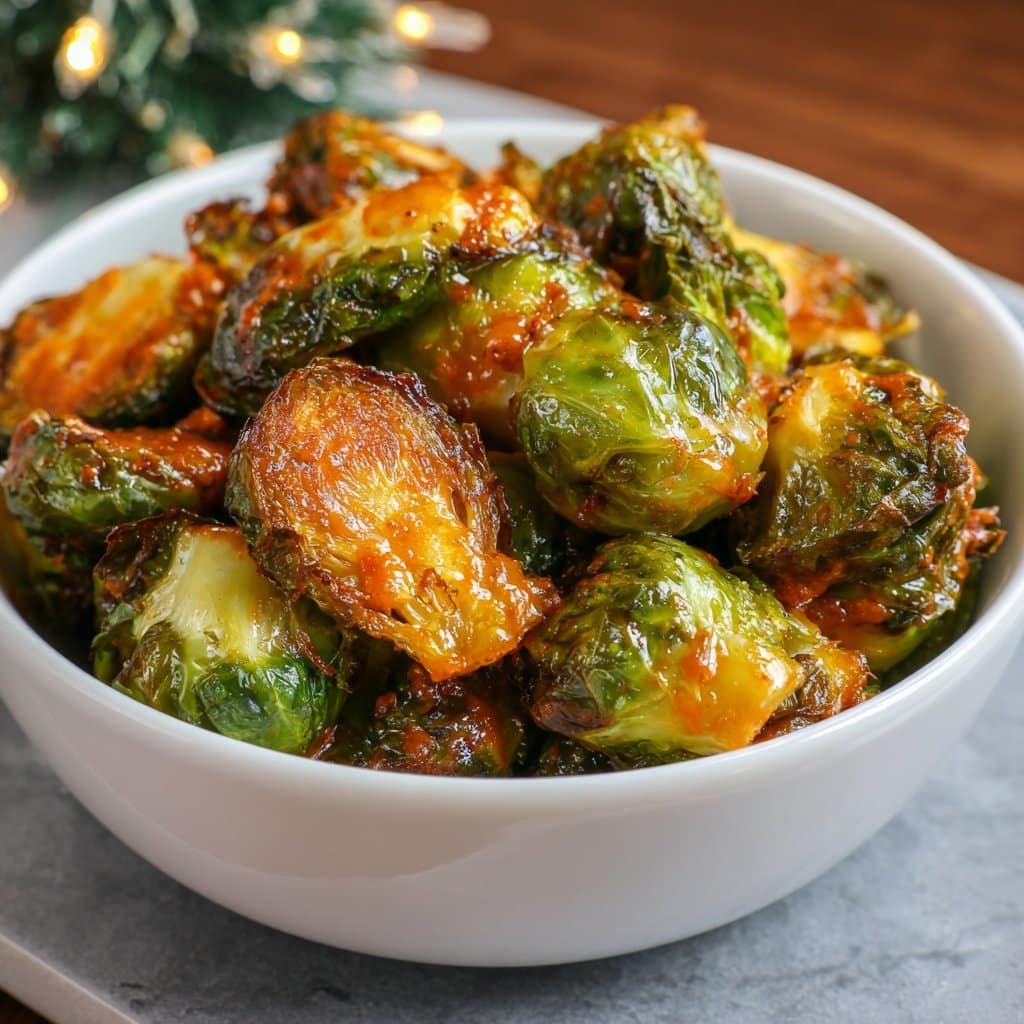
Okay, confession time: I used to avoid Brussels sprouts like a kid avoiding broccoli. But one night, after a long Tuesday (you know the kind), I was craving something spicy and crunchy. I spotted a bag of lonely brussels in the fridge, and, armed only with stubbornness, an air fryer, and my trusty bottle of Buffalo sauce, magic happened. Now my family actually requests these — go figure. Making veggies cool? Never thought I’d see the day.
Why I Keep Making These
I mean, first of all, they cook up so fast—in under 20 minutes usually, and I don’t have to stand over a hot stove or deal with a pan to scrub later (which is basically my love language). I make these when I want something that’s not just another boring side dish. Sometimes they disappear before dinner—my kid calls them “spicy veggie popcorn” and sneaks handfuls post-school. And on really lazy days, I’ve tossed some straight form the freezer into the air fryer (almost worked—see notes…)
What You’ll Need (But I’m Not Judging Your Pantry)
- Brussels sprouts – I usually go for about 500g/1 lb, but honestly, any amount works; just adjust the other stuff as you go.
- Olive oil – 1 to 2 tablespoons. Or avocado oil if I remember to grab it. My grandmother swore by vegetable oil, but… nah.
- Buffalo sauce – 3 to 4 tablespoons. Any brand. Franks is the classic, but I’ve definitely used Aldi’s version. If you have homemade, you’re officially fancy.
- Salt & pepper – To taste; go easy, Buffalo sauce is salty.
- Optional: Garlic powder, smoked paprika, or chili flakes – for an extra little nudge.
- Toppings: Crumbled blue cheese or feta, ranch or blue cheese dip for drizzling. (Anything creamy, honestly.)
Directions – Because You Probably Know More Than You Think
- Prep your sprouts: Chop off those tough ends. Slice bigger ones in half so they crisp nice. Sometimes I just quarter the massive ones, but don’t stress. Rinse and dry them—it’s okay if there’s a little moisture! The air fryer is forgiving.
- Toss it up: Throw sprouts in a big bowl. Drizzle your olive oil. Sprinkle with salt, pepper, and anything spicy you’re in the mood for. I use my hands here, because it’s easier and, I dunno, more satisfying? Wash up after, unless you want Buffalo-scented hands for the rest of the evening.
- Air fry first: 180°C/350F for 10-12 minutes. Give the basket a good shake halfway through. My air fryer gets a bit huffy if I skip this step; yours might vary. This is usually when I sneak a tester piece.
- The saucing: Pour sprouts into a bowl, douse with Buffalo sauce, toss like you mean it. Back into the air fryer for another 2-4 minutes. (Want ’em even crispier? Go max time, but watch so you don’t end up with tiny charred stumps. Unless, erm, that’s your thing.)
- Serve and top: Pile onto a plate, go wild with blue cheese if you like—absolutely OK to skip if you are staunchly anti-blue-cheese (I get it). Add dipping sauce or just dig in.
Notes from My Very Imperfect Kitchen
- Once, I tried using frozen sprouts without thawing—don’t. They turn to mush. If you must use frozen, thaw and thoroughly pat dry first, but honestly, it’s not the same.
- If you forget to shake the basket, you’ll get some burnt stragglers. Eh, extra crunch?
- I think these are kinda better at room temp, but maybe that’s because I always get distracted and leave them out too long.
Variations I’ve Tested (Not All Winners)
- Honey Buffalo: Add a teaspoon of honey to your sauce for sweet heat—got rave reviews, but my kid still prefers regular.
- Buffalo Cauliflower: Tried the exact same method with cauliflower florets. Works, but takes a few min more. But cauliflower’s just a bit drier, you know?
- Crispy coating misadventure: I attempted a panko crust once—egg wash, then bread crumbs. Honestly, too fussy for a weeknight and most fell off. Maybe with more patience (which is not my strong suit!).
Equipment (But Don’t Panic if You’re Missing Something)
Clearly, you want an air fryer, but if not, a really hot oven (220°C/425F) can work in a pinch — lay the sprouts out on a baking tray, same steps, just add about 10 minutes to the time. Perfect is the enemy of good, right?
Storing the Leftovers (If You Have Any, Lucky You)
Pop ‘em in an airtight container, they’re fine in the fridge for 2-3 days. They do lose their crunch, but taste is still on point. I think this actually tastes better the next day, but maybe that’s just because I’m eating it cold straight form the fridge at midnight. Oh, but I can’t exactly vouch for their longevity—a full batch rarely survives one day here!
Serving — How We Do It
We go family style: pile up the sprouts on a big cutting board, drizzle with ranch or scatter crumbled blue cheese over. Or serve them with toothpicks as a snack for movie night (who needs popcorn anyway?). On football Sundays, I stick ‘em right next to the wings—less mess, same vibe. My uncle once put some in a wrap with leftover chicken; it actually worked amazingly well. So, you know, follow your gut here.
Things I Learned the Hard Way
- I once dumped way too much Buffalo on at the start; don’t! It burns in the air fryer. Wait for round two.
- If you rush cutting the sprouts and leave some too big, they don’t get as crispy as the little ones. So, actually, take a second with the knife. Or bribe someone else to do it.
- If you try to pack the fryer basket too full, they just kind of steam each other. Better to go two smaller batches if you can spare the patience. I barely can, but it’s worth it.
What People Usually Ask Me (And What I Tell ‘Em)
- Can I make these ahead of time? You sure can. They’ll be less crispy, but honestly, I re-toast them in the air fryer for a couple mins. Works pretty well, sort of like leftovers pizza—in a good way.
- Will my house smell? Yeah, a little. It’s Brussels sprouts, what can I say? Open a window if you’re worried, but the Buffalo scent sort of covers things up.
- Could I use other sauces? Go wild! Sriracha, BBQ, or even just plain old hot sauce. I once used teriyaki—and uh, that’s a story for another time (kinda odd, honestly).
- Is this actually healthy? I mean, what’s healthy these days? There’s veggies, and you control the oil. So probably healthier than the buffalo wings I also make. Moderation and all that.
- My sprouts aren’t crispy; what gives? Two things: don’t overcrowd the basket, and let them dry out well before starting. If you skipped either, try again—you’ll get it!
Want to see air fryers I’ve tried? Check Serious Eats’ recommendations (their reviews are brutally honest!), or peek at Feasting At Home’s Buffalo sprouts twist for more serving inspo. And if you just want to commiserate about overcooked veggies, my inbox is open. Really, making good food is about laughter, trial and error, and not taking it all too seriously.
Ingredients
- 1 pound Brussels sprouts, trimmed and halved
- 2 tablespoons olive oil
- 1/2 teaspoon garlic powder
- 1/2 teaspoon salt
- 1/4 teaspoon black pepper
- 1/3 cup buffalo sauce
- 1 tablespoon melted butter
- 2 tablespoons chopped fresh parsley (optional, for garnish)
Instructions
-
1Preheat the air fryer to 380°F (193°C) for 3 minutes.
-
2In a large bowl, toss the halved Brussels sprouts with olive oil, garlic powder, salt, and black pepper until evenly coated.
-
3Place the Brussels sprouts in the air fryer basket in a single layer. Cook for 12–14 minutes, shaking the basket halfway through, until crispy and golden brown.
-
4While the sprouts are cooking, mix buffalo sauce and melted butter in a small bowl.
-
5Transfer the cooked Brussels sprouts to a clean bowl. Toss immediately with the buffalo sauce mixture until well coated.
-
6Garnish with chopped parsley if desired, and serve hot.
Approximate Information for One Serving
Nutrition Disclaimers
Number of total servings shown is approximate. Actual number of servings will depend on your preferred portion sizes.
Nutritional values shown are general guidelines and reflect information for 1 serving using the ingredients listed, not including any optional ingredients. Actual macros may vary slightly depending on specific brands and types of ingredients used.
To determine the weight of one serving, prepare the recipe as instructed. Weigh the finished recipe, then divide the weight of the finished recipe (not including the weight of the container the food is in) by the desired number of servings. Result will be the weight of one serving.
Did you make this recipe?
Please consider Pinning it!!

