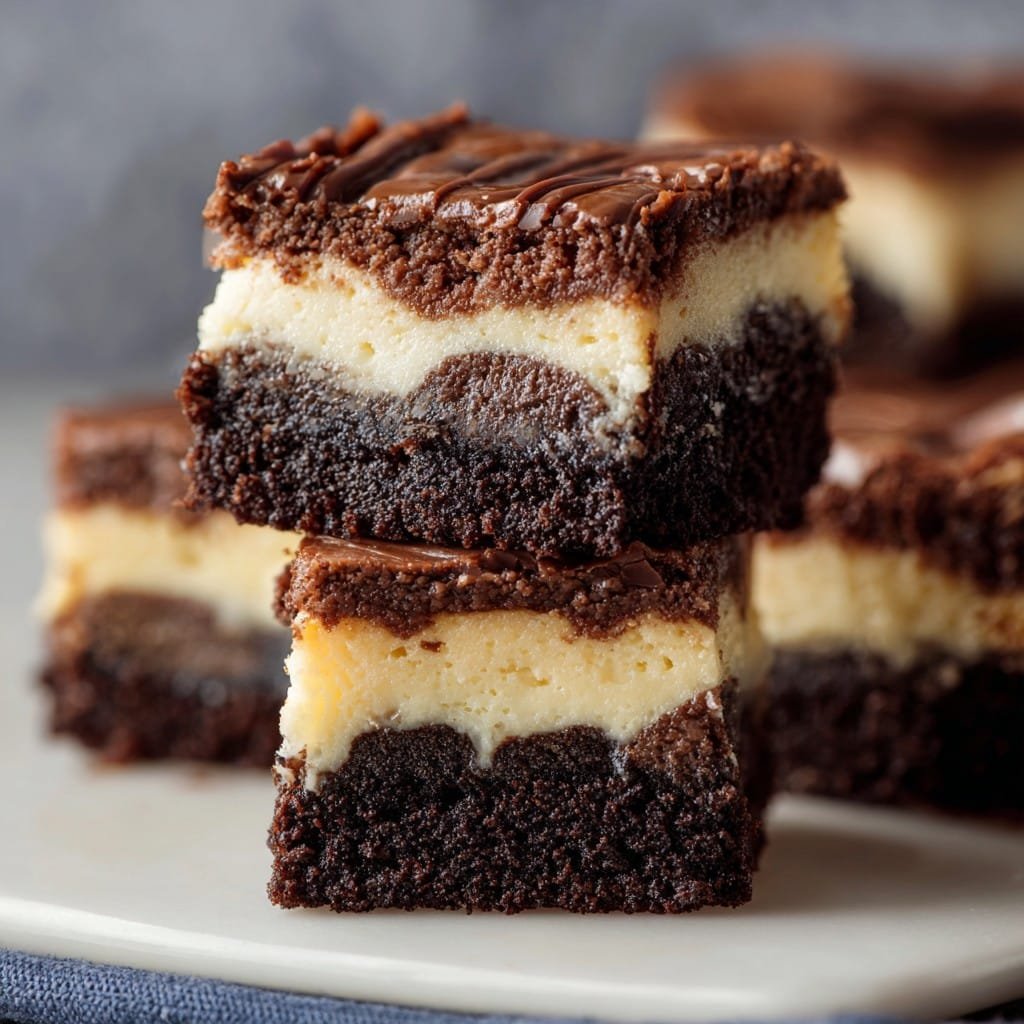
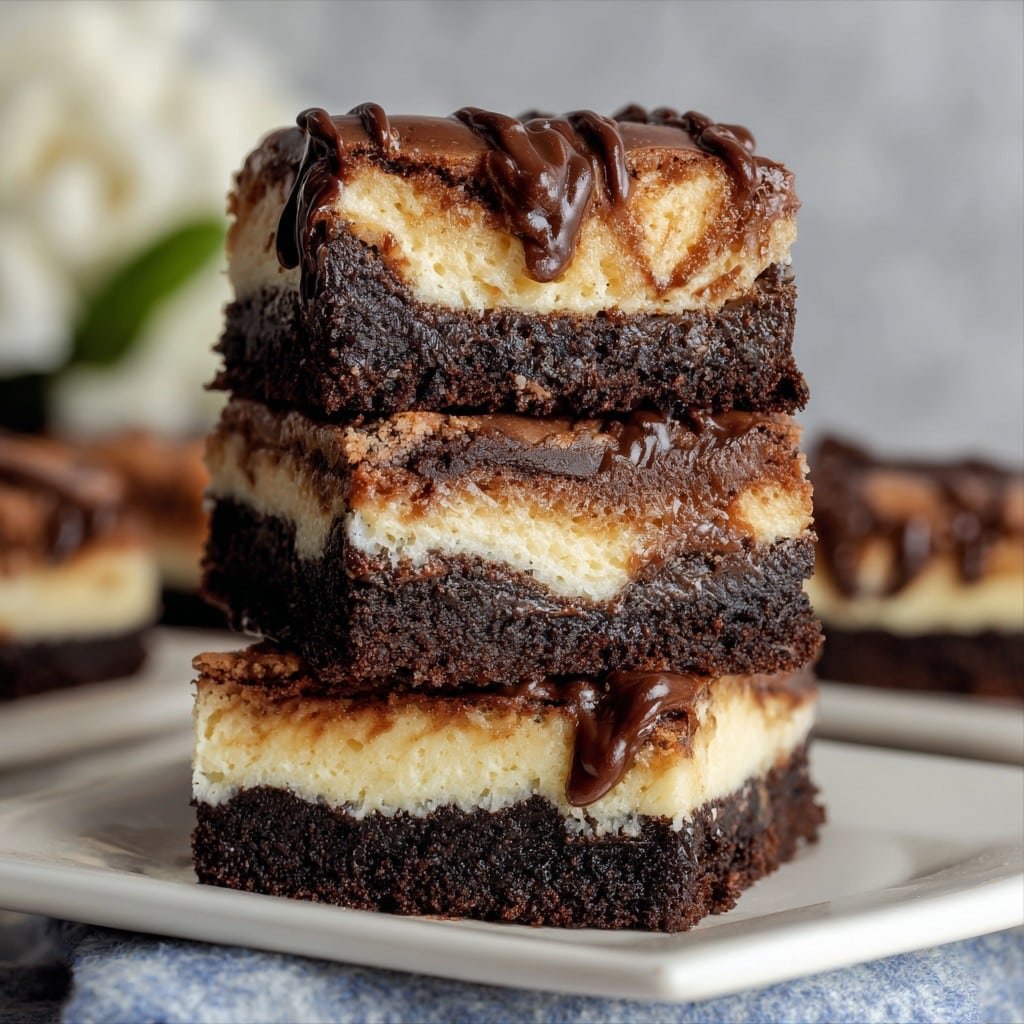
If you’re anything like me (distracted by a cat and bad at making up my mind), you know there’s always a moment when you want brownies but you’re also craving cheesecake. Well, a few winters ago (right after I’d burnt my thumb on a soup pot, actually), my sister dared me to combine both into bars, and this little experiment unexpectedly gave rise to our family’s favourite dessert. Some things in the kitchen just sort of happen when you’re not really paying attention, right? These Brownie Cheesecake Bars are gleefully messy, fudgy, and exactly the sort of thing you want to sneak from the fridge at midnight. Sorry not sorry.
Why You’ll Love Making These, Even on a Tuesday
I make this recipe when I want to impress guests but secretly also want leftovers (ha!). My family absolutely loses their mind over these bars because they’re the best of both worlds without picking sides. I sometimes use boxed brownie mix when I’m running late or feeling like life’s too short for sifting, but homemade is worth it if you can swing it. Also—this is maybe a bit embarrassing—I once forgot the vanilla and it was still pretty darn tasty (though don’t tell my mother-in-law that, she’d clutch her pearls). And honestly, sometimes I bake half the cheesecake filling just on its own—oops.
What Goes In ’Em (with My Notes)
- Brownie Base:
- 110g (½ cup) unsalted butter – salted works if that’s all you have, just skip the added salt
- 175g (1 cup) granulated sugar – I’ve even done half brown sugar once, gave it a caramel note
- 2 large eggs
- 70g (⅔ cup) unsweetened cocoa powder – I use whatever’s on hand, I don’t stress
- 60g (½ cup) all-purpose flour – My gran swears by cake flour, but I never notice much difference
- 1 tsp vanilla extract (or a glug—who’s judging?)
- ¼ tsp salt
- Cheesecake Swirl:
- 225g (8 oz) cream cheese, at room temp – Don’t use low-fat, it’ll get weird
- 50g (¼ cup) sugar – Sometimes I toss in a scoop of Greek yogurt if I’m short on cream cheese
- 1 large egg
- ½ tsp vanilla extract (Imitation is fine, truly)
- Extras & Swaps:
- 50g (½ cup) chocolate chips or chopped chocolate – optional, but makes it truly decadent
Let’s Get Mixing (Here We Go!)
- Preheat your oven to 175°C (350°F)—if your oven has a mind of its own like mine, double-check with an oven thermometer.
- Line an 8-inch square pan with parchment. If you forget, don’t panic. Greased foil or just a good spray of oil will do.
- Melt the butter in a saucepan or zap it in the microwave. Stir in the sugar. This part smells like fresh-baked heaven. Let it cool a tic, then whisk in eggs, cocoa, vanilla, salt, and flour. Batter will look almost too thick, like edible mud. That’s perfect.
- Pour almost all the brownie mixture into your pan. Hold back a couple generous spoonfuls for the swirl — I know, it’s tempting to just dump it all in!
- Beat together cream cheese, sugar, egg, and vanilla until smooth. Actually, I find it works better if you let the cream cheese soften first. Mine’s always a bit lumpy if I’m impatient.
- Dollop the cream cheese goodness over the brownie layer. Random blobs are fine.
- Spoon over the reserved brownie batter. Now swirl—jiggly figure eights, or just drag a butter knife through like a zig-zag. If it looks wonky, trust me, it’ll settle as it bakes.
- Scatter on some chocolate chips if you’re feeling extra (the official rule in my house is: don’t skimp).
- Bake 35–40 minutes until the edges look set and the middle still wobbles a bit. Don’t overbake! At 35 minutes, I poke the corner (gently) just to check. It’s okay if there’s a smudge on your toothpick.
- Cool in the pan… and this is where I usually sneak a taste while no one’s looking. Refrigerate a couple hours before slicing if you want nice clean bars (but let’s be honest, warm and gooey is a vibe).
If You’re the Note-Taking Type (Or Just Curious)
- I’ve learned not to swirl too much. That one time I did, it just turned out like a muddled marble cake (still delicious though, so no actual regrets).
- Letting these cool fully is technically correct, but some days, I just can’t wait any longer.
- My friend once tried a gluten-free flour mix—surprisingly, it worked, but watch the bake time. It can dry out fast.
What Else Can You Do? (Variations… and Fails)
- I tried adding crushed Oreos inside, but—honestly? The crowd didn’t love it. The cookies got a bit soggy (I still ate three anyway).
- Peanut butter swirl? Oh yes, highly recommend. Warm it up and drizzle it through before baking.
- Chopped walnuts or pecans thrown into the brownie layer, if you like a bit of crunch.
- Once I subbed raspberry jam for part of the cream cheese layer. Unexpectedly delightful! Might try that again, actually.
What You’ll Need (But There’s Wiggle Room)
- 8-inch square pan (I’ve used a round cake tin in a pinch—edges are different, but whatever)
- Hand mixer or a sturdy whisk. Once, my electric mixer quit halfway and I just used a wooden spoon—it worked, even if my arm was sore.
- Parchment paper is ideal. No parchment? Grease and hope for the best, as I say.
- Microwave or stovetop for melting butter. No preferences; both get the job done.
How to Store (But Not for Long!)
Technically, these keep in an airtight container in the fridge for 4–5 days, but honestly, in my house they never last more than a day—two at most, and that’s only if someone forgets their midnight snack. You can freeze them, too, wrapped up tight, but I prefer them fresh. Pro tip: taste even better the next afternoon.
How We Serve ‘Em (Or Devour, No Judgement)
I love these straight outta the fridge, but my cousin insists they’re best warmed—10 seconds in the microwave. Fancy idea: top a warm bar with a scoop of vanilla ice cream. For birthdays, we’ve even stuck a candle in the pan (don’t ask me why; ask my little niece; she has strong opinions).
Hard-Earned Pro Tips (Because I’ve Messed Up, Trust Me)
- I once tried rushing them out of the oven—big mistake, too gooey, almost pudding. Now I let ’em sit in the warm oven five extra minutes if my kitchen is too chilly.
- Cream cheese straight from the fridge? Nightmare to blend, lumps galore. Just let it warm up a bit.
- Don’t skip lining the pan. You’ll thank me later scraping out less brownie-cement.
Questions Folks Always Ask Me (Your Troubles, My Troubles)
- Can I double this recipe for a crowd?
- Yup, just use a 9×13 inch pan. Watch the bake time, though—give it at least 45-50 min. Test with a skewer; it’s okay if it’s a tad sticky in the middle.
- Do I really need to chill them before slicing?
- Nah, but they cut neater that way. But, sometimes messy is more fun. I say—do what you feel.
- Is boxed brownie mix okay?
- Absolutely, especially if you’re short on time. I like the Ghirardelli one (see here), but honestly any brand is fine. Just prep as directed and save a bit to swirl on top.
- Best way to get clean slices?
- Chill and use a hot knife (run it under water). Wipe between cuts. (Or just embrace the fudge.)
- Can I make this gluten-free?
- Yes, just swap flour for a 1:1 GF blend. See tips in notes above, too.
- What’s your favourite resource for baking tips?
- If you’re looking for more bar dessert ideas, check out Sally’s Baking Addiction (she’s got tons!).
P.S. If you end up with a bit of leftover cheesecake mix, just bake it in a ramekin alongside the bars—that’s your secret baker’s treat. And if you, by some wild chance, have extras, these bars make a smashing ice cream sandwich, so go wild (see Serious Eats’ guide for DIY ice cream tips). Anyway, what was I saying? Oh right, happy baking!
Ingredients
- 1/2 cup (115g) unsalted butter, melted
- 1 cup (200g) granulated sugar
- 2 large eggs
- 1 teaspoon vanilla extract
- 1/3 cup (40g) unsweetened cocoa powder
- 1/2 cup (65g) all-purpose flour
- 8 oz (225g) cream cheese, softened
- 1/3 cup (67g) granulated sugar (for cheesecake layer)
- 1 large egg (for cheesecake layer)
- 1/2 teaspoon vanilla extract (for cheesecake layer)
Instructions
-
1Preheat oven to 350°F (175°C). Line an 8×8-inch baking pan with parchment paper and lightly grease.
-
2In a medium bowl, whisk together melted butter and 1 cup sugar. Add 2 eggs and 1 teaspoon vanilla, whisking until blended.
-
3Add cocoa powder and flour, mixing until just combined. Spread brownie batter evenly into prepared pan.
-
4In another bowl, beat softened cream cheese with 1/3 cup sugar until smooth. Add 1 egg and 1/2 teaspoon vanilla extract; mix until well combined.
-
5Pour cheesecake mixture over brownie layer and gently swirl with a knife to create a marbled effect.
-
6Bake for 35 minutes or until the center is set. Cool completely in the pan before slicing into bars.
Approximate Information for One Serving
Nutrition Disclaimers
Number of total servings shown is approximate. Actual number of servings will depend on your preferred portion sizes.
Nutritional values shown are general guidelines and reflect information for 1 serving using the ingredients listed, not including any optional ingredients. Actual macros may vary slightly depending on specific brands and types of ingredients used.
To determine the weight of one serving, prepare the recipe as instructed. Weigh the finished recipe, then divide the weight of the finished recipe (not including the weight of the container the food is in) by the desired number of servings. Result will be the weight of one serving.
Did you make this recipe?
Please consider Pinning it!!

