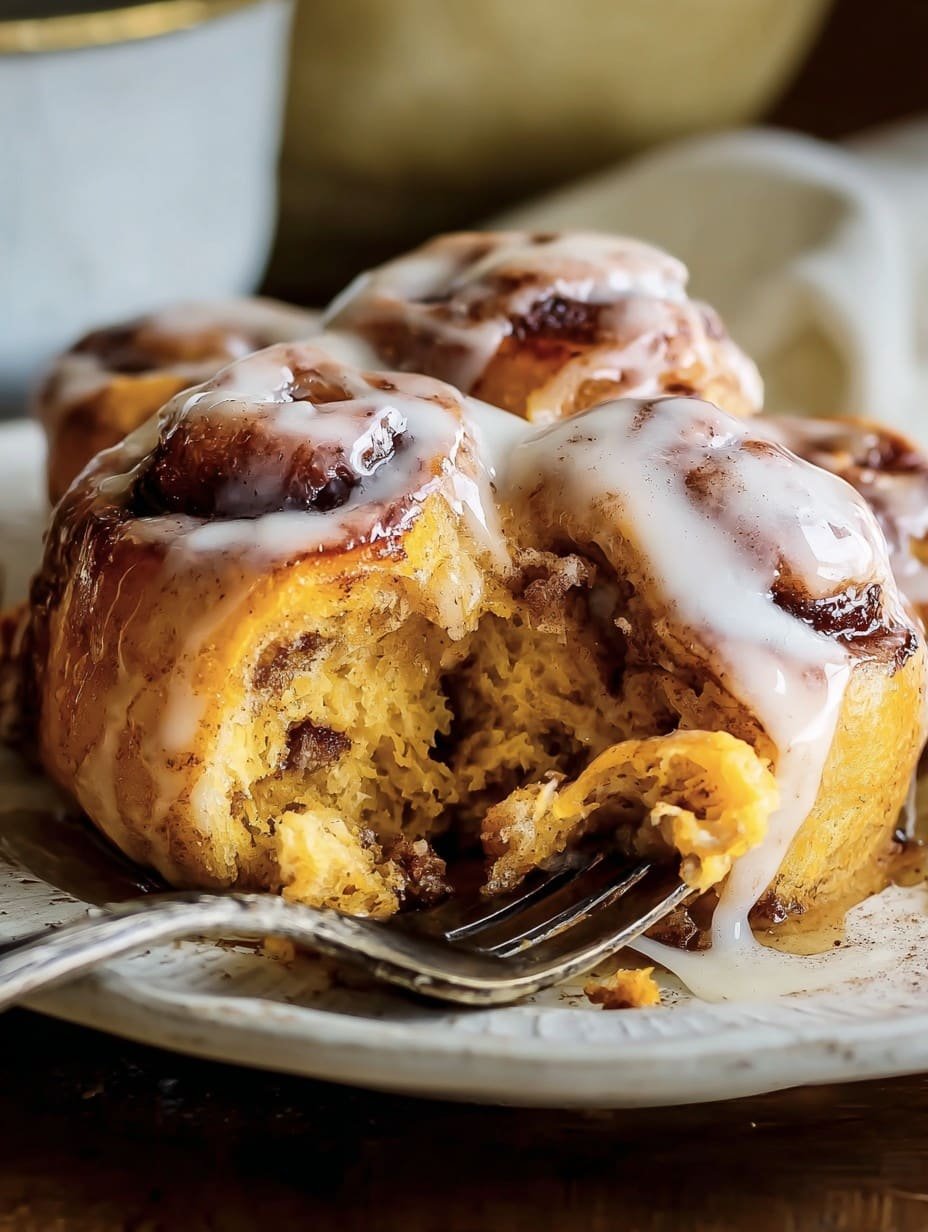
Let Me Tell You About Apple Pie Cinnamon Rolls (And That One Time I Burnt the Filling…)
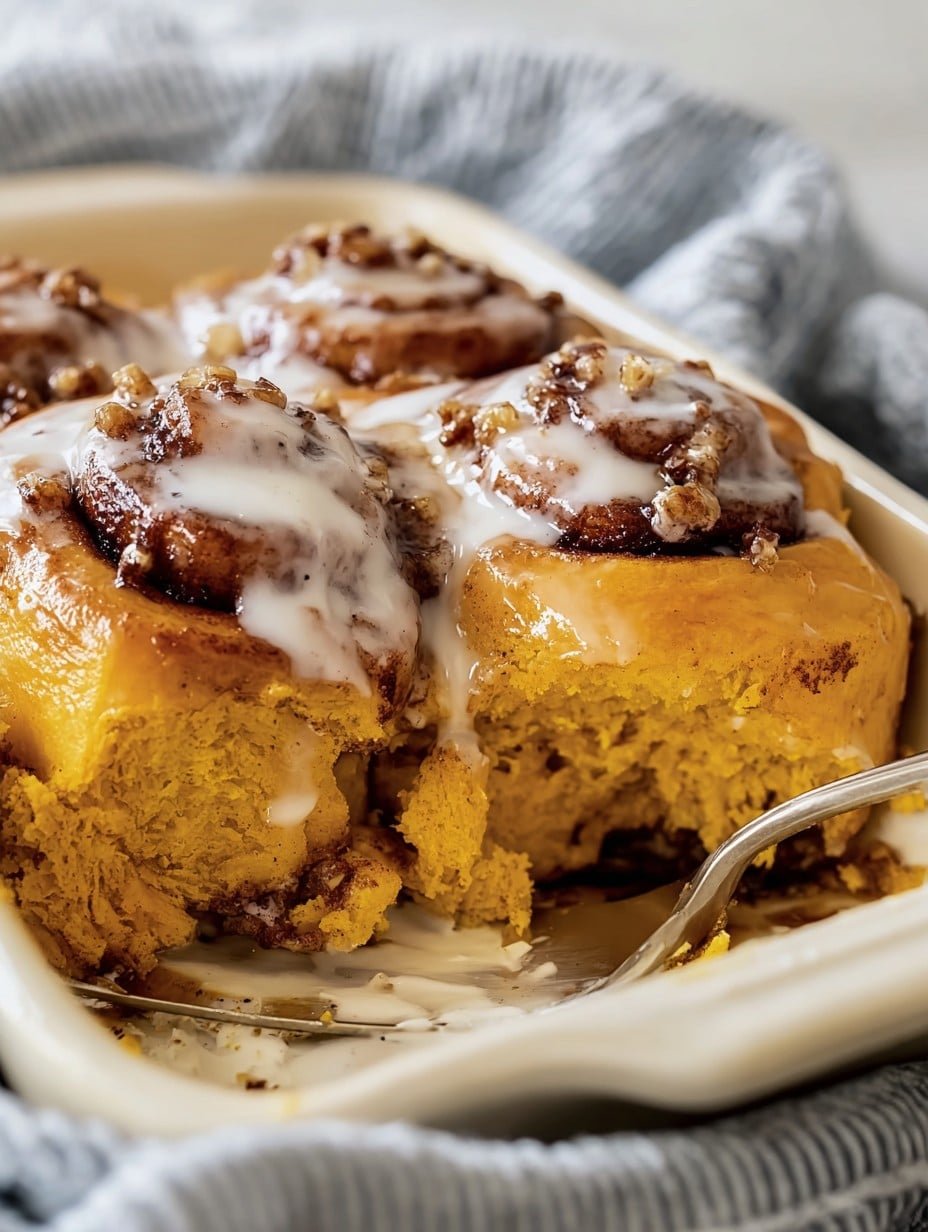
Okay, so imagine this: it’s a rainy weekend, the house smells like apples and cinnamon, and you’re halfway through a cup of tea you forgot about (again) because you’re too busy licking sticky filling off your fingers. That’s basically me making apple pie cinnamon rolls. No joke, I sort of stumbled on this recipe after I, uh, accidentally left a batch of cinnamon roll dough rising too long. But it worked out! I chucked some apple pie filling in, because, why not? And bam—now the kids ask for these instead of actual apple pie. Which, honestly, is fine by me because these are a bit less fiddly, and I get my cinnamon fix.
And once—side note—I tried making these in summer, and the filling was so runny it escaped everywhere. Still delicious, but the cleanup? Let’s just say my dog was thrilled.
Why You’ll Love These, Or At Least Not Totally Regret Making Them
I make these when I want that apple pie flavor but don’t feel like rolling out a crust (ugh). My family pretty much goes nuts for them, especially my daughter, who thinks they’re “like, a cinnamon apple hug.” If you’re the sort who likes big weekend breakfasts or you want to win points at the next office thing (you know that person who brings store-bought muffins? Outdo them with these), these rolls are the ticket. Sometimes I do wonder if it’s the brown sugar goo that people are really after, though…(I totally scrape the pan myself).
What You’ll Need (And What I Swapped In When I Ran Out)
- 2 1/2 cups plain flour (that’s all-purpose for my US pals; once used bread flour and it was fine, but chewier)
- 2 1/4 tsp instant yeast (you know the little packet? Or half a cube of fresh yeast—my grandma swears by it, but I just grab the pre-measured stuff)
- 1/4 cup caster sugar (or granulated, honestly—don’t panic if that’s all you’ve got)
- 1/2 tsp sea salt (table salt works too—I won’t tell)
- 1 egg (room temp, or just put the cold one in your pocket for a bit—seriously, mum tip)
- 1/2 cup milk (whole, 2 percent, almond—one time I used oat when I was out. Tasted slightly porridge-y but not in a bad way?)
- 1/4 cup unsalted butter, melted (did once use Stork, because that’s what I had. Tasted… different, but edible!)
- For the Filling:
- 2 medium apples, peeled and chopped (Granny Smith or Bramley are sharp, but I like Gala for sweetness)
- 2 tbsp brown sugar (light or dark, but if you only have white, just chuck in a dash more cinnamon)
- 1 tsp cinnamon (sometimes I add a shake of nutmeg if I’m feeling fancy)
- 1 tsp lemon juice (optional, really—adds tang)
- 2 tbsp butter, for sautéing
- Glaze: 3/4 cup powdered sugar, 1-2 tbsp milk (water in a pinch), 1/2 tsp vanilla
Let’s Roll (Steps, Mishaps, and Where I Usually Sneak a Taste)
-
Mix the Dough
Start by warming your milk until it’s just warm (not hot; if you can stick a finger in, you’re good)—stir in the yeast and sugar, and give it five-ish minutes. Foam? Great, you’re in business. (If not, start again. Or, actually, I sometimes just carry on and it’s always worked out, but maybe that’s luck.)
Now slosh in the melted butter, plop in the egg, add flour and salt, and mix. I use a big wooden spoon, but if you’ve got a mixer—lucky you.
Knead it all together; 8–10 minutes by hand or until it’s stretchy and smooth. Should be a bit tacky but clean the bowl. -
First Rise
Pop the dough in a greased bowl, cover with a damp tea towel, and leave it somewhere warmish until doubled (anywhere from 45 minutes to an hour… maybe less if your kitchen’s a sauna, like mine in August). Don’t stress if it’s not a perfect ball—mine always looks lumpy but puffs up fine. -
Make the Apple Pie Filling
Melt butter in a pan, toss in the apples, sugar, cinnamon, and lemon juice—stir and let it all bubble till the apples soften, about 10 minutes (this is usually when I sneak a piece, you know, for science). Set aside to cool a bit—too hot and it’ll melt your dough. -
Shape the Rolls
Roll your dough into a rectangle—about a foot by eight inches, or whatever shape you manage. Spread the cooled apple mix over, leave a little border at the edges. Now, roll it up (long ways), and don’t worry if filling tries to escape—just sort of tuck it in as you go.
Slice into 8–10 rolls (I use dental floss—unused!—because knives always squish them for me, but honestly, either way works.)
Arrange in a greased baking dish, leaving a little space between. Cover and let rise 30 mins. -
Bake
Heat oven to 180°C (that’s 350°F)—bake about 23 to 27 minutes till golden and bubbling round the edges. -
Glaze
Mix glaze ingredients and drizzle (or slather, which I prefer) over warm rolls.
Notes, AKA Things I’ve Decided Matter (Or Don’t)
- If your filling is super watery, just drain a bit off—otherwise your rolls can go sloppy. Been there. Or add a spoon of flour if you like.
- If the dough feels dry, just add a splash more milk (sometimes I get too enthusiastic with the flour, oops).
- Actually, I sometimes mix apples and pears together, because that’s what was rolling round the fruit bowl.
Some ‘What If…?’ Variations (One Winner, One Fail)
- I swapped out the apples for pears and ginger one time—surprisingly lovely.
- Tried putting raisins in the filling? Bit weird, but if you’re a raisin fan, go for it. My lot weren’t thrilled, honestly.
- Oh, and once I subbed in a sheet of ready-rolled puff pastry for the dough. Quicker, yes, but went kind of… soggy. Wouldn’t repeat unless desperate.
What You Need (And Improv Moves If Tools Are Missing)
- Mixing bowl
- Wooden spoon (a clean, sturdy mug works if a spoon’s missing!)
- Frying pan or saucepan for apples
- Baking dish, 9-inch-ish
- Rolling pin (or honestly, wine bottle—been there, done that)
- Clean tea towel
How To Store These Beauties
Tightly covered, they’ll last two days at room temp—or pop ’em in the fridge and reheat (10 seconds in the microwave does the trick). Although, honestly, in my house, they never last more than a day! If you do need to freeze, wrap individually and thaw overnight. However, I think the texture goes a bit chewy after defrosting, so fresh is best.
How I Like To Serve ’Em (With a Personal Twist)
My favourite is warm rolls with a scoop of vanilla ice cream—breakfast, snack, dessert…you decide. My partner once added a glug of caramel sauce and now I can’t un-see it (dangerously good). Sometimes we go full autumn vibes and sprinkle toasted pecans on top—makes you feel impossibly cozy, I promise.
Lessons Learned (AKA Don’t Rush or the Yeast Police Will Get You)
- Let that dough rise—once I tried baking too soon and ended up with doughy hockey pucks. Be patient!
- Cool your filling before spreading, or you’ll have a weird mess (voice of experience here…)
- Add the glaze when the rolls are warm, but not straight from the oven, unless you like a glazing puddle at the bottom.
FAQ—Your Questions, My Not-So-Perfect Answers
- Can I use canned apple pie filling?
Yes, absolutely—on lazy days, I do! Chop it up a bit so it spreads easier, but honestly, any brand works fine (I once used Betty Crocker’s). - Do you have to peel the apples?
Nah, if you like more texture and are in a rush. Skin-on adds chew, but I prefer peeled if I’m being fancy. - My rolls are dense. Why?
Probably the dough didn’t rise long enough, or the yeast was off. Or maybe the kitchen was too chilly. Try giving it more time next round. - How do I stop the filling from leaking?
Good question—I wish I knew! Sealing the dough edges helps a bit, but some escape is normal (and actually, it makes that yummy toffee at the edges). - Can I make these vegan?
Sure thing—use vegan butter, swap the milk for any plant milk, and skip the egg (add a splash more milk or try a ‘flax egg’—I got this from Minimalist Baker). - Is it possible to make the dough ahead of time?
Yep! Let it do its first rise in the fridge overnight—just allow some extra time to warm up before rolling. Actually, I think the flavor gets better the next day. - Can I halve the recipe?
Of course, though you’ll wish you made more. But just halve every ingredient, no special math.
Last thing—if you’ve never made any kind of rolls before, don’t sweat it; if they look a bit wonky, they’ll still taste amazing. Dough is forgiving, and messy cinnamon rolls have more character, I say! And if by some fluke you have leftovers, they make a cracking midnight snack (though I once tried dunking one in tea, and, er, do not recommend—crumb explosion).
Ingredients
- 2 cups all-purpose flour
- 1/4 cup granulated sugar
- 2 1/4 teaspoons active dry yeast
- 1/2 teaspoon salt
- 2/3 cup warm milk
- 1/4 cup unsalted butter, melted
- 1 large egg
- 2 medium apples, peeled and diced
- 2 tablespoons brown sugar
- 1 teaspoon ground cinnamon
- 1/4 teaspoon ground nutmeg
- 1 tablespoon cornstarch
- 1/3 cup powdered sugar
- 1 tablespoon milk (for the glaze)
Instructions
-
1In a large bowl, combine flour, granulated sugar, yeast, and salt. Add warm milk, melted butter, and egg. Mix to form a soft dough and knead for 5-8 minutes until smooth.
-
2Cover the dough and let it rise in a warm place for 45 minutes or until doubled in size.
-
3While dough rises, cook diced apples, brown sugar, cinnamon, nutmeg, and cornstarch over medium heat until apples are soft and mixture thickens. Let cool.
-
4Roll out the dough into a rectangle. Spread apple pie filling evenly over the dough. Roll up tightly from the long side and slice into 8 rolls.
-
5Place rolls in a greased baking dish. Cover and let them rise for 30 minutes. Bake at 350°F (175°C) for 25-30 minutes until golden brown.
-
6Mix powdered sugar and milk to make a glaze. Drizzle over warm rolls before serving.
Approximate Information for One Serving
Nutrition Disclaimers
Number of total servings shown is approximate. Actual number of servings will depend on your preferred portion sizes.
Nutritional values shown are general guidelines and reflect information for 1 serving using the ingredients listed, not including any optional ingredients. Actual macros may vary slightly depending on specific brands and types of ingredients used.
To determine the weight of one serving, prepare the recipe as instructed. Weigh the finished recipe, then divide the weight of the finished recipe (not including the weight of the container the food is in) by the desired number of servings. Result will be the weight of one serving.
Did you make this recipe?
Please consider Pinning it!!

