You Ever Just Need a Low-Effort Winner?
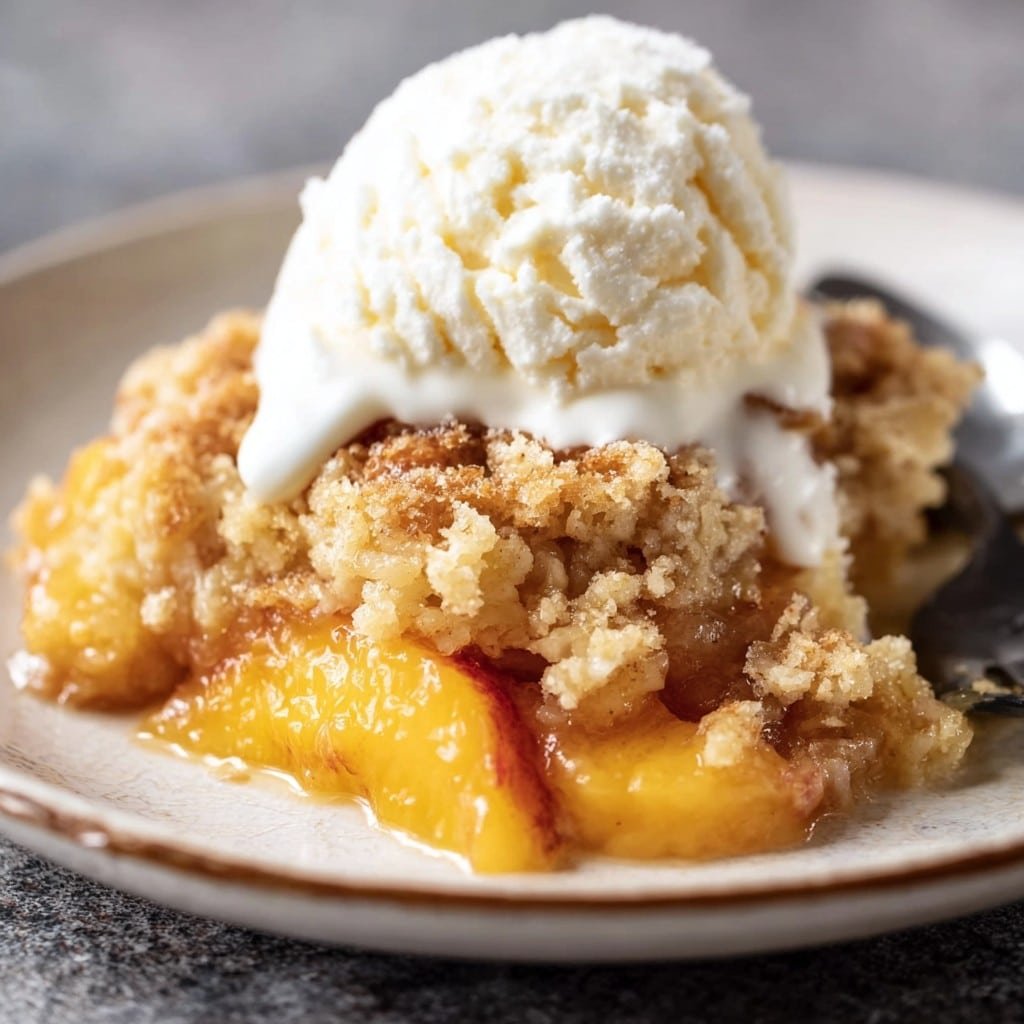
Alright, let’s be real for a sec: Not every day is for scratch-baked, Martha Stewart-level desserts. I first made this peach cobbler dump cake at, well, basically the world’s most chaotic family reunion (picture: cousins everywhere, my Aunt Denise playing 80s rock and nobody agreeing on dessert). It’s one of those desserts that’s barely a recipe—more like a delicious accident that keeps working. I honestly didn’t believe something that sounded, frankly, a bit lazy (just dump the stuff in?) was gonna be such a hit—but holy smokes, it disappeared faster than you can say “who took the last piece?” And yes, my uncle tried to claim it was his idea. Sure, Gary.
Why Make This? (Besides It’s Easy)
I make this when I have about 14 minutes of motivation and a craving for something sweet, warm, and very homey. My family goes absolutely wild for this because it somehow tastes like I spent hours fussing, but honestly, it’s so simple I can throw it together while half-watching reruns of Ted Lasso. If you’re the kind of person (like me, no shame) who sometimes wants dessert but hates extra measuring cups, this is for you. Sometimes I get fancy and add a scoop of vanilla, sometimes I just eat it with a spoon out of the pan. Zero judgement, friend.
Here’s What You Need (And Some Swaps)
- 2 cans (about 15 oz each) sliced peaches in syrup (I’ve used peaches in juice when that’s all I had. Grandma swears by Del Monte, but off-brand absolutely works.)
- 1 box yellow cake mix (Can you use white cake mix? Yep. Might taste a little lighter. Spice cake? Actually pretty fun at Thanksgiving.)
- 1/2 cup unsalted butter, melted (Salted is fine too—just cut back on extra salt later, if you add any. When I’m lazy, I just slice cold butter and lay it on top. Procrastination hack?)
- Optional: A hefty sprinkle of cinnamon, nutmeg, or both. Or none. Your call.
- Extra: Some folks add chopped pecans or walnuts. I tried marshmallows once… let’s just say I don’t recommend it unless sticky chaos is the vibe.
Let’s Throw It Together: Directions (With Some Chaos)
- Preheat your oven to 350°F (about 180°C for those of us outside the US). Find a 9×13 inch baking dish. No dish that big? I’ve doubled up two smaller ones in a pinch. It’s… not beautiful. But it works.
- Dump. (Yes, really.) Pour both cans of peaches (syrup and all!) into your dish. No stirring yet—just let ‘em hang out.
- Sprinkle the dry cake mix evenly over the peaches. Don’t press it down—just shake it out like spreading fairy dust. This is when I absent-mindedly taste a smidge of the cake mix (don’t tell my dentist).
- Drizzle the melted butter all over the top—try to cover as much cake mix as you can. Missed spots? No stress; dry patches sort themselves out during baking. Or so I claim every time.
- Optional extras: Sprinkle on cinnamon and/or nutmeg now. If you’re feeling bold, toss some chopped nuts over it all. Or don’t. Depends how wild your day’s been, I guess.
- Bake, uncovered, for 40 to 50 minutes. You want the top golden and bubbly—though honestly, sometimes my oven takes longer and I get impatient. If you get a rogue doughy patch on top, just scoop around it. It’s rustic, right?
- Let it cool for a bit. Or don’t. I’ve burned my tongue more than once refusing to wait. You do you.
Stuff I’ve Learned the Hard Way (Notes)
- If you decide to drain your peaches “just a little,” you end up with what looks like desert craters. Keep all the syrup unless you’re truly syrup-averse.
- The colder your butter, the patchier the top. But patchy is fine! I used to fuss—now I let it go. (Cue that Frozen song.)
- Once, I added too much cinnamon and it almost overpowered the peach—go easy. A ‘light touch’ is my motto now. Maybe too light sometimes!
Other Ways I’ve Messed With This (Variations)
- Spice cake mix gives major autumn vibes (think: crunchy leaves and fluffy socks). It also works with apple pie filling instead of peaches—pretty tasty.
- Cherry pie filling plus chocolate cake mix? It’s… interesting. Maybe an acquired taste. My kids didn’t love it, but teenagers are moody anyway, so who knows.
- Tried adding a handful of shredded coconut once—too weird for me, but maybe you’re braver.
What You Might Need (But Maybe Don’t?)
- 9×13 inch baking dish—they say it’s key, but any ovenproof dish will honestly do so long as you don’t fill it to the brim.
- Microwave or small saucepan for melting butter. Once melted butter in a mug over a candle (would not repeat, but hey, it worked).
- Spoon or spatula for spreading. Or a decent shake and tap if you’re feeling old-school.
How to Store It (Though It Never Lasts For Me)
Technically, cover and refrigerate for up to 4 days. (I just wrap the whole pan in cling film.) But honestly, in my house it never lasts more than a day! On the off chance you have leftovers, it reheats well in the microwave. Actually, I think it tastes even better the next day—the flavors settle in, y’know?
How I Serve It
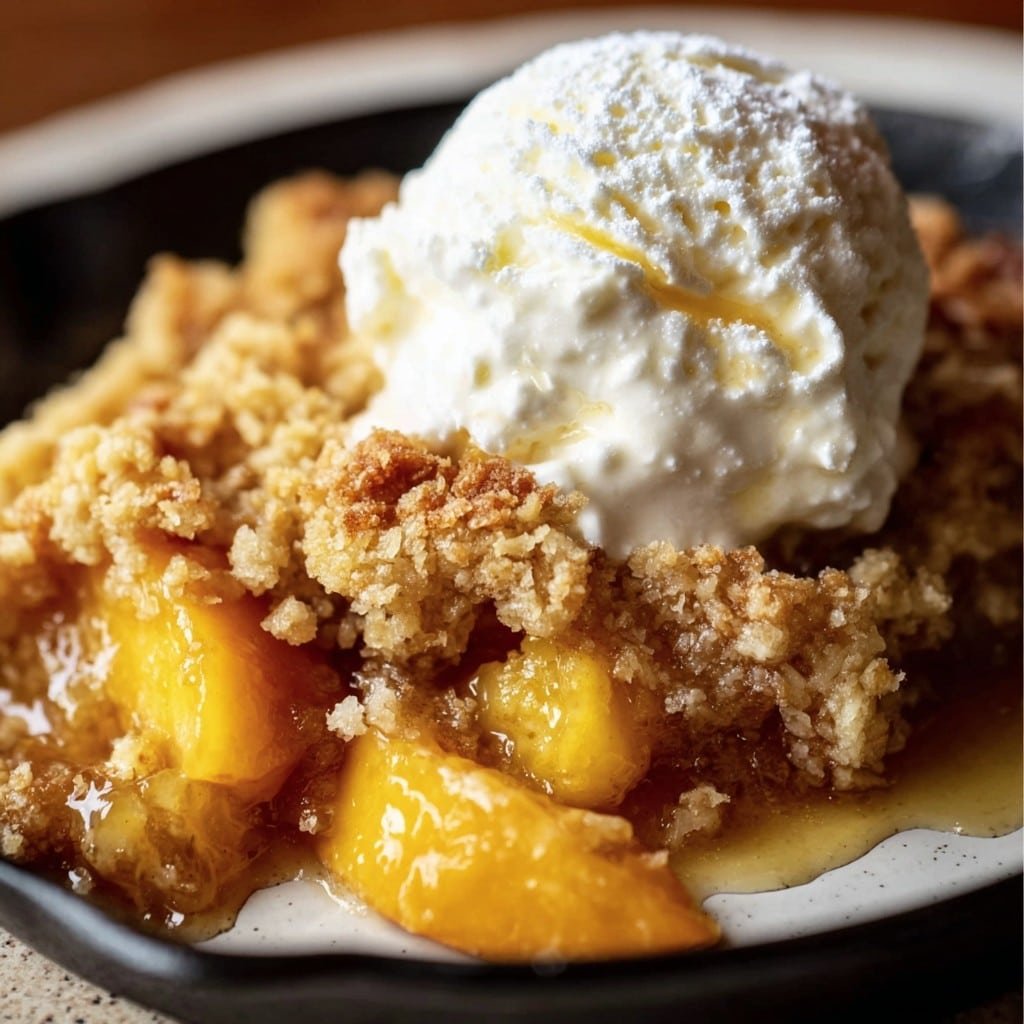
In my humble opinion, this is best served a bit warm, with a scoop (heaping!) of vanilla ice cream. My cousin likes it with cold milk poured over, which is… let’s call it unique. Sometimes I fancy it up with a dollop of whipped cream and a sprinkle of cinnamon. Sunday afternoons with coffee and a slice? Bliss. Sally’s Baking Addiction has some ice cream pairing ideas I love too, if you want to go wild.
Pro Tips—If Only I’d Listened to Myself
- Don’t try to speed up melting the butter “just this once” by putting it in for too long—scorched butter is not a good look (or taste). Ask me how I know. But if I’m short on time, I use a microwave and pull it out as soon as it looks melty.
- If you overbake by, say, 15 minutes because you lost track of time scrolling King Arthur Baking, it’ll still be tasty, just with crunchier bits.
Hot Seat: Reader Questions I Actually Get (FAQ)
- Can I use fresh peaches?
- Yes! Just peel and slice about 4-5 cups, toss with sugar (a quarter cup or so) and a bit of lemon juice. Pour in some extra juice or water to mimic that canned syrup magic. The flavor’s pretty fab actually, though the texture’s—hmm, less uniform?
- Do I have to melt the butter?
- I usually do for even coverage, but honestly, plopping cold slices over the cake mix works in a pinch. Sometimes there’s dry patches, but eh, it’s still delish.
- Can I make this gluten-free?
- Totally—just grab a GF yellow cake mix (like Bob’s Red Mill). It turns out great, maybe even a bit fluffier than the regular one, but don’t quote me on that.
- Do I need to grease the pan?
- I forget about half the time; it rarely sticks. If you’re nervous, quick spritz of nonstick spray can’t hurt.
- Why is it called ‘dump cake’?
- Because you basically dump everything in the pan and give thanks for easy desserts. At least, that’s what my family’s always said—no digging required!
So there you go: my Peach Cobbler Dump Cake Recipe, with all my quirky kitchen opinions and a couple of stories thrown in for good measure. Let me know if you tweak it—or if you, too, have accidentally eaten half the pan before dinner. It happens.
Ingredients
- 2 cans (15 oz each) sliced peaches in syrup, undrained
- 1 box (15.25 oz) yellow cake mix
- 1/2 cup unsalted butter, melted
- 1 teaspoon ground cinnamon
- 1/4 teaspoon ground nutmeg
- 1/4 cup brown sugar
- 1 teaspoon vanilla extract
- Vanilla ice cream or whipped cream for serving (optional)
Instructions
-
1Preheat your oven to 350°F (175°C). Lightly grease a 9×13 inch baking dish.
-
2Pour the sliced peaches with their syrup evenly into the prepared baking dish.
-
3Sprinkle brown sugar, cinnamon, and nutmeg evenly over the peaches. Add vanilla extract.
-
4Evenly sprinkle the dry yellow cake mix on top of the peaches and spice mixture; do not stir.
-
5Drizzle melted butter evenly over the cake mix, ensuring as much coverage as possible.
-
6Bake for 40–45 minutes, or until the top is golden brown and the filling is bubbling. Cool slightly and serve warm with vanilla ice cream or whipped cream if desired.
Approximate Information for One Serving
Nutrition Disclaimers
Number of total servings shown is approximate. Actual number of servings will depend on your preferred portion sizes.
Nutritional values shown are general guidelines and reflect information for 1 serving using the ingredients listed, not including any optional ingredients. Actual macros may vary slightly depending on specific brands and types of ingredients used.
To determine the weight of one serving, prepare the recipe as instructed. Weigh the finished recipe, then divide the weight of the finished recipe (not including the weight of the container the food is in) by the desired number of servings. Result will be the weight of one serving.
Did you make this recipe?
Please consider Pinning it!!

