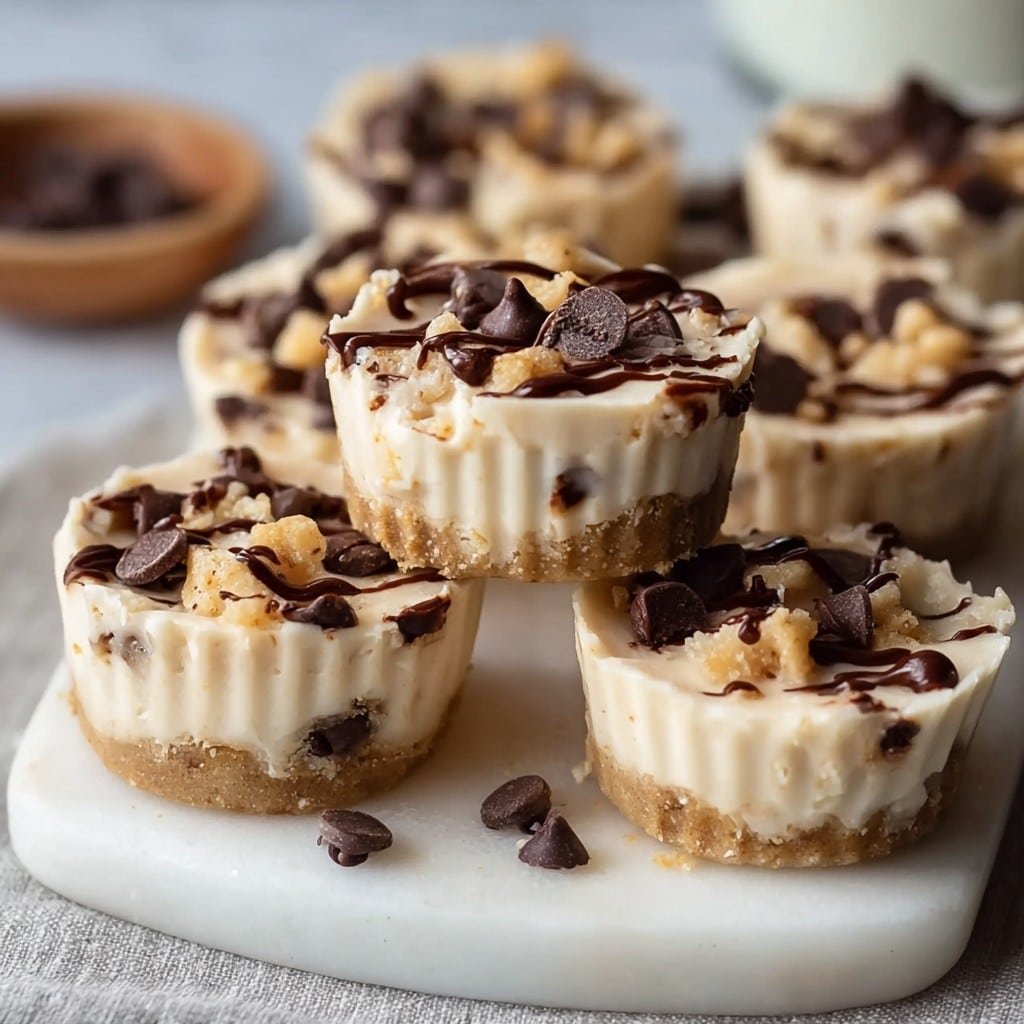
So You Want Cookie Dough Cups? Pull Up a Chair
Alright, listen: if you’d told me five years ago I’d be proudly spooning “healthy” cookie dough out of muffin liners while my kids eye me like hungry raccoons, well, I’d have probably laughed. But here I am. The first time I made these—high protein yogurt cookie dough cups, that is—I was honestly just looking for an excuse to eat something sweet-ish without actually firing up the oven. Plus, I was (maybe still am) notoriously bad at planning snacks ahead, so the no-bake thing really called my name. These practically saved my bacon when I was trying to up my protein but still craved something cold and snacky after a long hike (or, let’s be real, after binge-watching old episodes of Bake Off).
Did I accidentally use salt instead of sugar that first time? Yep. Did my toddler still try to eat them? Also yes.
Why You’ll Love These (Or At Least Not Regret Making Them)
I keep a batch of these in the fridge for when my afterschool chaos hits and I just can’t deal with another request for “real” cookies. My family goes a bit bonkers for them, especially if I don’t mention there’s Greek yogurt in there (my six-year-old’s verdict: “tastes like cake, Mom, but better for my muscles.”)
I make these when I want dessert but don’t want to: clean a mixer, heat up my house, or explain to my neighbor why their kid is covered in flour. Honestly, on school holiday mornings, I sometimes just let the kids make ‘em so I get five minutes of actual peace. That’s, like, the ultimate mom hack, isn’t it? (On the flip side, the one thing I can’t stand is when the chocolate chips all sink to the bottom, but after a few rounds, I figured out a fix. More on that later!)
What You’ll Need (Or Probably Already Have)
- 1 cup plain Greek yogurt; go full-fat or low, but full-fat is smoother. I sometimes use Skyr when the store’s out of my brand.
- 1/2 cup almond flour; regular old oat flour is fine too. My sister swears by cashew flour but she’s, y’know, extra.
- 3 tablespoons peanut butter, or, hey, sunflower seed butter if your house is nut-free (mine’s not, but my best friend’s is).
- 3 tablespoons maple syrup (sometimes I cheat and use honey—shhh… don’t tell my grandmother, she’s a maple loyalist)
- 1 teaspoon vanilla extract; though I’ll admit I’ve used vanilla bean paste once or twice ‘cause I got it on sale.
- 1/4 teaspoon salt
- 1/3 cup mini chocolate chips—use whatever you’ve got. Chopped chocolate works in a pinch.
- Muffin liners, or just parchment squares if you’re out.
How I Make ‘Em (Mostly Without Measuring Cups… oops)
- In a medium bowl, dump in your Greek yogurt, almond flour, and peanut butter. I guess “add” would sound more professional but honestly—I just dump it all in.
- Pour in the maple syrup and vanilla. Mix with a spoon (or a spatula if yours isn’t stuck to the dishwasher). It’ll look weird at first, almost too thick, but just keep stirring. This is where I taste-test, because, well, someone has to.
- Toss in the salt and, once the mix is totally smoothish, fold in those chocolate chips. Here’s my thing: save a few for the top so you get that “wow, these look like cookies!” moment.
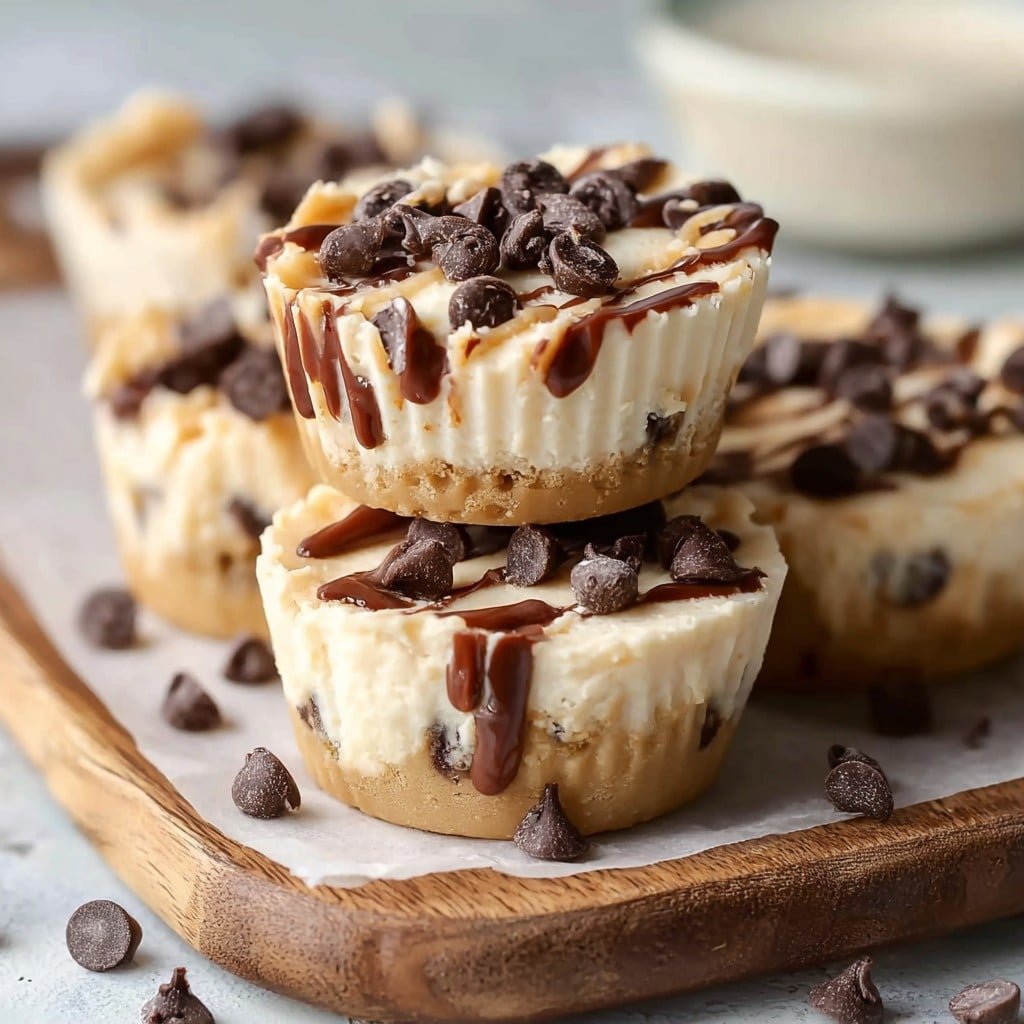
- Grab your muffin liners (I swear by the silicone ones, but regular old paper works). Plop a heaping spoonful into each liner. Six to eight, maybe nine if you make them smaller. Don’t sweat it if they’re uneven—mine never are.
- Smooth the tops out a bit or just poke them flat with your spoon. Sprinkle on those leftover chocolate chips. Then pop ‘em in the freezer for 45 minutes, or the fridge if you (like me) don’t love things too cold on your teeth.
- Take ‘em out, let sit a minute or two if frozen, then try not to eat them all standing by the fridge. Or do; I don’t judge.
All the Odd Notes That Make These Work
- If your dough’s too thick, add a splash of milk—any kind will do. If it’s too thin, a bit more flour. I’ve had batches both runny and dry—somehow, they always work out.
- Actually, letting the dough rest for 5 minutes before scooping makes the texture way better. Found that out by accident (read: I got distracted on a phone call).
- You can chill the mix as a single bowl and scoop it out à la cookie dough, but the muffin cups look fancier if you wanna impress anyone.
Variations (and a Fail for Good Measure)
- Chopped dried apricots instead of chocolate chips? Surprisingly tasty—though my kids call those “fruit salad dough cups.”
- Protein powder: Add a couple tablespoons if you live dangerously. I did vanilla once; it was good but kinda chalky. Chocolate protein was a hard no, tasted like mud pies. Never again.
- Cinnamon swirl: Mix a teaspoon of cinnamon into the dough, or sprinkle on top before chilling. Warming and cozy—kind of like if oatmeal cookies and yogurt had a baby.
If You Don’t Have All the Gadgets…
You’re in luck. No fancy equipment is needed (a normal old bowl and spoon is what I use), but if you have a mini muffin pan, that’s pretty fun. Don’t have muffin liners? Just line a regular dish with parchment and cut the dough into squares. Or spoon it straight into your mouth, I’m not here to police your snack habits.
Storing ‘Em (Good Luck With That)
Stick your cups in a sealed container in the fridge—they’ll keep for about four days? But honestly, in my house, they disappear by the next afternoon. If you accidentally freeze them solid, just thaw for five minutes before snacking. Sometimes the texture gets a little icy. If you care.
How We Serve ‘Em (With a Side of Chaos)
Most times, we just eat them straight from the fridge—after dinner, mid TV binge, you name it. For birthday parties, I serve on a platter with extra toppings (kids love sprinkles, adults go for chopped nuts or sea salt flakes). My son insists on eating his with a tiny fork like he’s auditioning for Masterchef. Go figure.
Pro Tips (Learned the Hard Way, Naturally)
- Once, I tried to rush the freezing step so I could sneak a quick bite—ended up with a gooey mess. Just wait the full time, trust me, impatience makes for messy fingers.
- Mixing in chocolate chips too fast makes them clump. Actually, wait until your dough is smooth, then fold ‘em gently. I learned that after picking out “chocolate boulders” in my second batch.
- If you over-flour by accident, a bit more yogurt can rescue things (but don’t go wild or it’ll turn soupy)
FAQ—Curious Minds Want to Know!
- Can I make these dairy free? Oh for sure! Use coconut yogurt or any non-dairy Greek style, and swap nut butter if you need. Turned out fine in my vegan experiment.
- Do they taste like real cookie dough? Kinda! The texture is more like chilled cookie batter—if you want more classic dough vibes, throw in some oats or use a touch of brown sugar (I tried coconut sugar once; didn’t love it, but my neighbor did!)
- Can I double this? Yep, but use a bigger bowl. I tried tripling once and my arm basically fell off from all the mixing.
- Where’d you get your silicone muffin cups? Oh, I got mine on Amazon—they’ve lasted ages. But my pal swears by these reviewed liners if you want options.
And finally, if you make these and your kids ask for the leftovers, congrats—you’ve just won snacktime. If your partner eats them all before you remember they exist, well… that’s love, right?
Ingredients
- 1 cup plain Greek yogurt
- 2/3 cup creamy peanut butter
- 1/2 cup vanilla protein powder
- 1/3 cup almond flour
- 3 tablespoons honey or maple syrup
- 1/3 cup mini chocolate chips
- 1 teaspoon vanilla extract
- Pinch of salt
Instructions
-
1Line a muffin tin with 8 silicone or paper cupcake liners.
-
2In a mixing bowl, combine Greek yogurt, peanut butter, and honey (or maple syrup). Stir until smooth.
-
3Add vanilla protein powder, almond flour, vanilla extract, and a pinch of salt. Mix until well incorporated.
-
4Fold in the mini chocolate chips.
-
5Spoon the mixture evenly into the prepared liners. Smooth the tops with the back of a spoon.
-
6Freeze for at least 1 hour or until set. Enjoy straight from the freezer or let them thaw for a few minutes before eating.
Approximate Information for One Serving
Nutrition Disclaimers
Number of total servings shown is approximate. Actual number of servings will depend on your preferred portion sizes.
Nutritional values shown are general guidelines and reflect information for 1 serving using the ingredients listed, not including any optional ingredients. Actual macros may vary slightly depending on specific brands and types of ingredients used.
To determine the weight of one serving, prepare the recipe as instructed. Weigh the finished recipe, then divide the weight of the finished recipe (not including the weight of the container the food is in) by the desired number of servings. Result will be the weight of one serving.
Did you make this recipe?
Please consider Pinning it!!

