Okay, Let’s Talk Cookies (and Fall)
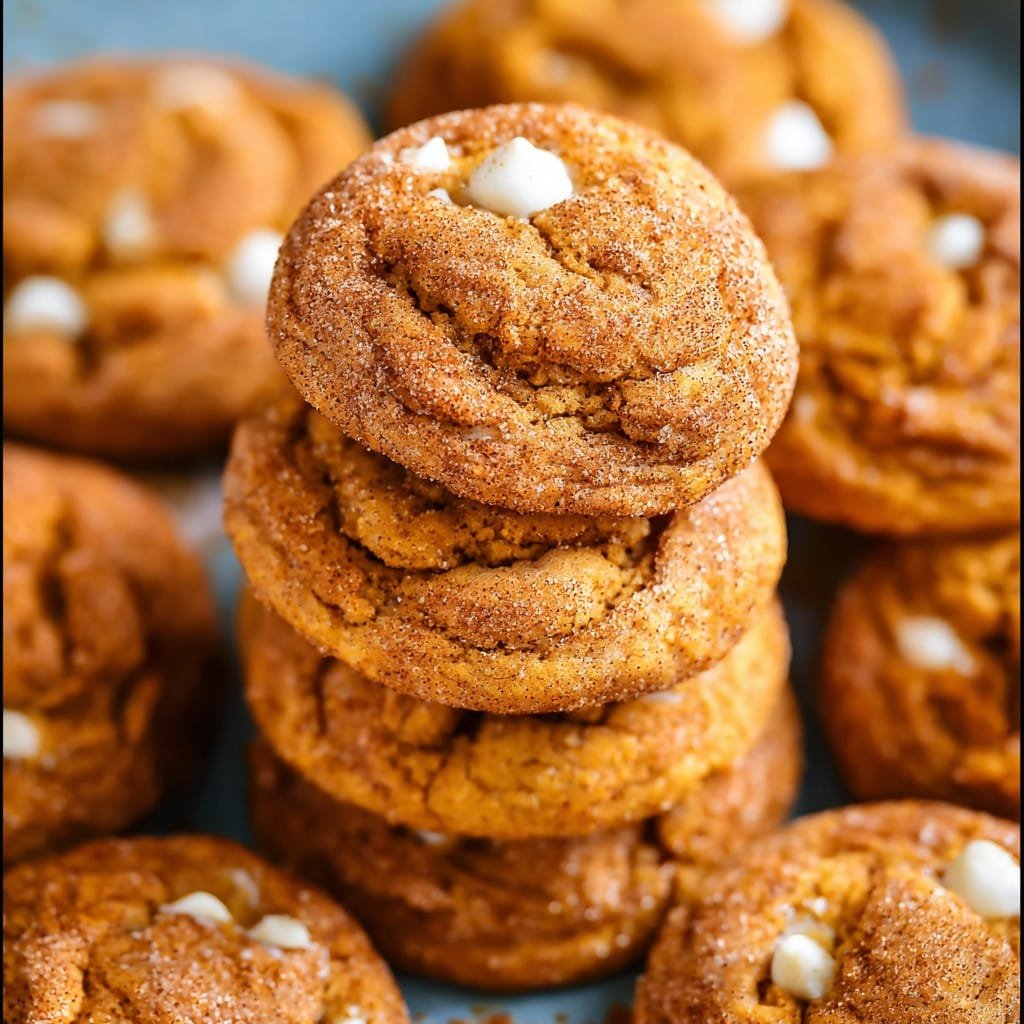
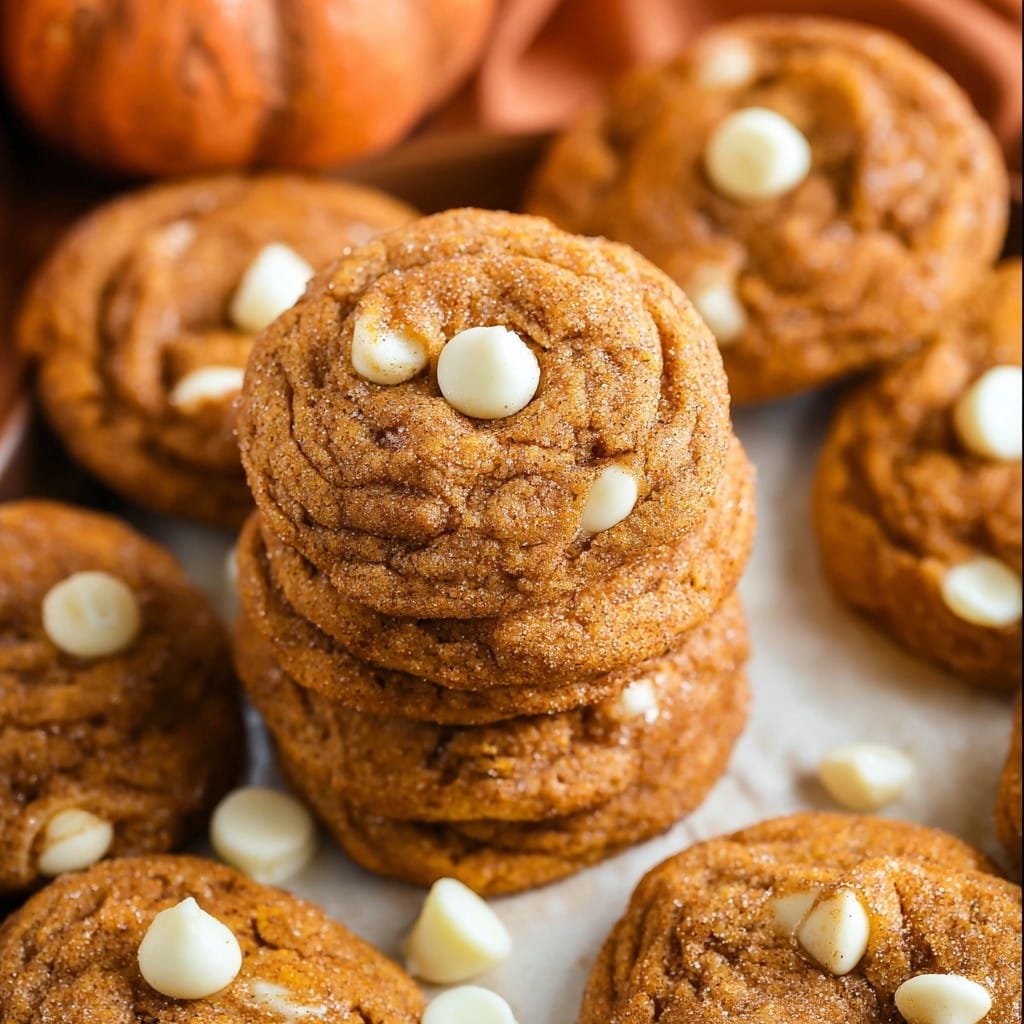
So, you know how some recipes just instantly make your kitchen smell like… well, like fall moved in and brought an extra suitcase? That’s exactly what happens every time I make White Chocolate Pumpkin Snickerdoodles. I first tried them one foggy October when there were three lonely cans of pumpkin puree in my cupboard (don’t ask why I thought I’d need that much). I wanted something spiced, but—let’s be honest—pie takes forever and there’s never a clean pie dish anyway, so cookies it was. Let’s just say my friends started requesting “those weird orange cookies with the white chips” before I knew it. And honestly, they didn’t last long enough to go stale. Side note: I once dropped a whole spatula in the batter when I got distracted by my neighbor’s unexpected ukulele performance outside. Didn’t ruin the dough though!
Why I Keep Coming Back to These
I bake these when I want something that’s just the right amount of sweet (but not blow-your-socks-off sweet) and when my family’s lurking around the kitchen hoping I’ll make “those soft pumpkin ones.” Seriously, I’ve had to hide the batch so there’s actually enough for more than 10 minutes. Plus, tossing in white chocolate chips just gives them a little extra—but it’s not fussy or fancy. I’ve had butter disasters where I forgot to soften it fully, and you know what? Still tasted good. My sister likes the raw dough more than the baked cookies—go figure.
You’ll Need (Ingredients List)
- 2 3/4 cups (330g) all-purpose flour (I’ve tried using a bit of whole wheat for extra nuttiness, but the texture goes weird—stick with plain if you’re not feeling bold)
- 1 tsp baking soda
- 1/2 tsp cream of tartar (my grandmother swore by this, but when I’ve run out, a squeeze of lemon juice worked surprisingly well)
- 1/2 tsp salt—though, honestly, I sometimes just use a generous pinch
- 1 1/2 tsp ground cinnamon, plus more for rolling the cookies
- 1/2 tsp nutmeg—pre-ground is fine; microplane-ing it fresh is fun but who always has the time?
- 1/4 tsp ground ginger (sometimes I nix this and toss in cardamom instead; tastes different, but nice)
- 1 cup (200g) granulated sugar
- 1/2 cup (110g) packed brown sugar—light or dark, I don’t sweat it
- 3/4 cup (170g) unsalted butter, softened (I’ve used salted butter in a pinch—just skip the extra salt above)
- 1 egg—out of eggs once? I tried a flaxseed substitute. Not bad, just a bit more rustic
- 2/3 cup (about 150g) pumpkin puree—ANY kind, seriously. Libby’s if you’re feeling posh
- 2 tsp vanilla extract (imitation or real; you do you)
- 1 1/2 cups (about 220g) white chocolate chips (use chopped white chocolate bars if you’re out of chips; once I ran out and used milk choc chips and the result was… interesting; maybe don’t try that?)
How I Actually Do It (Directions)
- Preheat the oven to 350°F (175°C)—though honestly, sometimes I forget until halfway through mixing and it’s fine (just means extra dough tasting while you wait for it to heat up). Line a couple baking sheets with parchment paper or one of those fancy silicone mats, if you have one.
- In a big bowl, whisk together the flour, baking soda, cream of tartar, salt, and all those spices—don’t overthink it if a little extra cinnamon falls in, it’s all good.
- Now comes the fun part: in another bowl, beat the butter with both sugars till it looks light and fluffy. I usually do this with my ancient hand mixer, but honestly, a wooden spoon and a bit of elbow grease works too.
(Here’s where I usually sneak a finger in for a taste. Don’t tell.) - Mix in the egg, pumpkin puree, and vanilla until combined. It might look a little, um, odd at this point—sort of like baby food—but don’t worry, it’ll come together.
- Gradually add the dry flour mix into the wet, stirring gently. You don’t want to overmix—stop just when it comes together. Stir through those white chocolate chips. Actually, sometimes I hold back a small handful to press a few into the tops right before baking (makes them look a bit Instagram-y).
- If you have time, pop the dough in the fridge for at least 30 minutes. Makes it easier to roll, plus helps the flavors mingle. But I get impatient and bake right away pretty often; it still works.
- Roll the dough into tablespoon-sized balls—ish. Mix a bit more cinnamon with sugar on a small plate and roll each ball to coat. (Kids love this bit; just be prepared to sweep sugar off the floor.)
- Bake for about 10–12 minutes. They’ll look a little soft and puffy in the middle and lightly golden at the edges—that’s exactly right. Take them out and let them sit on the tray for five minutes; they’ll settle a bit.
- Move to a cooling rack. Or just eat about half of them standing at the counter like I do. No judgment.
Stuff I’ve Learned by Accident (Notes)
- If you see orange streaks in the dough, don’t panic. I’ve mixed more than my share and sometimes it just happens.
- Forgot to chill the dough? It just spreads a bit more; totally edible. Actually, I tend to think the texture is a bit chewier.
- One time I swapped the brown and white sugars by accident (don’t ask, long story). Ended up just a bit more caramel-y. Try it out if you like living on the wild side.
How I’ve Messed Around with This Recipe (Variations)
- Pecans or walnuts thrown in with the chocolate chips gives it a bit more crunch—friend’s idea, turned out pretty good.
- I tried making this with dark chocolate chips NGL—kinda overpowered the pumpkin, but my uncle loved the result. (Probably not for traditionalists.)
- Someone once dared me to add a pinch of cayenne for a little “surprise”—not my favorite, but hey, you might be braver than me!
Kitchen Kit I Use (Equipment)
- Mixing bowls—plastic, glass, metal, whatever’s clean, honestly
- Hand mixer or decent wooden spoon (if you want a workout—sometimes I’m in a rush and just use a fork, though it’s a pain)
- Baking sheets—no sheet? I’ve used a pizza tray in a pinch (results: a bit odd, but it works)
- Parchment paper or silicone mat (or just grease your tray, old-school style; a little stick never hurt anyone)
Storage (If They Last That Long)
They keep nicely in an airtight container for 3–4 days, but let’s be real, in my house it never lasts more than a day! I honestly think these taste even better the next morning with strong coffee. You can freeze the dough in scoops for baking off when you’re feeling snacky later (or lazy on a rainy day).
How I Like to Serve ‘Em
Don’t bother with fancy plating. I serve them with a hot mug of tea for me, lukewarm milk for the kids (mainly because they never let me finish making the milk before grabbing cookies). Oh—and for some reason, dunking them in coffee just *works*. My cousin likes topping them with a scoop of vanilla ice cream, which seems over the top, but hey, live a little!
If I Could Go Back in Time (Pro Tips)
- I once tried rushing the chilling step—baked them right away, and got a big cookie puddle. Tasty, but very… flat. Letting the dough chill just a little does wonders.
- If you like chunkier cookies, don’t overmix when you add the flour. I used to just go all in, and ended up with flat frisbees. Not the vibe.
- Don’t use old baking soda. Did that once—cookies turned out tough as old boots. Keep it fresh, trust me.
Questions I Actually Get (FAQ)
- Can I make these gluten-free? Probably, though I haven’t tried—my pal Sam uses a good 1:1 flour blend like this one from Minimalist Baker and says it’s great.
- Can I use fresh pumpkin instead of canned? Sure! Just roast, puree, and let it drain a bit so it’s not watery. (Sounds like a faff but tastes amazing.)
- Are these super sweet? Not really—white chocolate is sweet, but the pumpkin and spice tones it down. You could cut back the sugar a tad, but I haven’t noticed a huge difference.
- Can I double the recipe? Oh, totally. Just use a big bowl. Or a clean stockpot, which I did once when every other bowl was in the dishwasher. Actually worked fine!
- What’s the deal with cream of tartar? Old-school snickerdoodle thing. Adds a slight tang; but if you don’t have it, a little lemon juice or vinegar works pretty well.
- What if I don’t have white chocolate chips? Honestly, I’ve chopped up a bar of regular white chocolate or even used butterscotch; they both work, but the usual chips tend to melt more evenly.
Other Things I’ve Stumbled On
If you want some more cookie inspiration, check out Sally’s Baking Addiction’s Pumpkin Snickerdoodles for a slightly different take (she chills hers for hours, which, well, patience is a virtue I don’t always possess), and King Arthur Baking’s guide on baking with pumpkin if you fancy going deeper down the pumpkin rabbit hole.
Anyway, thanks for tagging along with my rambling cookie journey—hope you enjoy making these White Chocolate Pumpkin Snickerdoodles as much as I do! If you’ve got variations or disasters, let me know; firsthand mishaps are always more fun than the ones from a recipe book. Now, I’m off to sweep up cinnamon sugar again…
Ingredients
- 2 3/4 cups all-purpose flour
- 1 1/2 teaspoons ground cinnamon
- 1 1/2 teaspoons cream of tartar
- 1/2 teaspoon baking soda
- 1/2 teaspoon salt
- 1 cup unsalted butter, softened
- 1 cup granulated sugar
- 1/2 cup light brown sugar
- 1/2 cup canned pumpkin puree
- 1 large egg
- 1 teaspoon vanilla extract
- 1 cup white chocolate chips
- 1/4 cup granulated sugar (for coating)
- 1 tablespoon ground cinnamon (for coating)
Instructions
-
1Preheat oven to 350°F (175°C) and line baking sheets with parchment paper.
-
2In a medium bowl, whisk together flour, ground cinnamon, cream of tartar, baking soda, and salt.
-
3In a large bowl, beat butter, granulated sugar, and brown sugar until light and fluffy. Add pumpkin puree, egg, and vanilla extract, and mix until combined.
-
4Gradually add dry ingredients to wet ingredients. Stir in white chocolate chips.
-
5In a small bowl, combine the coating sugar and cinnamon. Scoop dough into 1.5-inch balls and roll each ball in the cinnamon-sugar coating.
-
6Place dough balls 2 inches apart on prepared baking sheets. Bake for 11-13 minutes until edges are set. Let cool on the baking sheet for 5 minutes before transferring to a wire rack.
Approximate Information for One Serving
Nutrition Disclaimers
Number of total servings shown is approximate. Actual number of servings will depend on your preferred portion sizes.
Nutritional values shown are general guidelines and reflect information for 1 serving using the ingredients listed, not including any optional ingredients. Actual macros may vary slightly depending on specific brands and types of ingredients used.
To determine the weight of one serving, prepare the recipe as instructed. Weigh the finished recipe, then divide the weight of the finished recipe (not including the weight of the container the food is in) by the desired number of servings. Result will be the weight of one serving.
Did you make this recipe?
Please consider Pinning it!!

