Let’s Talk About My Wild Love for This Baked Feta Pasta
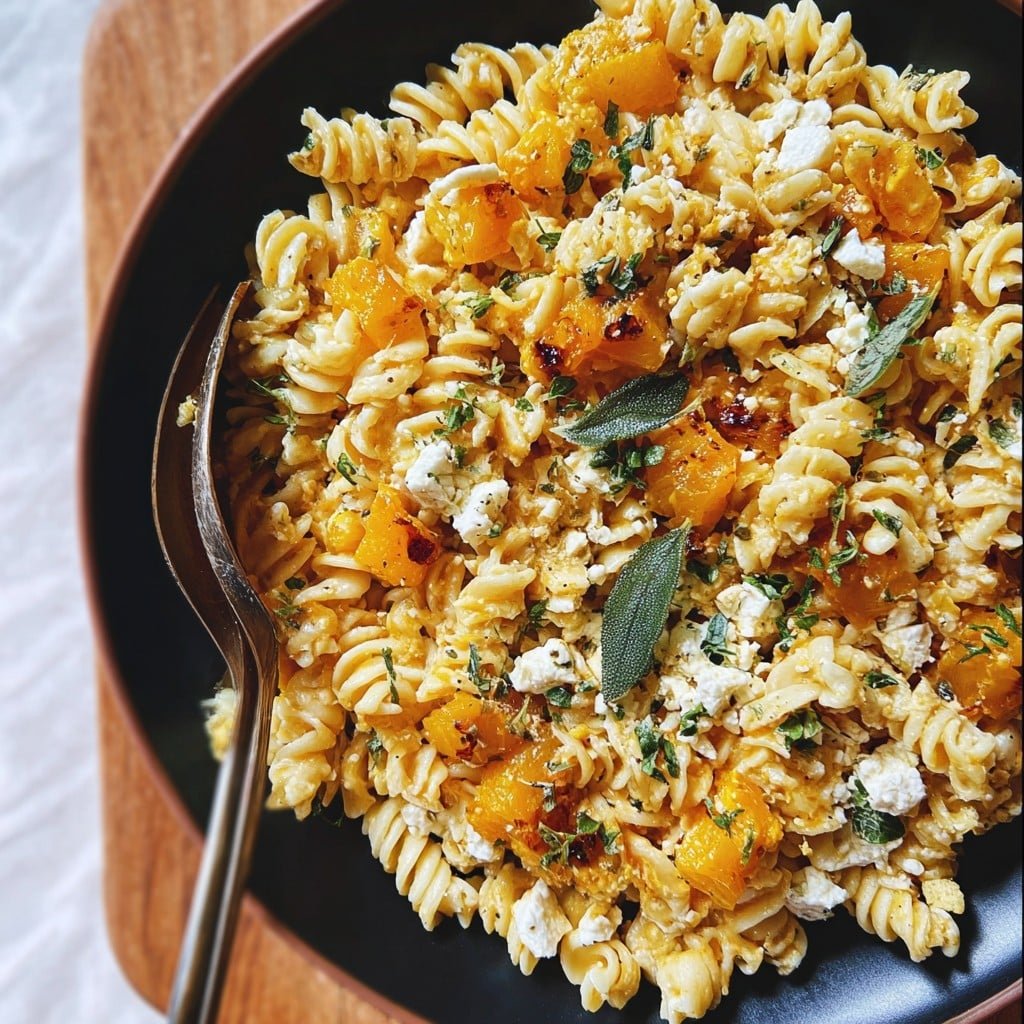
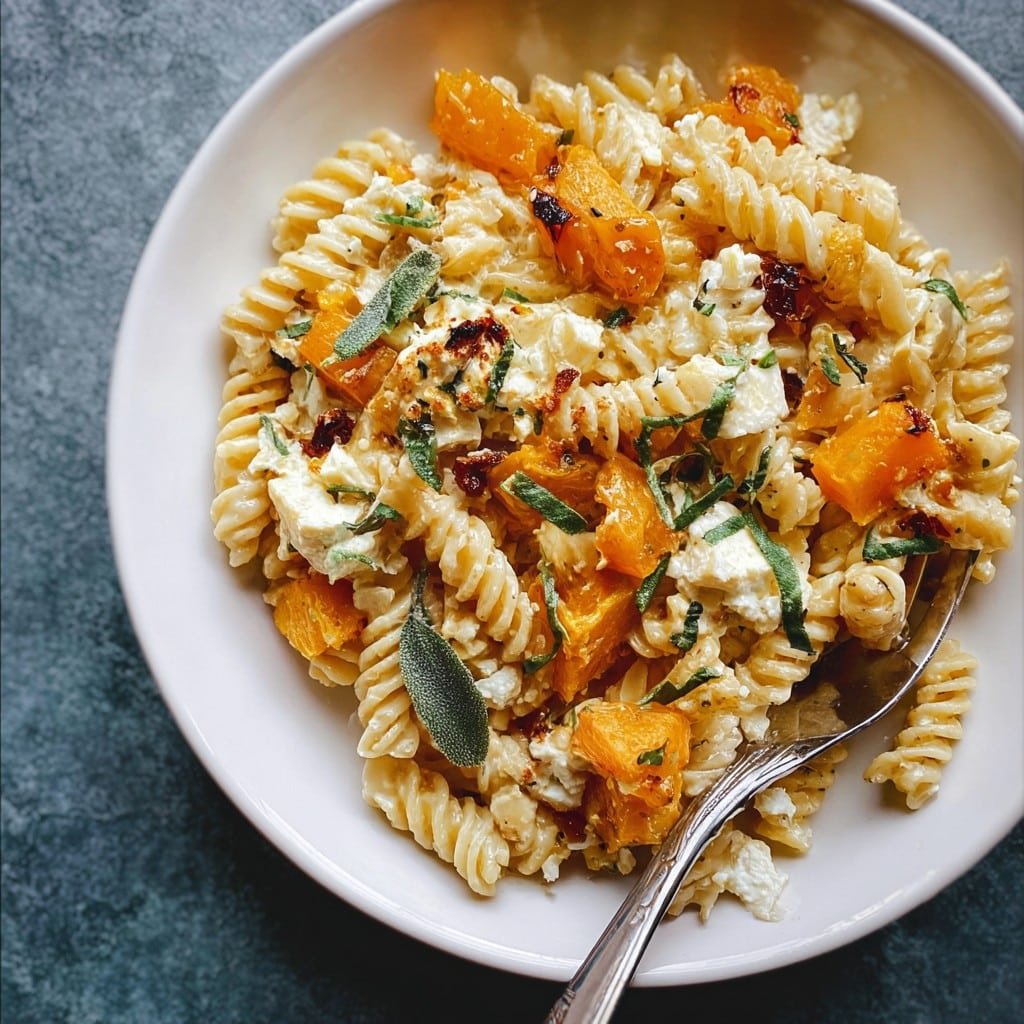
I remember the first time I threw together this Baked Feta and Butternut Squash Pasta with Sage and Garlic—I was staring into my nearly-empty fridge (you know those nights), figuring there was no way the random things in there could possibly work together. But, honestly, the whole thing just sort of clicked. Now, anytime butternut squash is on sale (or my friend Lisa sneakily leaves one on my front porch—thanks Lisa, if you’re reading!), this dish practically makes itself. My kids still call it “that orange cheesy pasta” which, well, fair enough. And honestly, if you don’t catch a little bit of crispy cheese stuck to the roasting pan with your spoon before serving, you’re missing the best bites. Oh, and I once dropped a whole bunch of sage on the floor—swept it up, used it anyway. Probably don’t repeat that, but hey. (Sorry, Mum.)
Why You’ll Probably Get Hooked on This Pasta Too
I make this when I need dinner to basically cook itself and smell incredible while it does; half the time I’m just waiting for the oven timer and humming along. My family goes a little mad for this (although my youngest claims she still doesn’t “like squash”… yet she eats two helpings?). Something about the feta getting all soft and gooey—well, it’s basically food magic. Plus, there’s this moment as you stir it all together where you think, “Is this too simple to taste that good?” (Spoiler: it’s not.) If you hate doing dishes, you’ll love that you can basically do it all in one roasting pan. Oh, I used to get frustrated when the garlic would burn, but actually if you tuck it under the squash, it stays safe. Learned that one the hard way.
What You’ll Need (But Don’t Stress Too Much)
- About 1 small-ish butternut squash, peeled and cut in chunky cubes. Or, if the thought of wrestling a squash makes you want to hide, seriously grab the pre-cut stuff (it’s fine, really).
- A good-sized block of feta, at least 200g. I sometimes use the budget supermarket feta—life’s too short for snobbery.
- 3 to 4 garlic cloves (more if you’re like me and refuse to measure garlic). Any old garlic works, my Granny insisted on the giant kind but, eh.
- A big bunch of fresh sage (small handful). Dried is okay in a pinch, but it’s a totally different feeling, trust me.
- Olive oil—just swirl it until things are well coated. If you run out, a bit of melted butter gets dreamy, or even sunflower oil—won’t judge.
- Salt and pepper, obviously. Or skip the salt if your feta’s the salty type.
- About 300g (a big fistful plus a bit) of whatever pasta you fancy. I keep penne around but once used farfalle because that’s what was left in the box.
- Optional: chili flakes, a squeeze of lemon, or a scattering of walnuts because nuts in pasta are way underrated (unless you’re allergic, clearly).
How I Make It (Plus Where I Nearly Always Sneak a Bite)
- First, turn your oven on to 220°C (425°F). If you forget for five minutes, it’s not a disaster. Happens.
- Toss the butternut squash cubes onto a roasting tray (lined if you can be bothered). Drizzle olive oil all over, season with salt and pepper, and mix with your hands. Don’t be shy—you want the squash shiny.
- Tuck the garlic cloves (skin-on, honestly, it saves so much time) amongst the squash. Drop the block of feta right in the middle. Trust me, looks weird now but it’s the right way.
- Scatter most of your sage leaves on top, drizzle a bit more oil, and shove the whole thing in the oven. Bake about 30-35 minutes—until the squash is deeply golden and the feta’s kind of bronzed at the edges.
- Meanwhile, put a big pot of salted water on to boil. I always forget to start this early so the pasta finishes late; on second thought, maybe start it sooner than I do.
- Cook the pasta according to the packet. But honestly, just taste a piece and if it feels right, you’re done. Save a mug of the pasta water before you drain—it’s weirdly important.
- Right, take the baking tray out. Squeeze the garlic cloves from their skins and mash them with a fork back into the mixture. Take a moment to nab a piece of roasted squash; it’s basically your reward for doing dishes later.
- Tip the drained pasta into the tray. Give everything a good stir—don’t be gentle. If it’s looking a bit dry, add a splash or two of that pasta water. This is the messy part. Add a squeeze of lemon (if you like), some chili flakes, and most of the walnuts if you’re adding those.
- Taste. Pop in more salt or pepper if needed. Top with a couple of extra fresh sage leaves if you’ve got them kicking about. Serve hot, but honestly, it tastes even better cold straight from the fridge (I know, I know).
What I’ve Learned By Messing This Up
- I’ve accidentally overcooked the squash—went for a phone call, came back, total mush. Actually not bad, more like a sauce (if you’re into that sort of thing).
- Don’t use the garlic if it’s started sprouting green bits—it gets bitter, every time.
- Trying to make it with those fancy block cheeses that aren’t feta doesn’t work, or at least it didn’t for me; save yourself the heartbreak.
What Else Can You Do? (Or “How I Got It Wrong”)
- One time I swapped the squash for sweet potato—good, but kinda too sweet. Maybe more chili helps?
- Spinach stirred in at the end works; peas too, especially if you have a bag lurking in the freezer.
- Once tried adding cooked bacon—delicious but felt like it overshadowed the cheese. My eldest actually complained, so lesson learned.
- For gluten-free sorts, any pasta; rice pasta works better than lentil pasta, at least in my kitchen.
Don’t Have the “Right” Kit? No Worries
I always use a big roasting tray (mine’s a battered old thing form IKEA, honestly, even a baking dish with high-ish sides is fine). No pasta pan? Use the biggest pot you have. I’ve even done the squash in a cast iron skillet when I couldn’t find the tray (hid it behind the bread bin, like a fool). If you’ve only got a sheet pan, just make sure you don’t overload it, or you’ll steam, not roast. Looks a mess but tastes fine.
How Do I Store It? (But It Never Lasts That Long…)
This keeps in a lidded container in the fridge about 2-3 days, and supposedly you can reheat it, though I usually just eat it cold with a fork while answering emails. Oh, it does stiffen up so add a splash of water before microwaving if you go that route. Honestly, my family tends to demolish it by the next day, so proper storage is rarely a problem.
How I Serve It (Don’t Judge!)
We usually eat it with a big bowl of garlicky greens or a pile of crispy salad leaves; my lot like a dollop of Greek yogurt on top (bit rich, but oh well). Sometimes, if it’s a proper celebration, I’ll throw a bottle of inexpensive white wine into the mix. Oh! Don’t forget crusty bread to mop up the salty cheese bits stuck to the tray. That’s tradition here.
Things I Learned the Stubborn Way
- Let the feta brown at the edges, don’t pull it too soon—that color tastes amazing. I tried being impatient once, totally regretted it. Worth the wait.
- Don’t over-salt—feta can surprise you with its saltiness, especially the cheap stuff.
- Don’t skip the step with pasta water; I used to, and always wondered why the sauce didn’t cling. Now I get it, finally.
Real-World Q&As (Yes, People Ask Me These!)
- Q: Can I use goat cheese instead?
- A: You could, but it turns into more of a tangy, oozy mess (I like it, kids didn’t). Up to you!
- Q: Does it freeze well?
- A: I’ve frozen leftovers once. It was…fine. Texture gets a bit odd. If you thrive on leftovers, go for it.
- Q: What pasta shape is best?
- A: Honestly, whatever you have. I love rigatoni for this, but I’m not fussy (macaroni was a bit sad, though).
- Q: Can I make it vegan?
- A: Haven’t tried (yet?). Vegan feta seems like it’d work, but mind the salt—let me know if you do!
- Q: Any reason you don’t add onions?
- A: I did once and it kinda overpowered the sage and garlic, but you do you! Maybe red onions are milder?
And hey, if you want a deeper dive into roasting veg or picking a decent feta, Serious Eats has a brilliant guide I use. For top pasta tips (especially if yours always turns out gluey) Bon Appetit gives some good advice—even if their chefs look too cool for home kitchens. If you dig this sort of cozy food, maybe check out a baked pasta recipe from Smitten Kitchen too. Always fun to get lost down that rabbit hole.
Anyway, that’s my not-too-serious guide to baked feta and butternut squash pasta. Hope you get that magic bite of crispy, cheesy squash too. And don’t forget to rescue the sage that tries escaping the baking tray… it’s always the tastiest piece.
Ingredients
- 1 medium butternut squash, peeled and diced (about 3 cups)
- 7 oz (200 g) block feta cheese
- 12 oz (340 g) short pasta (such as penne or rigatoni)
- 3 tablespoons extra-virgin olive oil
- 3 cloves garlic, minced
- 2 tablespoons fresh sage leaves, chopped
- 1/2 teaspoon salt
- 1/4 teaspoon black pepper
- Optional: 1/4 teaspoon crushed red pepper flakes
Instructions
-
1Preheat the oven to 400°F (200°C). Arrange the diced butternut squash in a baking dish, drizzle with 2 tablespoons olive oil, and sprinkle with salt and black pepper. Toss to coat.
-
2Nestle the block of feta cheese in the center of the squash. Scatter minced garlic and chopped sage over the squash and feta. Drizzle with the remaining olive oil.
-
3Bake uncovered for 30-35 minutes, or until the butternut squash is tender and the feta is golden and creamy.
-
4While the squash and feta bake, cook the pasta according to package directions in salted water until al dente. Drain and set aside, reserving 1/2 cup of pasta water.
-
5Remove the baking dish from oven. Gently mash the feta and squash together. Add cooked pasta and a splash of reserved pasta water, stirring gently to combine and create a creamy sauce. Adjust seasoning as desired. Sprinkle with crushed red pepper flakes if using and serve warm.
Approximate Information for One Serving
Nutrition Disclaimers
Number of total servings shown is approximate. Actual number of servings will depend on your preferred portion sizes.
Nutritional values shown are general guidelines and reflect information for 1 serving using the ingredients listed, not including any optional ingredients. Actual macros may vary slightly depending on specific brands and types of ingredients used.
To determine the weight of one serving, prepare the recipe as instructed. Weigh the finished recipe, then divide the weight of the finished recipe (not including the weight of the container the food is in) by the desired number of servings. Result will be the weight of one serving.
Did you make this recipe?
Please consider Pinning it!!

