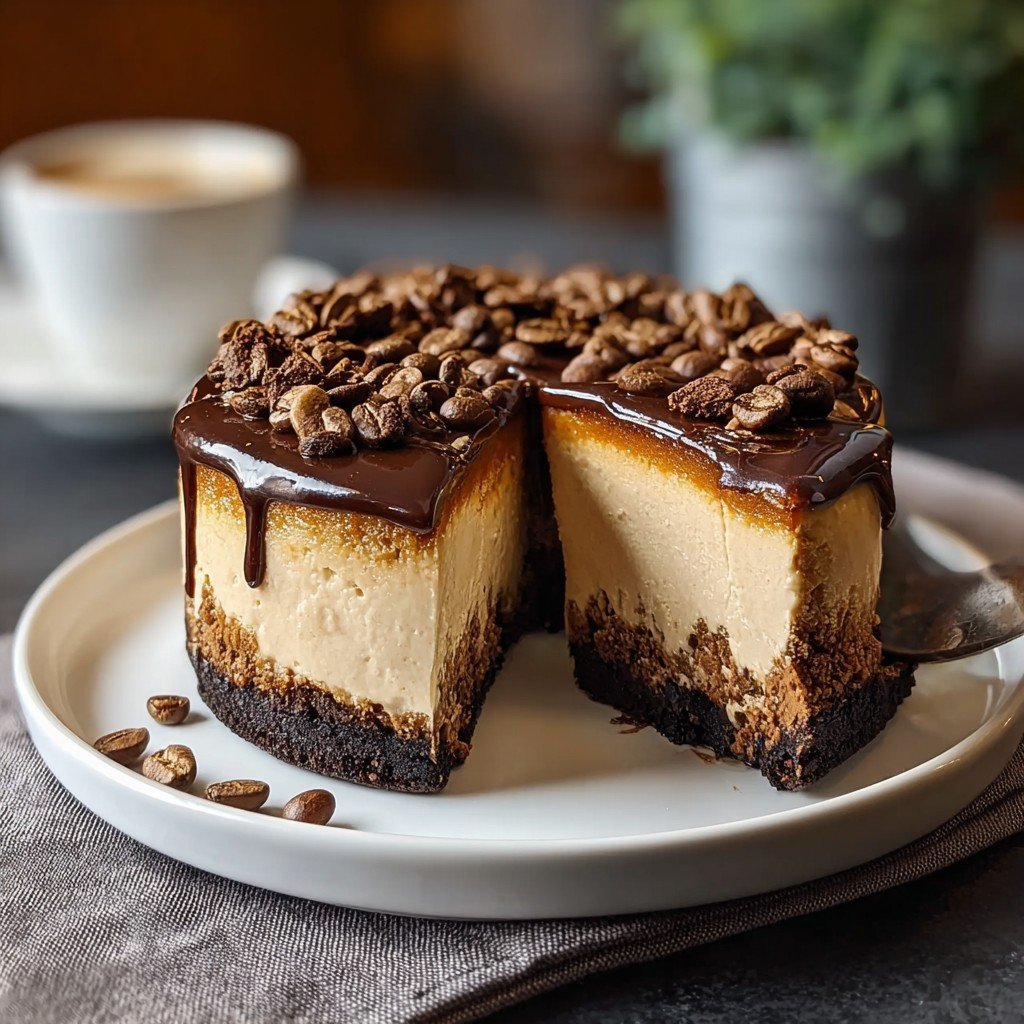
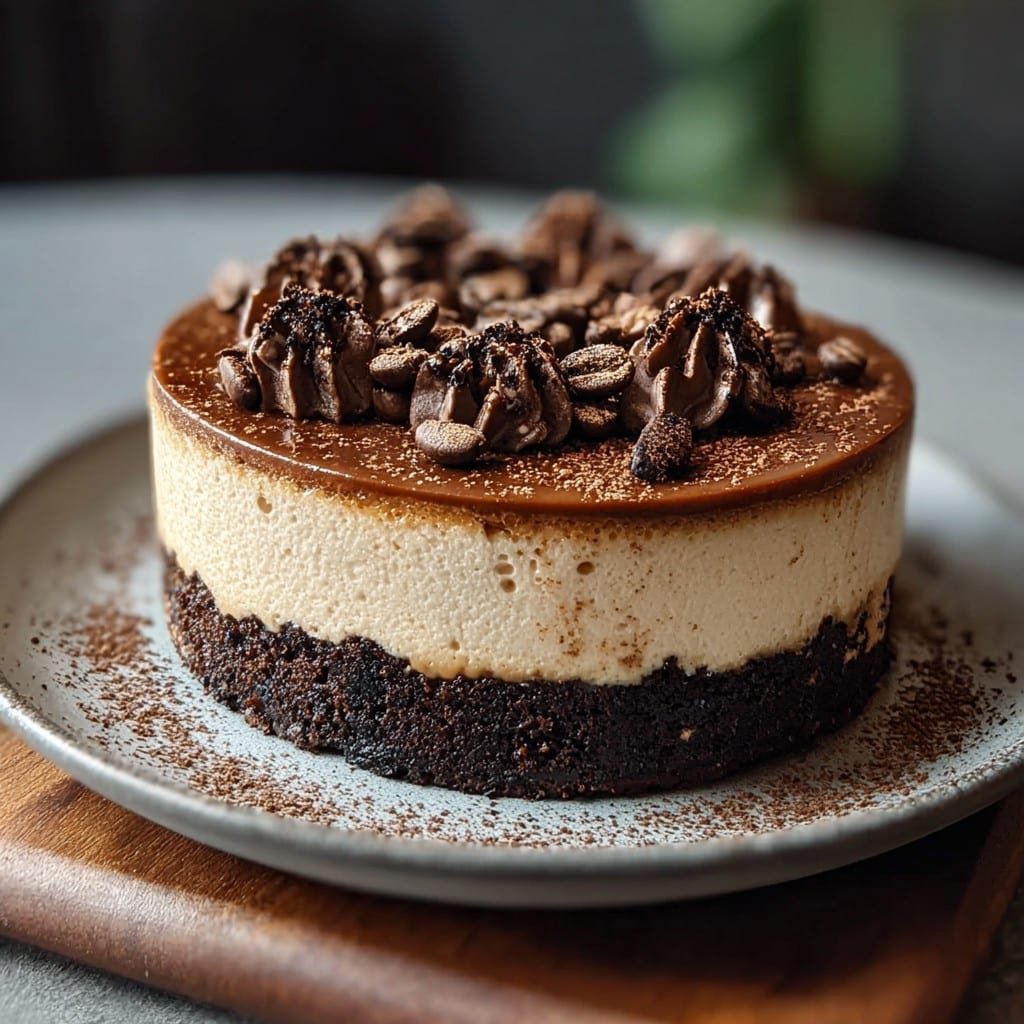
If you’ve ever craved the smack-you-awake flavor of coffee and the creamy dreaminess of cheesecake at the same time—well, pal, pull up a chair. Espresso Cheesecake marries those two cravings better than anything I’ve made in, oh, the last decade. First time I tried it, I was trying (failing) to impress my in-laws. Spoiler: I burnt the crust, but they keep asking for it years later, so something must’ve worked! Anyway, if you’re a bit scatterbrained in the kitchen like me, don’t sweat it—this is a forgiving recipe. And, confession time, I don’t own a proper stand mixer, so it’s always a slight arm workout, ha!
Why You’ll Love This Recipe Anyway
I make this whenever we need a show-off dessert, but also—oddly—on random Tuesday nights when it’s just been One of Those Days. My family goes bonkers for the coffee scent wafting from the oven. (It beats them asking if dinner’s ready every five minutes, at least.) Oh, and if you’re the type who gets nervous about water baths, same. Used to drive me nuts, but we’ll get through it together! And if your cheesecake ever cracks, just call it “rustic”—that’s my go-to.
Stuff You’ll Need (No Steel Nerves Required)
- 200g digestive biscuits (or graham crackers if you’re stateside; plus a handful more if you’re nervous about crust coverage)
- 90g melted butter (honestly, I’ve grabbed margarine when the fridge was bare—no shame)
- 550g cream cheese, full fat (my Nan swears by Philadelphia, but store brand gets the job done)
- 180g caster sugar (I sometimes just use plain white sugar. It’s fine, promise)
- 3 large eggs
- 100ml sour cream (Greek yogurt in a pinch; I’ve even used vanilla yogurt, just drop a smidge of the sugar to balance)
- 2–3 tbsp (about two espresso shots’ worth) strong espresso, cooled
- 1 tsp vanilla extract
- Pinch of salt
- Cocoa powder for dusting (optional, but who’s skipping garnish?)
- Chocolate shavings or beans if you’re feeling extra
How To Pull It Off (With a Bit of Luck)
- Preheat your oven to 160°C (about 320°F)—no need for absolute precision, mine runs hot anyway.
- Line a 20cm (8 inch-ish) springform tin with baking paper. If you don’t have one, line a regular tin with strips to help you lift it out. It’s a pain, but doable.
- Crumble your biscuits. I usually stick them in a zip-top bag and let off some steam with a rolling pin—or a heavy mug if it’s handy.
- Toss crumbs with melted butter till it looks a bit like damp sand. Tip it into your tin, squish it down (the bottom of a glass does wonders here). Chuck it in the fridge while you tackle the filling.
- In a big bowl, beat the cream cheese and sugar till smooth(ish). If it’s a little lumpy, don’t stress—just blame it on homemade charm.
- Beat in eggs, one at a time. Here’s where I usually taste-test and realize the first coffee wasn’t nearly strong enough. You want it punchy—so add your espresso and vanilla now. Sprinkle in the salt.
- Fold in the sour cream, as gently as you like. Don’t fuss if your batter seems runnier than expected; it thickens as it bakes.
- Pour all that goodness over your chilled crust. Give the tin a little tap on the counter to banish bubbles (or at least most of them).
- Bake for about 50–60 minutes. After half an hour, I check it because my oven messes with my head. You’re looking for the edges set but the middle a bit wobbly—it sets up as it cools (trust me!).
- Turn off the oven, crack the door, and let it chill in there for 30 minutes (maybe longer if you remember; I forget often enough).
- Cool to room temp, then into the fridge for a couple of hours or, honestly, overnight. If you sneak a slice early, I won’t judge.
- Dust with cocoa, shower with chocolate, whatever tickles your fancy. Serve. Enjoy the applause or awkward silence—it’s all good.
Stuff I Wish I’d Known Earlier (Cheesecake Edition)
- If your cheesecake has a tiny crater, fill it with whipped cream and grin—it’s a feature, not a bug.
- Strong coffee is non-negotiable. Once tried instant, tasted…odd. But not undrinkable-odd. Just—wouldn’t serve it at a party.
- I used to think you needed a fancy gizmo to blitz the crumbs. A study mug can bear the load just fine.
- If you use Greek yogurt, skip the salted variety unless you want a cheesecake that tastes oddly like breakfast.
If You’re Feeling Adventurous: Variations I’ve Tried (Sort Of)
- Swap espresso for a big spoonful of instant coffee granules dissolved in a dash of hot water. Decent, just a bit granier than I’d like.
- Add a handful of mini choc chips to the batter—my nephew calls this “cheesecake surprise.”
- Tried an all-cookie crust (those thick, fudgey ones) once. It melted into a puddle. Not recommended unless you like eating with a spoon.
- Topping with mascarpone, or fresh whipped cream—both ace.
Equipment (But Honestly, You Can Improvise)
- Springform tin is handy, but not the law. If you’ve only got a deep pie pan, line it well with parchment (or wax paper if that’s what’s in the drawer).
- Electric mixer makes life easier, but I manage with a wooden spoon sometimes (and have an arm like Popeye for it).
- For a crumb base, rolling pin is classic, heavy mug is scrappy, food processor is, well, fancy-shmancy.
Can You Keep Leftovers? (Not That We Ever Do…)
Technically, yes—in an airtight tub in the fridge, it’ll hold for 2–3 days. But honestly, it never survives past breakfast the next morning in my house. If it does, I wrap slices in baking paper for lunchboxes (don’t tell my kids’ teachers), or freeze a wedge for emergencies. Not that I’ve ever had an actual dessert emergency, but, you know, better safe than sorry.
How I Serve It (And Why the Dog Always Hangs Around)
We usually plop a fat slice on mismatched plates, dust with cocoa, and sometimes pour over a little shot of cooled espresso—it’s a tradition ever since my brother-in-law did it by accident and we loved it. Bit of whipped cream on the side if it’s a fancy day or you’ve got guests. (Dog does not get any, despite his best efforts.)
Pro Tips, Learned the Hard Way
- I once tried to bake on the top rack—nope, crust overbrowned and filling still wobbly. Middle rack is your friend.
- If you’re short on time, don’t chuck it straight into the fridge from the oven; I did, ended up with a sweaty cheesecake top. Let it breathe first.
- Don’t skip the lining step. Cleaning welded-on cheesecake is a fate I wish on no one.
FAQs—The Real-Life Version
- Can I make this without eggs?
- In theory, yep—swap with a commercial egg replacer or creamy tofu. I haven’t, but I saw it on Minimalist Baker and she knows her stuff.
- Is freeze-dried instant espresso ok?
- Actually, it’s fine if that’s all you have. Just dissolve it well. Maybe add more (I like things bold).
- Why did my cheesecake crack?
- Loads of reasons—overmixing, cooling too quick, angry oven. Doesn’t affect taste; just grab whipped cream.
- Can I make it gluten-free?
- Sure thing. GF biscuits work. Some taste a bit bland frankly, but BBC Good Food has smart swaps.
- Do I need a water bath?
- I used to think so. Now? Not always. A tray of hot water on the oven floor does the trick in my oven, but skip it if you like a bit of rustic charm (aka cracks).
Oh—one last thing (told you I go off track): If you swipe your last bite through the leftover cocoa dust, it’s somehow ten times better. Why? No clue. Just is.
Ingredients
- 1 1/2 cups graham cracker crumbs
- 1/4 cup unsalted butter, melted
- 24 oz cream cheese, softened
- 1 cup granulated sugar
- 3 large eggs
- 1/2 cup sour cream
- 2 tablespoons instant espresso powder
- 2 teaspoons vanilla extract
- 1/4 cup hot water
Instructions
-
1Preheat the oven to 325°F (163°C) and grease a 9-inch springform pan.
-
2Combine graham cracker crumbs and melted butter; press into the bottom of the prepared pan to form a crust.
-
3Dissolve instant espresso powder in hot water and set aside.
-
4In a large bowl, beat cream cheese and sugar until smooth. Add eggs one at a time, mixing well after each addition.
-
5Blend in sour cream, dissolved espresso, and vanilla extract until fully combined. Pour batter over crust.
-
6Bake for 60 minutes, or until the center is almost set. Let cool completely, then refrigerate for at least 4 hours before serving.
Approximate Information for One Serving
Nutrition Disclaimers
Number of total servings shown is approximate. Actual number of servings will depend on your preferred portion sizes.
Nutritional values shown are general guidelines and reflect information for 1 serving using the ingredients listed, not including any optional ingredients. Actual macros may vary slightly depending on specific brands and types of ingredients used.
To determine the weight of one serving, prepare the recipe as instructed. Weigh the finished recipe, then divide the weight of the finished recipe (not including the weight of the container the food is in) by the desired number of servings. Result will be the weight of one serving.
Did you make this recipe?
Please consider Pinning it!!

