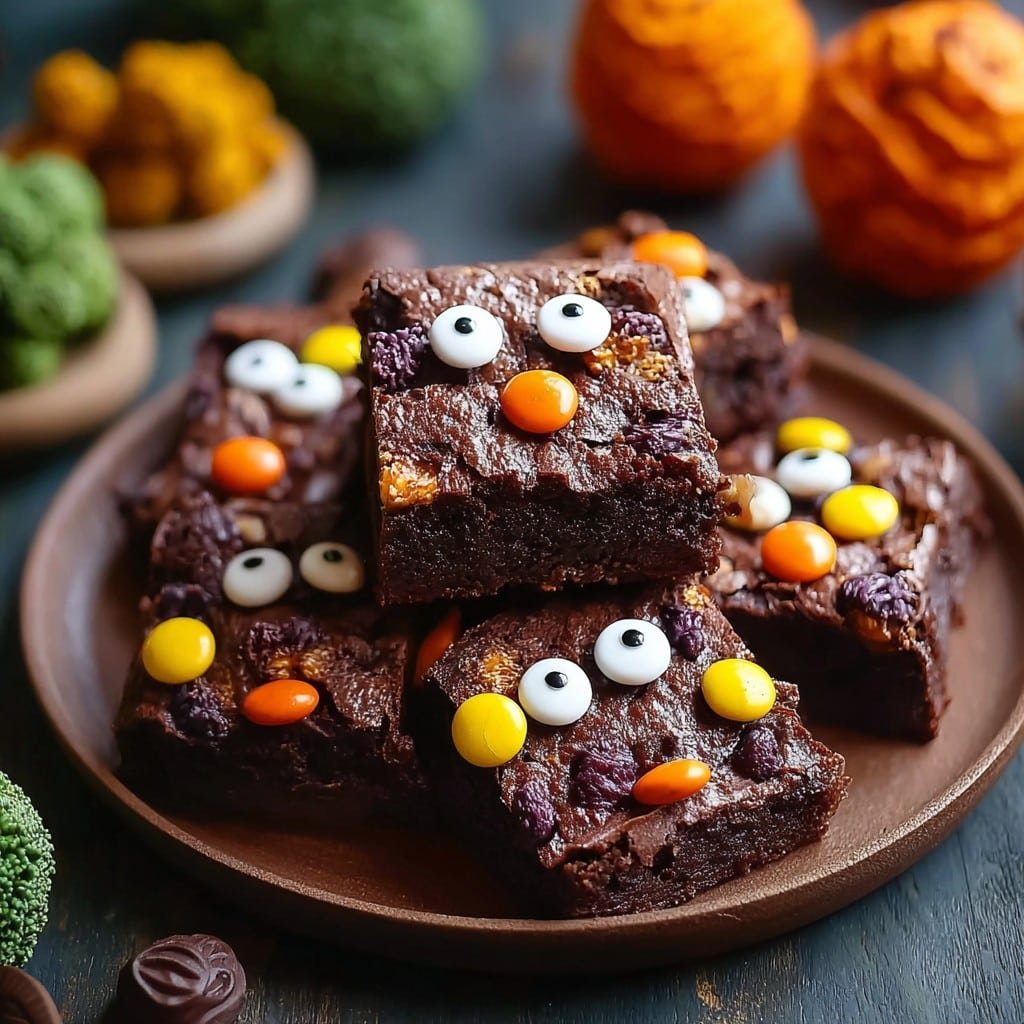
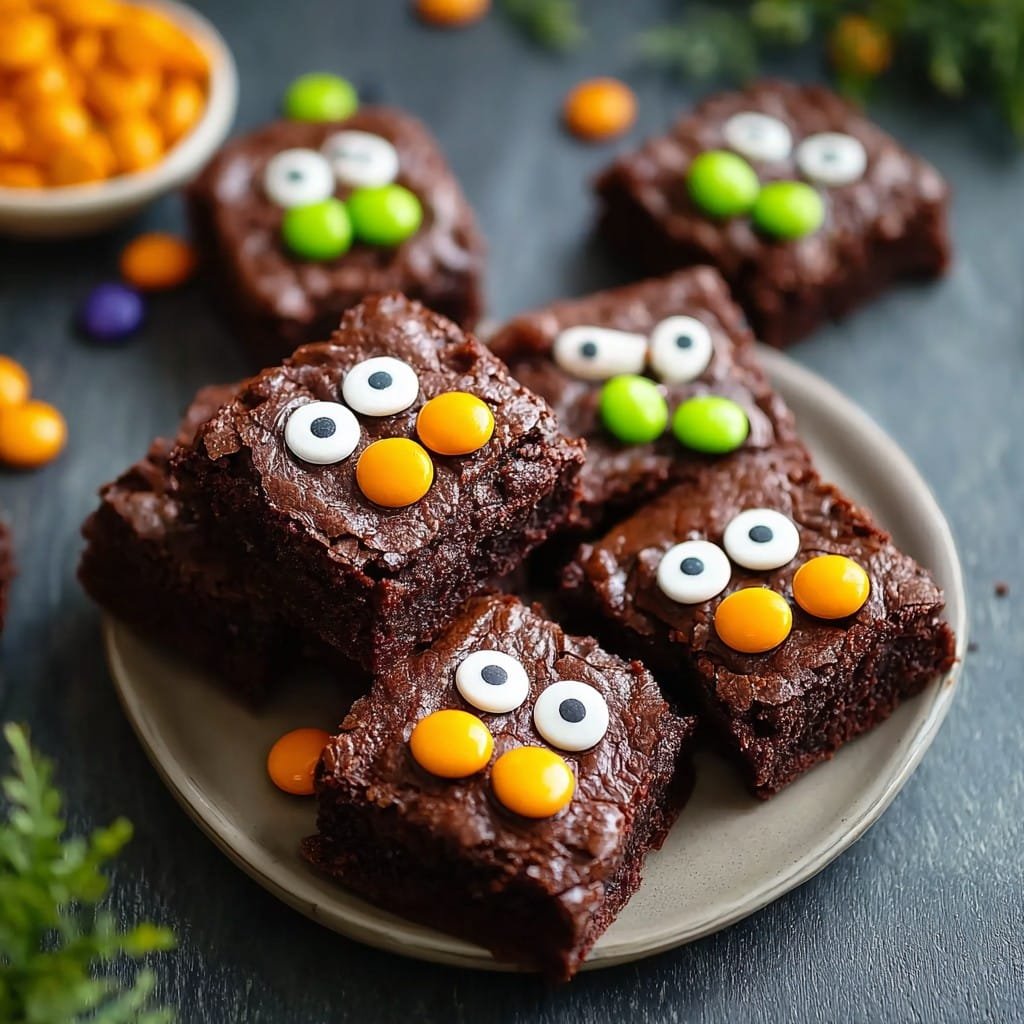
My Go-To Monster Mash Brownies: More Fun Than a Barrel of Bats
There was this one October when my nephew showed up randomly in a Frankenstein costume (in July, mind you), and I realized we needed something sweet—something silly—to match the mood. Enter: Monster Mash Brownies. I’ve stuck with these ever since. Mostly because they’re ridiculously easy and, honestly, it’s almost impossible to mess them up, even if your brain’s half on autopilot after a long day. Plus, watching the kids snack on them while wearing goofy plastic fangs… it’s kinda worth the mess in my kitchen (and, let’s be real, the inevitable sugar rush).
Why You’ll Love This (Or At Least Why I Do)
I drag this recipe out whenever I’m craving chocolate but don’t have the patience for anything fancier. My family goes bonkers for these—especially when I let them help scatter candy eyeballs all over the top. Have you ever seen chocolate chips, pretzel sticks, and green food gel mixed together? It’s not pretty, but wow, is it tasty. Sometimes, the brownies look a bit like something from a mad scientist’s lab, and that’s the whole point (I secretly love how uneven they bake sometimes—makes them spookier!).
Pile of Ingredients (With a Few Personal Notes)
- 1 box brownie mix (whatever’s on sale—my gran swore by Betty Crocker, but seriously, they’re all decent)
- 2 eggs (sometimes I use only one if I’m running low, turns out okay… just more fudgy)
- 1/4 cup water (or milk, if you want them richer; I’ve done both)
- 1/2 cup vegetable oil (I’ve subbed in melted butter before, but it makes the top less shiny)
- 1/2 cup semi-sweet chocolate chips (milk chocolate is grand too, or dark, or hey, white if that’s your jam)
- Handful of mini marshmallows
- Handful of pretzel sticks, broken up (optional; sometimes I skip these if the cupboard’s looking bare)
- Various monster candies: candy eyeballs, colored sprinkles, those wiggly worm gummies if you’ve got ’em
- Green or purple food gel/writing icing (sometimes I just use regular food coloring, but it’s a bit runny)
How I Actually Make These
- Preheat your oven to whatever your brownie mix says (usually, it’s 350°F or thereabouts—but don’t quote me!). Grease up a 9″ x 13″ pan with butter or spray. I once forgot, and, well, good luck scraping out your brownies.
- Grab a big bowl. Dump in the brownie mix, eggs, water, and oil. Stir—no need to beat it into oblivion, just combine till it looks chocolatey. This is usually where I sneak a small spoonful. For quality control, I say. (Eggs don’t scare me, but do what’s comfy for you.)
- Fold in your marshmallows, chocolate chips, and pretzel bits. If it looks like a monster already, you’re doing it right.
- Pour that magnificent mess into your pan. Smooth it out with a spatula—or a butter knife, or even the back of a spoon, whatever’s handy.
- Bake according to the box, usually 22–25 minutes. But check it: stick a toothpick in the middle—if it comes out kinda gooey but not liquid, you’re set. In my oven, it’s more like 23 minutes (I don’t know why, but it won’t budge).
- Let it cool for about 15 mins, but honestly, half the time we cut ‘em hot because nobody can wait. Scatter monster candies and sprinkles while it’s still warm (they stick better that way). Draw wiggly lines of food gel for that “monster guts” look. Don’t worry if yours looks like it survived a horror flick—that’s half the fun.
A Few Real-World Notes
- The marshmallows sometimes make weird little craters in the brownies. I used to think I did it wrong, but actually, that’s just how they melt. It’s all good.
- If your food gel’s a bit gloopy, thin it out with a dab of warm water—trust me, it flows easier.
- Candy eyeballs can sometimes sink, so press them in gently at the very end.
- Oh, and keep a damp paper towel handy—those sprinkles go everywhere. Literally everywhere.
Variations (Monster Experiments That May—or May Not—Work)
- Once, I tried swirling in peanut butter, but it sort of seized on the top. Still tasty, just not, you know, ‘Instagram cute.’
- My niece likes to add crushed Oreos (pretty great, actually, though it gets real rich, real fast).
- I attempted gluten-free brownie mix… eh, not my favorite, but you do you. Maybe a homemade gluten-free mix would work better; I haven’t cracked the code yet.
Stuff You’ll Need (and a Quick Fix If You Don’t)
- Mixing bowl (but I’ve mixed it right in the pan in a pinch—just don’t go too wild or you’ll scratch it up)
- Baking pan (9×13, or a deep casserole if that’s all you’ve got. Just watch the cooking time!)
- Spatula or big spoon (or, honestly, just use your clean hand to smooth it if you don’t mind getting sticky)
- Toothpick—though a fork works if you’re in a rush
How to Store Them (If They Even Last That Long)
Technically, these brownies keep covered on the counter for 2–3 days (airtight container is best). But, in my house, good luck stretching them past one. If you do have leftovers, pop ‘em in the fridge for a firmer bite—my kids prefer them cold, but I honestly think this tastes better the next day after sitting out. Serious Eats did a storage experiment, if you want the nitty-gritty science, which is sort of fascinating.
How We Serve ‘Em at My Place
So, here’s the scoop: We usually cut the Monster Mash Brownies into uneven squares, kinda rustic style. Sometimes with a scoop of vanilla ice cream (get the cheap stuff—it always melts better), or occasionally—if there’s time and we’ve got it—hot fudge. One year my sister-in-law brought whipped cream in a can and made monster “hair.” Now, it’s tradition to see who can make the silliest topping, and yes, someone does always use way too much food coloring. We laugh, but then eat it anyway.
Pro Tips (Aka, Stuff I’ve Messed Up Before)
- Don’t try to rush the cooling time, unless you want a monster landslide (I made that mistake once—regretted it every sticky step).
- If you double up the marshmallows, your brownies might end up more like lava cake—very rich, but incredibly messy. Worth a shot for the brave.
- Actually, I find it works better if you add candies after that initial 10-minute cooling. They don’t melt as much, but still stick—a nice happy medium.
- Oh, and don’t overmix. You want a little chunk here and there. More texture, more fun.
Monster Mash Brownies FAQ: Conversations I’ve Honestly Had
- Q: “Can I use homemade brownie batter?”
A: Oh, for sure! I just use boxed cause I’m lazy (no shame), but homemade works—and maybe tastes even better. Find a good one over at Sally’s Baking Addiction if you’re craving something extra. - Q: “Do the candy eyeballs actually stay on?”
A: They do… mostly. I’d say press them in gently right after baking. If some fall off, eh, let ’em roll. It’s Halloweeny (or just silly); who cares? - Q: “Can I freeze these?”
A: I have, but the marshmallows get weird. Like, sort of chewy; not a disaster, but not peak. Maybe skip the freezing unless you really have to. - Q: “Do I need food gel, or can I use regular icing?”
A: Food gel’s more vibrant, but regular icing spreads fine—just might smudge more. Don’t stress. Kids eat it anyhow. - Q: “What’s the spookiest way you’ve served these?”
A: Oh, last year we stuck sour gummy worms poking out and called it ‘graveyard brownies.’ The kids lost their minds (in a good way, I think). Try it.
Anyway, whether you’re channeling your inner mad scientist, just feeding a crew of sugar fiends, or, honestly, trying to distract yourself with something mindless (been there), these Monster Mash Brownies never let me down. They might look a little messy; life usually is. Give ‘em a whirl, and let me know what weird twists you try!
Ingredients
- 1 cup unsalted butter, melted
- 2 cups granulated sugar
- 3/4 cup unsweetened cocoa powder
- 4 large eggs
- 1 teaspoon vanilla extract
- 1 cup all-purpose flour
- 1/2 teaspoon salt
- 1/2 cup semi-sweet chocolate chips
- 3 tablespoons Halloween sprinkles
- 3 tablespoons candy eyes
Instructions
-
1Preheat the oven to 350°F (175°C) and line a 9×13 inch baking pan with parchment paper.
-
2In a large bowl, whisk together melted butter, sugar, and cocoa powder until well combined.
-
3Add eggs and vanilla extract, stirring until smooth. Mix in flour and salt until just combined.
-
4Fold in chocolate chips and spread the batter evenly in the prepared pan.
-
5Top with Halloween sprinkles and candy eyes, gently pressing them into the batter.
-
6Bake for 25 minutes or until a toothpick inserted in the center comes out with a few moist crumbs. Let cool before slicing and serving.
Approximate Information for One Serving
Nutrition Disclaimers
Number of total servings shown is approximate. Actual number of servings will depend on your preferred portion sizes.
Nutritional values shown are general guidelines and reflect information for 1 serving using the ingredients listed, not including any optional ingredients. Actual macros may vary slightly depending on specific brands and types of ingredients used.
To determine the weight of one serving, prepare the recipe as instructed. Weigh the finished recipe, then divide the weight of the finished recipe (not including the weight of the container the food is in) by the desired number of servings. Result will be the weight of one serving.
Did you make this recipe?
Please consider Pinning it!!

