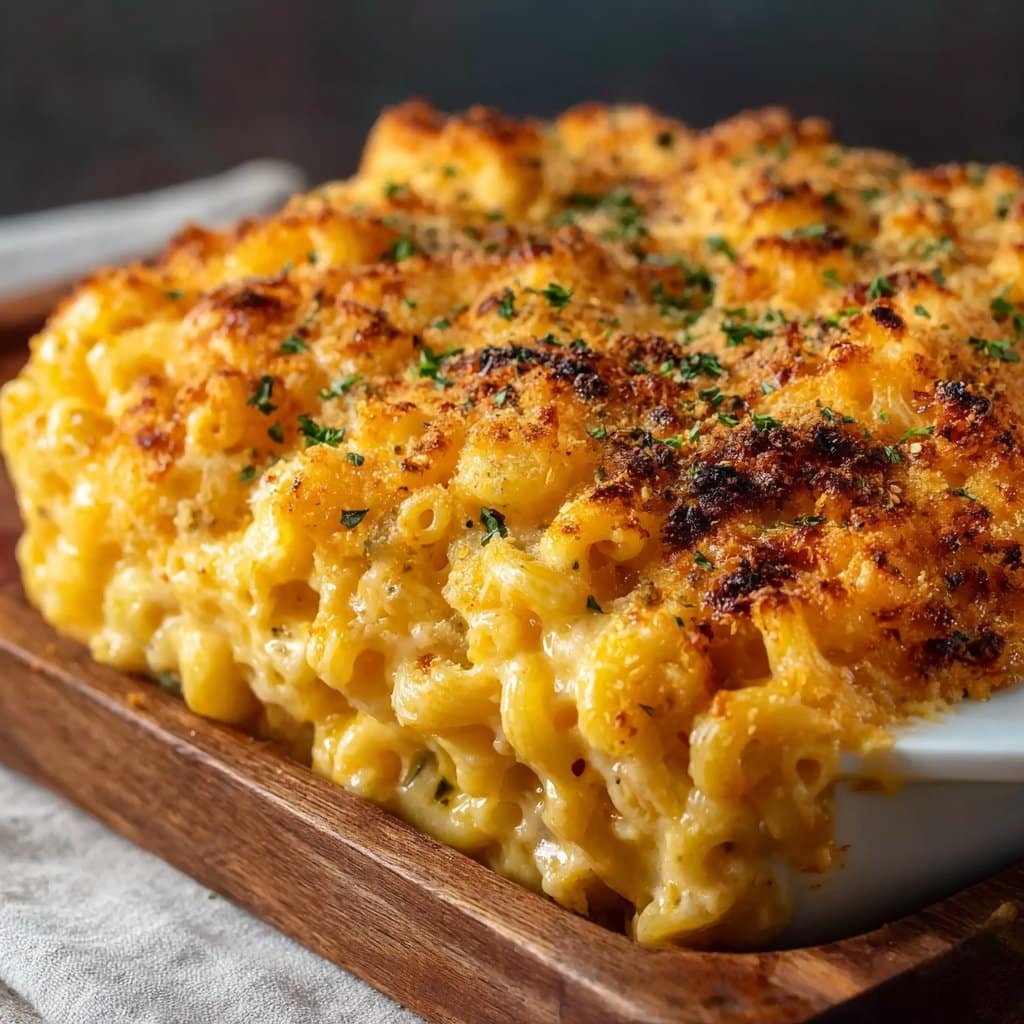
Baked Mac and Cheese Recipe
The Story Behind My Baked Mac and Cheese
Alright, let me just say right up front: baked mac and cheese is pure nostalgia in a dish for me. I remember the first time I tried to make it—way back in uni when my flatmate and I nearly set off the smoke alarm (not my proudest moment, but hey, you learn as you go). And honestly? I still get that giddy feeling when the whole house smells like cheese and pasta. It’s a comfort food thing, right? Anyway, I’ve been fiddling with this recipe for years, and it’s always my secret weapon when there’s nothing in the fridge except for a couple of cheese odds and ends. Or when I want to impress my mum, who swears by her own secret version (spoiler: mine is better. Sorry, mum!).
Why I Keep Coming Back to This Mac and Cheese
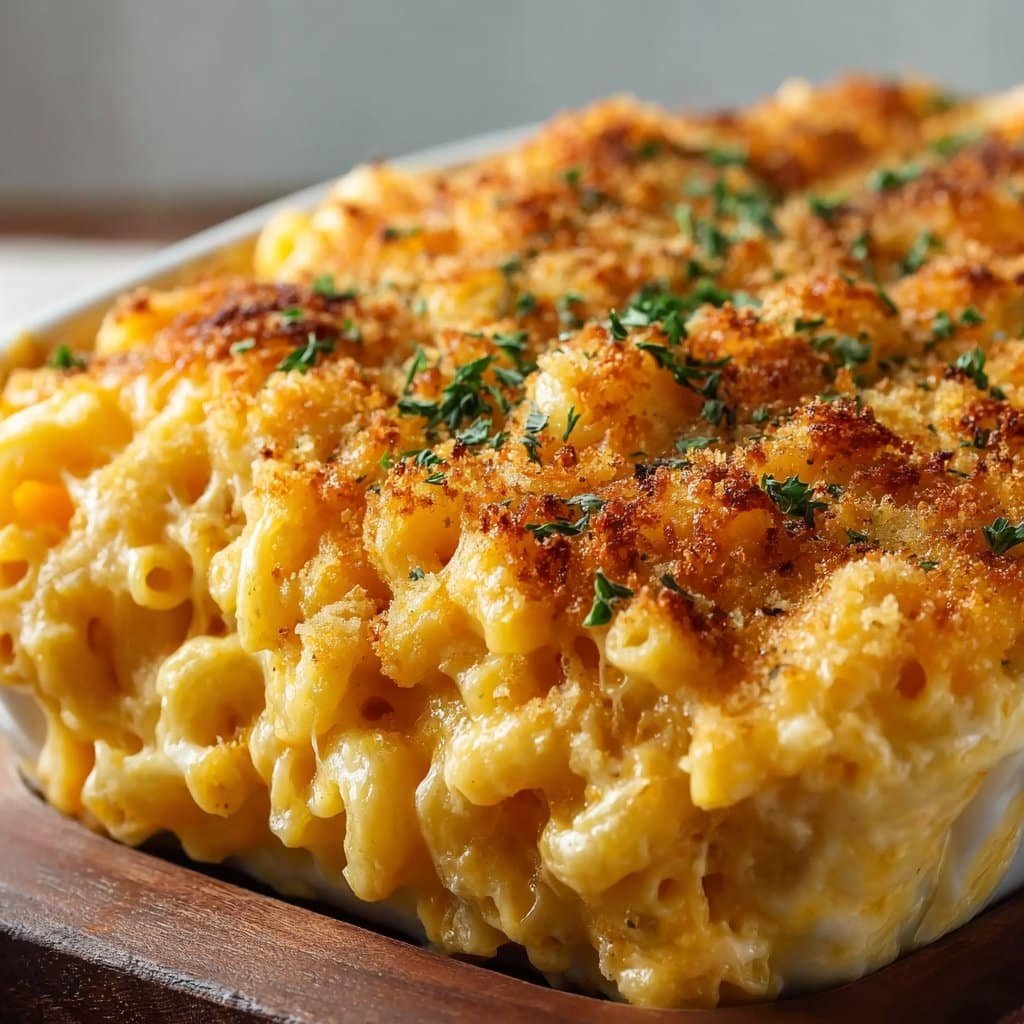
I make this whenever I want cheers from the family—my kids dive face-first into their bowls. My partner does this thing where they scrape the crunchy corners (the best bits!) before anyone else can. And when the weather goes all gloomy, there’s just nothing like a casserole dish of this on the table. Plus, if you’re like me and you sometimes get slightly impatient with sauces that want to be all fancy, you’ll appreciate how forgiving this recipe is. (Full disclosure: I once curdled the sauce and it still tasted great… cheese fixes everything.)
What You’ll Need (And Some Swaps If Needed)
- 300g (or about three heaping cups) dried macaroni — I’ve used penne in a pinch and nobody noticed, so don’t stress if you’re out
- 2.5 cups whole milk — semi-skimmed also works, though my gran insists on the full-fat stuff
- 1/4 cup (half a stick) butter — have used olive oil once but, honestly, it just wasn’t the same
- 1/4 cup plain flour
- 2 cups shredded sharp cheddar — mix in whatever odds and ends you find in the cheese drawer! Monterey Jack, gouda… sky’s the limit
- 1 cup grated mozzarella OR more cheddar, if you want the cheesepull effect
- 1 tsp salt (& more to taste)
- 1/2 tsp black pepper — sometimes I double this for extra punch
- 1/2 tsp smoked paprika (optional, but I like the barely-there smokiness)
- 1/2 cup panko or regular breadcrumbs — in a desperate moment, crumbled up crackers also work (true story)
- 2 tbsp melted butter (for the breadcrumb topping)
How I Usually Throw It Together (With a Few Tangents)
- Preheat your oven to 190C (375F). Grab a 9×13-inch baking dish or something roughly that size—I once used a roasting tin by mistake and it was… fine.
- Cook the macaroni in salted boiling water until just shy of done (al dente!); drain it. It keeps cooking in the oven, so don’t let it get too soft. I always forget and it’s still forgivable.
- In a big saucepan, melt the butter over medium heat. Toss in the flour and stir—don’t stop—or you’ll get lumps. Do this about 1-2 minutes, until it bubbles a bit. If it looks super dry, add a dash more butter or a splash of oil (I’ve totally done this on autopilot… still worked.)
- Slowly pour in the milk, whisking like your life depends on it (for me, that’s when my arm gets tired). This is where I usually sneak a taste, though maybe don’t, since it’s basically flour soup at this point.
- Keep stirring until it thickens into a sauce, about 5 mins. Don’t worry if it looks a bit weird; it all comes together.
- Take off the heat. Add in half the cheddar, all the mozzarella, salt, pepper, paprika. Stir until all melted and glorious. Honestly, it won’t be smooth like a commercial cheese sauce, but I think that’s the charm.
- Mix the pasta into the cheese sauce. Here’s where I debate adding more cheese (and 50 percent of the time, I do)
- Pour everything into your baking dish. Top with remaining cheddar.
- Mix breadcrumbs with melted butter; sprinkle on top. Or skip the breadcrumbs if you’re out. Sometimes I crush up stale bread or even potato chips (no judgment please).
- Bake 22–28 minutes until bubbling and golden on top. If your oven runs hot like mine, check at 20 mins. Leave to sit for 5-10, unless you want lava mouth (don’t ask how I know).
Stuff I Figured Out The Hard Way
- If the sauce splits, just keep whisking off the heat. Most of the time, it comes back together—unless you totally fry it, then, uh… melted cheese covers a multitude of sins
- Pasta shape really doesn’t matter (as long as it’s got tubes or grooves to collect cheese). Penne, spirals, elbow even rigatoni—go wild.
- That sit time after baking isn’t optional. I know it smells amazing, but trust me—cheese burns are not it.
A Few Fun Twists (and One Fail)
- Tried adding cooked bacon or crispy onions to the topping—both winners. Hot sauce in the cheese sauce? Only if you like things sneaky-spicy.
- Once, on a dare (maybe after one too many drinks), I mixed in a can of baked beans. It… wasn’t great. Wouldn’t recommend, but you do you.
- Broccoli florets or chopped jalapeños stirred in before baking? Big yes from me.
What You’ll Need (But Don’t Panic If You Don’t Have One)
- A large saucepan — If all you have is a big frying pan, just stir carefully and expect more splashes.
- A whisk — Or a fork, if your whisk’s vanished into the abyss (mine did for weeks). You’ll just need more elbow grease.
- Baking dish — A casserole pan or even a deep cake tin in a pinch works fine.
Keeping It For Later (If You Can)
You can stash leftovers in the fridge, covered tightly, 2-3 days. Though, honestly, in my house it never lasts more than a day. Reheat gently in the oven or even the microwave, with a splash of milk to keep it creamy. I think this tastes better the next day, but maybe that’s just me. Haven’t tried freezing it yet… maybe someday?
How We Serve This (Your Mileage May Vary)
We usually plop it on the table straight from the oven with a big spoon (because who has time for plating fancy?). Sometimes, if we’re feeling posh, there’s a green salad alongside. My youngest dunks theirs in ketchup—don’t judge!
A Few Lessons I Learned (The Hard Way)
- Be patient with the sauce. I once tried to crank up the heat to speed things up—big mistake—and ended up with burnt-bottom cheese. Not fun to clean.
- Layering extra cheese between the pasta before baking makes it extra oozy. (Learned that when I accidentally dropped half the bag in the dish.)
Real Questions From Real People (And My Honest Answers)
- Can I make this ahead? — Yup! Assemble, cover, and stash in the fridge up to a day ahead. Bake a bit longer straight from cold. I’d pull it out to warm up on the counter for 30 mins if you remember.
- Is it okay to use pre-shredded cheese? — Yeah, totally. The anti-caking stuff bugs some people but for baked mac and cheese, it melts just fine if you ask me.
- Could I go gluten-free? — For sure! Just use GF pasta and flour. I know some friends who like using this vegan gluten-free guide from Minimalist Baker if you need inspiration.
- Why does my sauce look gritty sometimes? — Usually means the cheese got too hot or was low-moisture. But honestly, it’ll still taste grand.
- Where can I find more cheese sauce tricks? — I love the deep dives over on Sally’s Baking Addiction (her community is brilliant.)
So there you have it. My slightly chaotic, always warmly received baked mac and cheese recipe—complete with all the bumps I’ve hit along the way. If you give it a go, let me know! Or, you know, just eat and enjoy. Life’s short; eat the cheese.
Ingredients
- 12 oz elbow macaroni
- 3 cups shredded sharp cheddar cheese
- 1 cup shredded mozzarella cheese
- 1/4 cup unsalted butter
- 1/4 cup all-purpose flour
- 3 cups whole milk
- 1/2 cup panko breadcrumbs
- 1/2 tsp salt
- 1/2 tsp ground black pepper
- 1/2 tsp paprika
Instructions
-
1Preheat oven to 350°F (175°C). Grease a 9×13 inch baking dish.
-
2Cook the elbow macaroni according to the package instructions until al dente. Drain and set aside.
-
3In a large saucepan, melt butter over medium heat. Whisk in flour and cook for 1-2 minutes to form a roux.
-
4Slowly whisk in the milk, salt, pepper, and paprika. Cook, whisking constantly, until the sauce thickens, about 5 minutes.
-
5Remove saucepan from heat and stir in cheddar and mozzarella cheeses until melted and smooth. Add cooked macaroni and mix until well combined.
-
6Pour the macaroni mixture into the prepared baking dish. Sprinkle panko breadcrumbs evenly over the top. Bake for 25-30 minutes, or until golden and bubbly. Serve hot.
Approximate Information for One Serving
Nutrition Disclaimers
Number of total servings shown is approximate. Actual number of servings will depend on your preferred portion sizes.
Nutritional values shown are general guidelines and reflect information for 1 serving using the ingredients listed, not including any optional ingredients. Actual macros may vary slightly depending on specific brands and types of ingredients used.
To determine the weight of one serving, prepare the recipe as instructed. Weigh the finished recipe, then divide the weight of the finished recipe (not including the weight of the container the food is in) by the desired number of servings. Result will be the weight of one serving.
Did you make this recipe?
Please consider Pinning it!!

