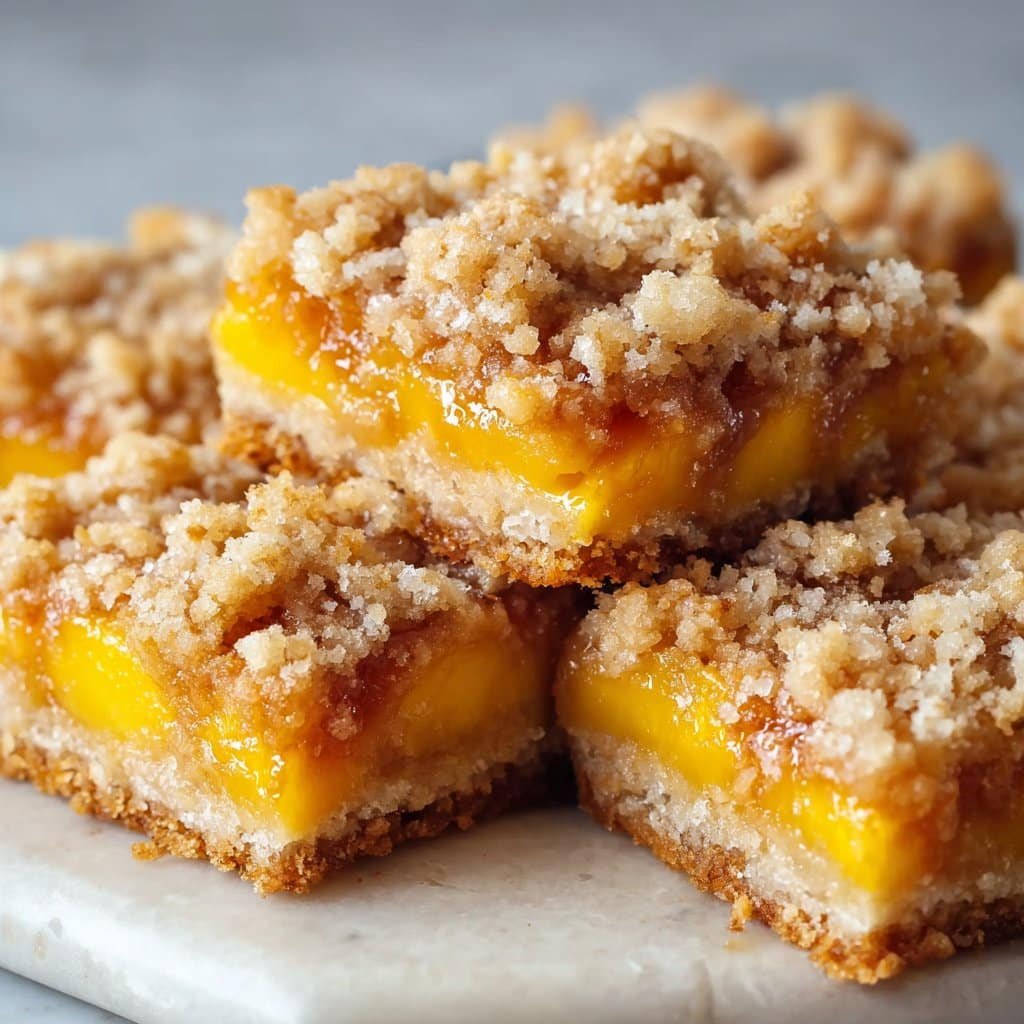
Let me set the scene: a basket of fuzzy peaches sitting on the kitchen counter, my youngest kid sneaking one (or trying, not very subtly; kids and covert ops, right?), and me realizing there’s no way we’ll eat all of them before they go soft. Peach bars to the rescue! Actually, these bars are kind of my summer panic button. They taste like peak July, but honestly, I make them whenever I find decent peaches at the store—yes, even the not-so-juicy ones some people snub. And, well, once I accidentally used nectarines because I grabbed the wrong bag. No one noticed, so there’s that.
Why You’ll Love Peach Bars (or at least, why I do)
I make this when I want something that feels fancier than a crumble but isn’t a pain. My family goes kind of bonkers for these—my dad will literally text me from two street corners away if he hears I’ve made them. Sometimes I’ll sneak one with morning coffee (and I do mean sneak, because if the kids see, they’re suddenly starving). Oh, and if you’re not a fan of peeling peaches…join the club. I don’t always bother.
What You’ll Need (Plus My So-Called Substitutions)
- 1 1/2 cups all-purpose flour (okay, sometimes I do a quick half-swap with whole wheat if I’m feeling virtuous—barely noticeable)
- 3/4 cup granulated sugar (I’ve used raw sugar in a pinch; it’s fine, just a bit more rustic?)
- 1/2 teaspoon salt
- 1/2 teaspoon baking powder
- 170g (that’s about 3/4 cup) cold, unsalted butter, cubed—my grandmother insisted on Kerrygold, but, seriously, store brand works too
- 1 large egg—not room temp, straight from the fridge is cool
- 4–5 ripe peaches (or nectarines if you fumble at the store like me), peeled and diced; if I’m feeling lazy, skin stays on—adds texture (that’s my story)
- 2 tablespoons cornstarch (or plain flour if you forgot cornstarch exists, which I do…a lot)
- 1/2 cup brown sugar (light or dark, whatever’s in the cupboard)
- 1 teaspoon vanilla extract (I’ve subbed with almond extract once; it was surprisingly fab)
- Juice from half a lemon, or a quick splash of bottled, no one will judge (except maybe my aunt, but ignore her)
Let’s Get Down To Baking, Shall We?
- Preheat your oven to 180°C (350°F). Grease and line an 8×8 inch (20cm) pan. Or a 9-inch square, honestly, they come out a bit thinner but who cares?
- Mix together flour, granulated sugar, salt, and baking powder. Toss in cold butter cubes. I use my fingers to rub it all together—feels oddly therapeutic; you can use a pastry cutter if you have one, but your hands are, frankly, faster.
- Crack in the egg and smush until it starts to clump. No need for it to be perfect dough—it’ll be crumbly, and that’s correct. Actually, I find it works better if it’s NOT fully mixed—leave some little buttery bits.
- Scoop out about a cup of this mix and set aside (this is your topping—do NOT forget, like I did once).
- Press the rest of the mixture firmly into the bottom of your pan. Don’t stress about getting it perfectly even.
- Toss diced peaches (or nectarines, rebel that I am), cornstarch, brown sugar, vanilla, and lemon juice together in a bowl. This is where I usually sneak a piece. If it looks a bit syrupy, that’s good.
- Pour your peach mixture over the crust in the pan. Try to get it even, but, y’know, life is short.
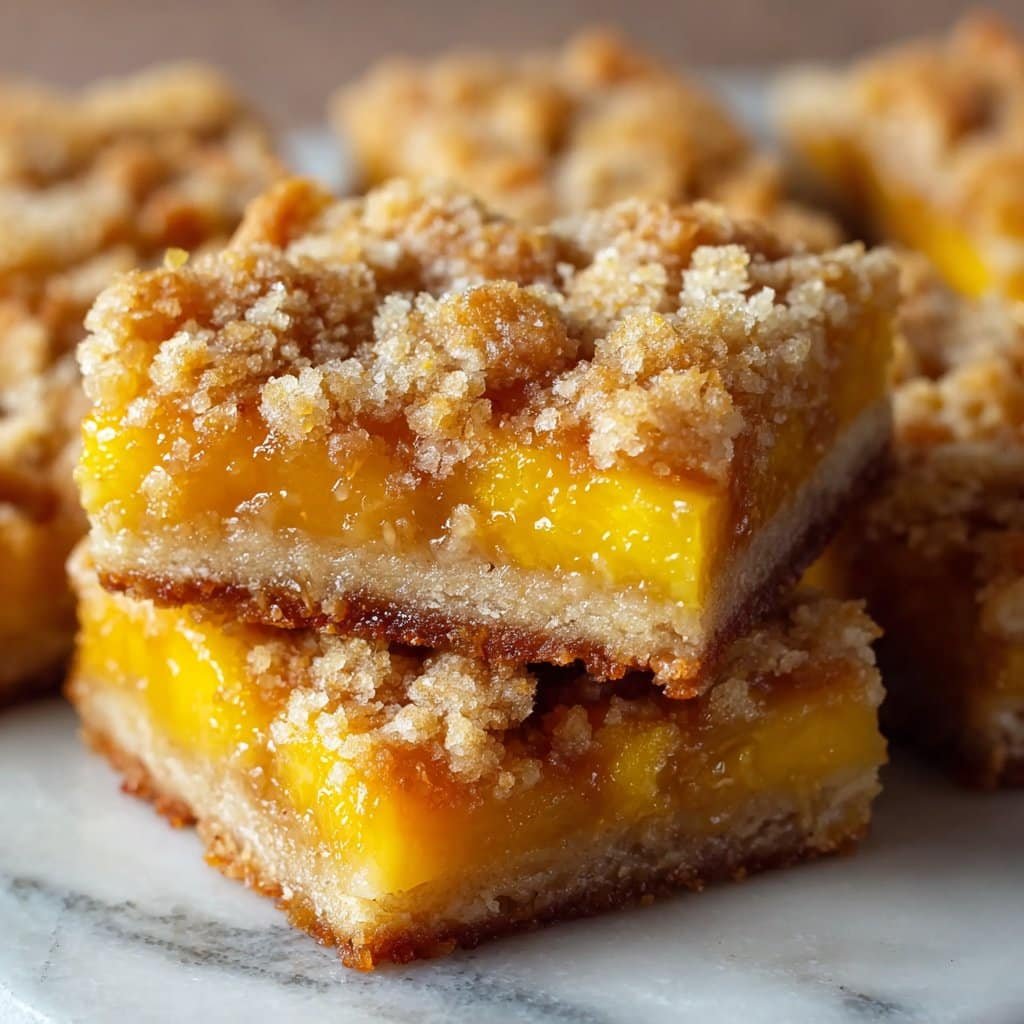
- Crumble the reserved topping all over. You want patchy coverage, not a full second layer—it gets crispy and golden.
- Bake for 40–45 minutes, until the top looks golden and the peach filling is bubbling. If your oven runs hot, check it at 35 min—mine’s a bit bonkers so your mileage may vary.
- Cool completely before slicing. Or not. I mean, molten peach filling is actually a fun hazard.
Stuff I Learned The Hard Way (Notes)
- If you forget to save the topping—yep, I’ve done that—just scatter a handful of oats or even a broken-up granola bar on top as emergency crunch.
- Brown sugar packs, but don’t bother smoothing it perfectly—a little lumpiness is fine.
- Don’t panic if the mix looks too dry before baking, the fruit sorts everything out in the oven.
Variations (With a Side of Honesty)
- I tried it with apricots once; not bad at all, if a bit…well, tart. I’m not repeating the time I used canned peaches—they went weirdly soft and it tasted like school pudding, so skip that.
- Berry combo: tossed in a handful of blueberries—gorgeous color, highly recommend.
- Once I added some shredded coconut to the topping. It was okay, but everyone fished out the peach bits, so lesson learned.
Equipment (And What To Do If You Don’t Have the Fancy Stuff)
- Square baking tin/pan, 8- or 9-inch—if all you’ve got is a round one, it’ll still work; you just get…triangle bars?
- Mixing bowls—I’ve mixed it all straight in the pan before; not recommended, but hey, less dishwashing
- Pastry cutter or just your hands. Honestly, a big fork will do, too. No rules here
Will They Last? (Storage Stuff…But Good Luck)
Okay, in theory, you can keep these in an airtight container for up to 3 days at room temp, or up to 5 days in the fridge. But honestly, in my house, peach bars disappear faster than you can say “who took the last one?” You can freeze them (slices between parchment), but I’ve never actually managed this—they just…go.
How I Like to Serve Peach Bars (Which Is Probably Too Simple)
Still slightly warm, maybe with a scoop of vanilla ice cream (or clotted cream, shout out to my UK mates). Sometimes I sprinkle a little cinnamon on top. My sister dunks them in her tea; weird, but it’s family, right?
Honestly, Here Are a Few Things I Learned (Pro Tips)
- I once tried to cut these too soon—disaster. Give them at least 30 min, or you’ll get a gooey mess (unless you’re going for peach bar crumble, then carry on).
- Resist adding extra peaches to “make it healthier”—I thought I was clever once, but it overflowed and glued itself to the pan.
- If the topping looks too pale, let it go a couple more minutes. Golden is the goal (not beige, that’s just sad).
FAQ (Because People Actually Ask Me These!)
- Can I use frozen peaches?
- Yes! Just thaw and drain them well—otherwise the bars get soggy. Trust me, I learned the hard way.
- Is peeling peaches really necessary?
- Nope, and I rarely do. If the skins bother you, sure, peel ’em. Otherwise, just go for it; life’s short.
- What if I don’t have cornstarch?
- Flour works, or tapioca starch—honestly, even potato flour if that’s lurking in your cupboard. Just use a bit less.
- Can I double this recipe?
- Yup, use a 9×13 pan (and you might want to line with parchment; makes getting ‘em out way easier).
Random Tangent (Totally Not About Peaches)
By the way, if you don’t already own a decent pastry cutter, they make life easier, and I use mine for everything from scones to pie crust. Not an ad, just me enabling your kitchen gadget habit. Or, if you’re obsessed with finding peak-season fruit anywhere in the US like me, Seasonal Food Guide is kind of fun. (Gets me in trouble at farmer’s markets though…)
That’s it. Give peach bars a whirl (and if your batch looks wonky, you’re doing it right). Holler if you come up with a killer variation—I’m always game for a kitchen experiment, even if it gets me looks from the rest of the family. Happy baking!
Ingredients
- 2 cups all-purpose flour
- 1 cup unsalted butter, softened
- 1/2 cup granulated sugar
- 1/4 teaspoon salt
- 3 cups fresh peaches, peeled and diced
- 2 tablespoons cornstarch
- 1/2 cup brown sugar
- 1 teaspoon vanilla extract
- 1/2 teaspoon ground cinnamon
Instructions
-
1Preheat the oven to 350°F (175°C). Line a 9×13 inch baking pan with parchment paper.
-
2In a medium bowl, combine flour, granulated sugar, and salt. Cut in the butter until the mixture resembles coarse crumbs.
-
3Press two-thirds of the crumb mixture firmly into the bottom of the prepared pan to form the crust.
-
4In a separate bowl, toss diced peaches with cornstarch, brown sugar, vanilla extract, and cinnamon. Spread the peach mixture evenly over the crust.
-
5Sprinkle the remaining crumb mixture over the top of the peaches.
-
6Bake for 35 minutes or until the topping is golden brown and the peaches are bubbly. Let cool completely before slicing into bars.
Approximate Information for One Serving
Nutrition Disclaimers
Number of total servings shown is approximate. Actual number of servings will depend on your preferred portion sizes.
Nutritional values shown are general guidelines and reflect information for 1 serving using the ingredients listed, not including any optional ingredients. Actual macros may vary slightly depending on specific brands and types of ingredients used.
To determine the weight of one serving, prepare the recipe as instructed. Weigh the finished recipe, then divide the weight of the finished recipe (not including the weight of the container the food is in) by the desired number of servings. Result will be the weight of one serving.
Did you make this recipe?
Please consider Pinning it!!

